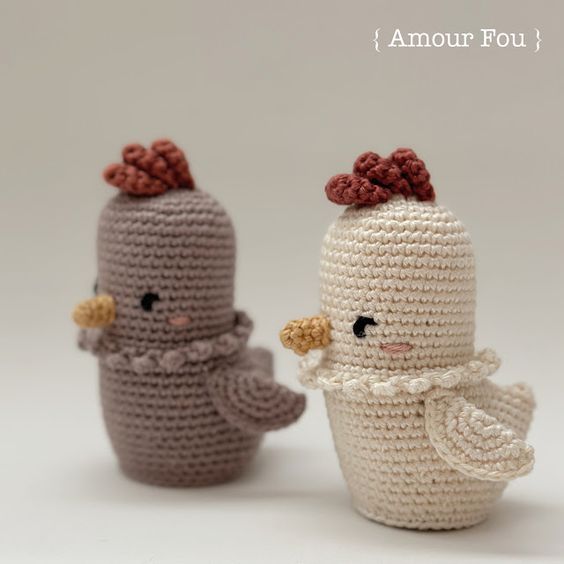
Crochet Clarisa The Hen
Crochet Clarisa The Hen is an adorable little project that will bring a smile to your face as you stitch her up. She's a sweet and whimsical hen with charming details that make her irresistible. From her bright red comb to her little yellow beak, every part of Clarisa is designed to spread joy. The intricate crochet work required to bring her to life is not only rewarding but also a delightfully relaxing process. As you work on creating Clarisa, you'll find yourself lost in the rhythm of the stitches, letting all your worries melt away. Once she's complete, Clarisa will make a perfect addition to your collection of handmade treasures or a thoughtful gift for a fellow craft enthusiast. Crochet your own Clarisa The Hen today and let her cheerful presence brighten up your day with her friendly charm.
Materials
— 2.00 mm crochet hook
— 100 % cotton yarn for a 2.00 mm hook (8/4 – Fingering)
— Tapestry needle and pins
— Stitch markers
— Polyfiber fill
Abbreviations (US Terms)
st = stitch
ch = chain stitch
slst = slip stitch
sc = single crochet
You will need:
— Beige, cream or brown for the body
— Dark red for the crest
— Yellow for the beak and egg. You can also use gold for the egg.
— A bit of pink to embroider the cheeks and of black to embroider the eyes.
Finished size:
From head to toe, your finished hen should measure more or less 10 cm
Of course, should you choose a different hook and yarn, final measures will vary…
Inner layer
Using cream or beige…
1. Magic ring of 6 sc
2. Crochet 2 sc in each st (12)
3. Crochet *1 sc, 2 sc in the next st*, repeat * 6 times (18)
4. Crochet 1 sc, 2 sc in the next st, *2 sc, 2 sc in the next st*, repeat * 5 times, 1 sc (24)
5. Crochet *3 sc, 2 sc in the next st*, repeat * 6 times (30)
6. Crochet 2 sc, 2 sc in the next st, *4 sc, 2 sc in the next st*, repeat * 5 times, 2 sc (36)
8. to. 18. Crochet 36 sc
Break the yarn and weave in ends. Turn inside out and set aside.
Body
Using cream or beige…
1. Magic ring of 6 sc
2. Crochet 2 sc in each st (12)
3. Crochet *1 sc, 2 sc in the next st*, repeat * 6 times (18)
4. Crochet 1 sc, 2 sc in the next st, *2 sc, 2 sc in the next st*, repeat * 5 times, 1 sc (24)
5. Crochet *3 sc, 2 sc in the next st*, repeat * 6 times (30)
6. Crochet 2 sc, 2 sc in the next st, *4 sc, 2 sc in the next st*, repeat * 5 times, 2 sc (36)
7. to 18. Crochet 36 sc
(If you want your hen to have two color, now it’s the time to change colors and continue the following rounds with the new color…)
19. Only through back loops, crochet 36 sc
20. Crochet 1 sc and chain 6.
Crochet 2 sc (increase) into the second ch from hook (mark the first sc, which will be the beginning of the following rounds) and then crochet 1 sc into each of the following 4 ch stitches, then 1 sc into each stitch of the head (36), then 1 sc into the first 4 remaining loops of the other side of the chain and 2 sc (increase) into the last ch stitch (48).
21. to 27. Crochet 48 sc
28. Crochet 3 sc, one decrease, *6 sc, one decrease*, repeat * 5 times, 3 sc (42)
29. and 30. Crochet 42 sc
Stuff only the head firmly and place a bit of stuffing inside the corner of the tail…
31. Crochet *5 sc, one decrease*, repeat * 6 times (36)
Now take the inner layer you did before and have already turned around and place it inside the body you are currently crocheting… We are going to join them in the following round…
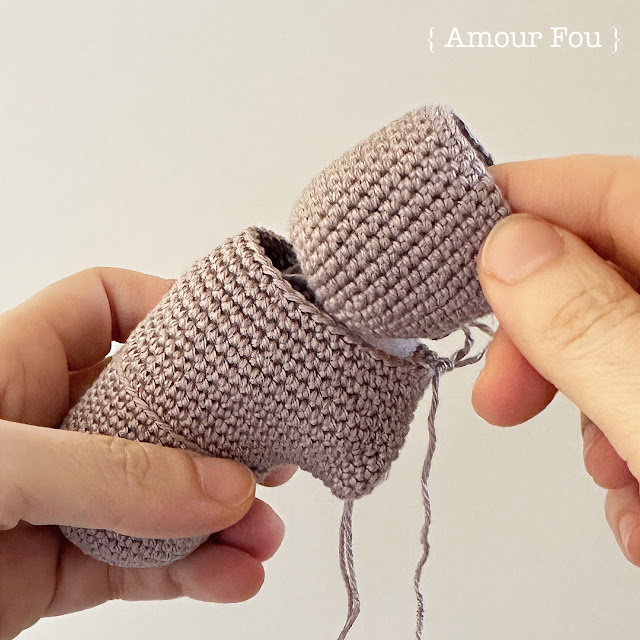
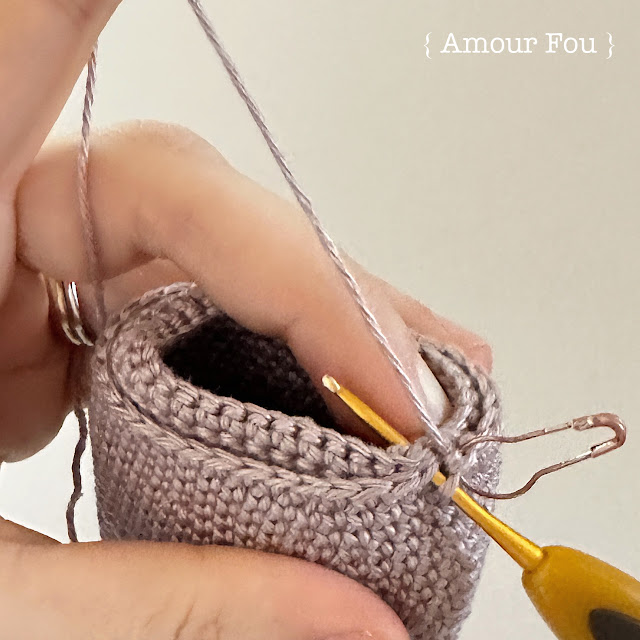
32. Place the inner layer inside the body. The opening of both pieces have 36 stitches, so join together each stitch of the inner layer with each stitch of the body with 1 sc. You’ll end the round with 36 sc.
Close, break the yarn and weave in ends.
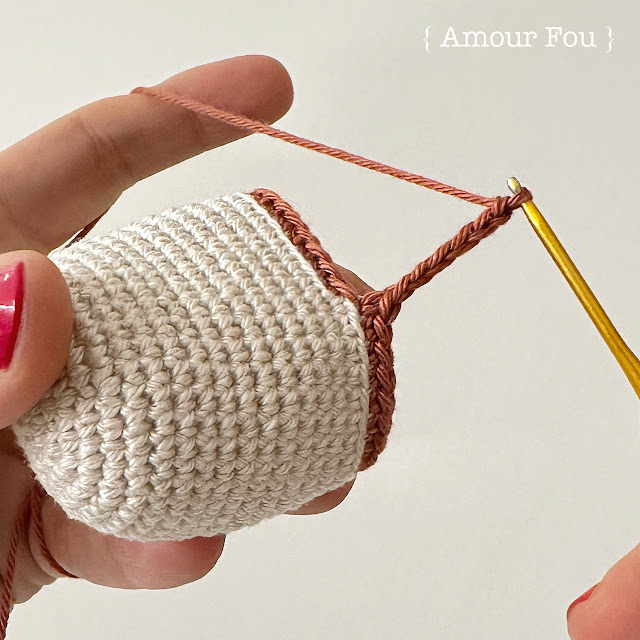
Collar of feathers
Turn the body upside down (head down!) and join the beige yarn in one of the front loops of round 19, right on the back of your hen...
1. Crochet 1 sc into each front loop of round 19 (36)
2. Crochet *1 slst, chain 3, starting from the second chain from hook crochet 1 sc into each remaining ch stitch (2), 1 slst*, repeat these instructions all along the round.
Close, break the yarn and weave in ends.
Wings
Make two, using cream or beige…
1. Magic ring of 6 sc
2. Crochet 2 sc in each st (12)
3. Crochet *1 sc, 2 sc in the next st*, repeat * 6 times (18)
4. Crochet 1 sc, 2 sc in the next st, *2 sc, 2 sc in the next st*, repeat * 5 times, 1 sc (24)
5. Fold and flatten the circle with your hands so it becomes half a circle with two layers. Be sure to align the stitches in the top layer with those in the bottom layer. Now crochet 1 sc in each pair of stitches, joining both layers together.
Close. Break the yarn and leave a long tail to sew the wings to the body.
Beak
Using yellow…
1. Magic ring of 5 sc
2. Crochet 5 sc
3. Crochet *1 sc, 2 sc in the next st*, repeat * 2 times, 1 sc(7)
4. Crochet 7 sc
Fasten off yarn, leaving a long tail to sew to the head.
Crest
Make three, using dark red…
1. Magic ring of 5 sc
2. Crochet 2 sc in each st (10)
3. and 4. Crochet 10 sc
No need to stuff...
5. Press the opening with your fingers and crochet together, with sc, both opposing sides to close the opening of the piece.(5)
Close. Break the yarn and leave a long tail to sew arms to body.
Golden egg
Using yellow or gold…
1. Magic ring of 6 sc
2. Crochet 2 sc in each st (12)
3. Crochet *3 sc, 2 sc in the next st*, repeat * 3 times (15)
4. Crochet 2 sc, 2 sc in the next st, *4 sc, 2 sc in the next st*, repeat * 2 times, 2 sc (18)
5. Crochet *5 sc, 2 sc in the next st*, repeat * 3 times (21)
6. Crochet 3 sc, 2 sc in the next st, *6 sc, 2 sc in the next st*, repeat * 2 times, 3 sc (24)
7. Crochet *7 sc, 2 sc in the next st*, repeat * 3 times (27)
8. to 14. Crochet 27 sc
15. Crochet *7 sc, one decrease*, repeat * 3 times (24)
16. Crochet 24 sc
Stuff firmly…
17. Crochet 1 sc, one decrease, *2 sc, one decrease*, repeat * 5 times, 1 sc (18)
18. Crochet *1 sc, one decrease*, repeat * 6 times (12)
19. Crochet 6 decreases
Close, break the yarn and weave in ends.
Assembly
— Sew the beak to the head, right above the collar of feathers and in line with the tail at the back.
— With a bit of black yarn, embroider the eyes to the sides of the beak and then use pink yarn to embroider the cheeks.
— Sew the wings to the sides of the body.
— Sew the 3 crests to the top of the head.
— Weave in all ends inside the doll.
— Place the golden egg inside the hen.