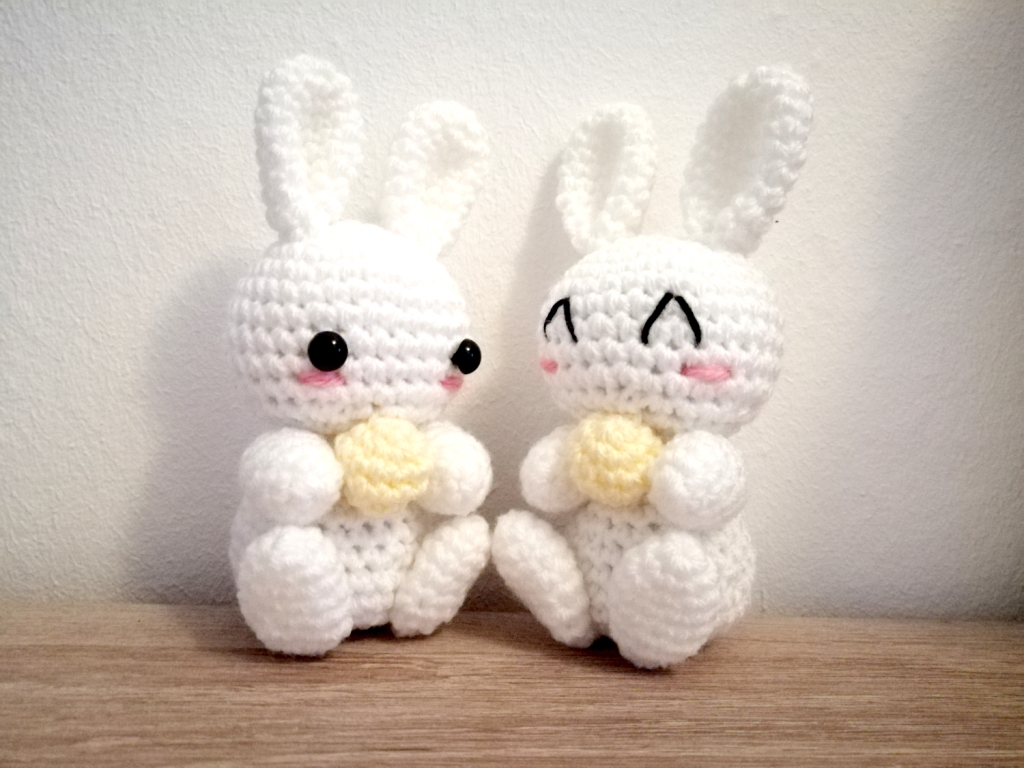
Crochet Tsukimi Bunnies
Crochet Tsukimi bunnies are the sweetest companions you could ever have. These adorable little bunnies, with their fluffy yarn tails and cute button eyes, are perfect for snuggling and bringing a touch of whimsy to any space. Whether you make them for yourself or as a thoughtful gift for a friend, these charming creatures are sure to bring a smile to anyone's face. With just a few simple stitches and some yarn, you can create your very own Tsukimi bunny to cherish and enjoy. So grab your crochet hook, pick out your favorite yarn colors, and get ready to craft these lovable bunnies that will surely add a touch of magic to your day.

Materials
To make the tsukimi bunnies you will need:
– A 2.5mm Crochet hook
– Yarn in whatever colors you’d like for the bunnies and the dango; I used white for the bunnies and yellow for the dango (optional black thread for the eyes and some pink for the cheeks)
– A tapestry needle and scissors
– Stuffing
– A stitch marker to help you keep track of the start of the round
– Safety eyes if using
Please note that you can make the beach bunny using any size crochet hook and yarn weight for a smaller or bigger result. I like using DK as it’s most commonly available. If you make amigurumi, it is usually recommended to go down a bit from the recommended hook size for the yarn to allow for a no-hole look (we don’t want to see the stuffing show through in between stitches)! Using DK yarn and a 2.5mm crochet hook, the bunnies should be about 15cm tall.
Stitches & Abbreviations
The pattern is written using US crochet terms in continuous spirals. You will need to know the following kinds of stitches to make him:
– Magic Ring (MR)
– Single crochet (sc)
– Decrease (dec); preferably using the invisible decrease method
– Increase (inc)
And now, let’s get started!
Head
Round 1: In a MR, sc 6
Round 2: Inc around (12)
Round 3: (Sc, inc) around (18)
Round 4: (Sc 2, inc) around (24)
Round 5: (Sc 3, inc) around (30)
Round 6-11 (6 rounds): Sc around (30)
Round 12: (Sc 3, dec) around (24)
Round 13: (Sc 2, dec) around (18), stuff and insert safety eyes if using
Round 14: (Sc, dec) around (12)
Round 15: Dec around (6), fasten off and sew closed
Body
Round 1: In a MR, sc 6
Round 2: Inc around (12)
Round 3: (Sc, inc) around (18)
Round 4: (Sc 2, inc) around (24)
Round 5: (Sc 3, inc) around (30)
Round 6-7: Sc around (30)
Round 8: (Sc 3, dec) around (24)
Round 9-10: Sc around (24)
Round 11: (Sc 2, dec) around (18)
Round 12: Sc around (18), stuff
Round 13: (Sc, dec) around (12)
Round 14: (Sc 2, dec) around (9), fasten off
Tail
Round 1: In a MR, sc 6
Round 2: (Sc, inc) around (9)
Round 3: (Sc, dec) around (6), fasten off
Ears (make 2)
Round 1: In a MR, sc 6
Round 2: Inc around (12)
Round 3-10 (8 rounds): Sc around (12), fasten off
Arms and legs (make 4)
Round 1: In a MR, sc 6
Round 2: (Sc, inc) around (9)
Round 3-7 (5 rounds): Sc around (9)
Round 8: (Sc, dec) around (6), fasten off, stuff arms lightly but leave legs unstuffed and sew them closed (do not sew the arms closed!)
Dango
Round 1: In a MR, sc 6
Round 2: Inc around (12)
Round 3-4: Sc around (12)
Round 5: Dec around (6), fasten off and sew closed
Assembly
Assembly is very easy: Sew the body to the head first, then fold the ears in half at the bottom and sew them to the head. Afterwards, sew on the tail. Then, sew on the legs, and lastly, the arms. Now all that’s left is to sew the dango to the hands of the bunny to make it look like the bunny is eating it. If you want to, you can add a bit of a blush to the cheeks. Make a second one and you’re done!