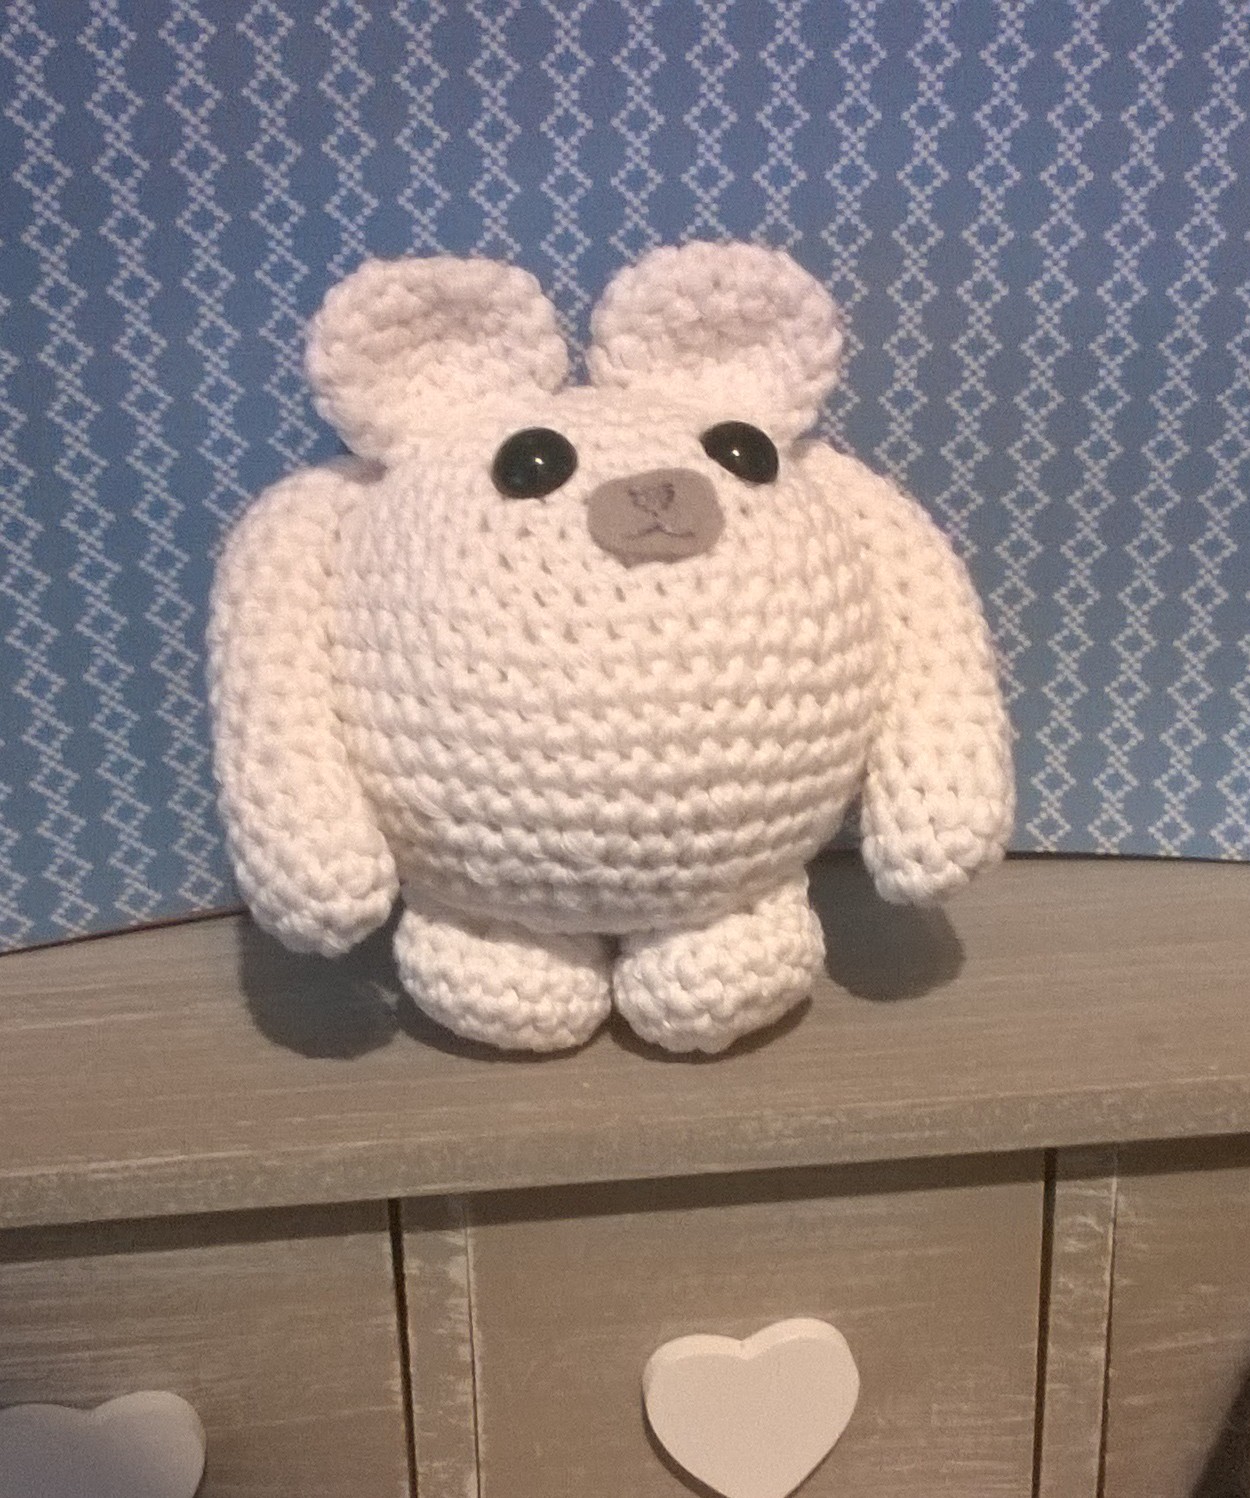
Crochet Fat Friends Polar Bear
The Crochet Fat Friends Polar Bear is an adorable addition to any crocheter's collection. With its chubby belly and sweet smile, this little polar bear brings a touch of whimsy and charm to any room. Its fluffy white yarn gives it a soft and cuddly appearance, perfect for snuggling on a chilly evening. Whether you're a beginner or an experienced crocheter, creating this lovable friend will surely put a smile on your face. Spread joy and warmth by making your own Crochet Fat Friends Polar Bear and let its cuteness melt your heart!

You will need
DK weight yarn in white
3.5mm crochet hook
12mm safety toy eyes
Wool needle
Toy stuffing
Embroidery thread
Embroidery needle
Scraps of grey felt
Fabric Glue
Abbreviations
Sl st –slip stitch
dc – double crochet
htr – half treble crochet
tr – treble crochet
st/sts – stitch/stitches
dc2tog – double crochet the next two stitches together
Feet.
Make two in white yarn
Make a magic ring and work 6dc into the ring. 6sts
Rnd 1: 2dc into each st to the end. 12sts
Rnd 2: (dc in the first st, 2dc in the next st) repeat to end. 18sts
Rnd 3-4: dc in each st to end. 18sts
Rnd 5: (dc2tog) repeat to end. 9sts
Cut the yarn leaving a long tail and pull through loop to secure.
Stuff your feet and leave them to one side for now.
Arms
Make two in white yarn
Make a magic ring and work 6dc into the ring. 6sts
Rnd 1: 2dc into each st to the end. 12sts
Rnd 2-3: dc in each st around. 12sts
Rnd 4-7: dc2tog, dc in next and each following st to end. 8sts at end of round 7
Rnd 8-15: dc in each st to end. 8sts
Cut the yarn leaving a long tail and pull through loop to secure.
Stuff your arm lightly and leave them to one side for now.
Ears
Make two in white yarn
Make a magic ring and work 6dc into the ring. 6sts
Rnd 1: 2dc into each st to the end. 12sts
Rnd 2: (dc in the first st, 2dc in the next st) repeat to end. 18sts
Rnd 3: (dc2tog, dc in next seven sts) repeat to end. 48sts
Rnd 4: (dc2tog, dc in next six sts) repeat to end. 42sts
Rnd 5: (dc2tog, dc in next five sts) repeat to end. 36sts
Rnd 6: (dc2tog, dc in next four sts) repeat to end. 30sts
Fasten off and press flat to form shape.
Body
Make one in white yarn
Make a magic ring and work 6dc into the ring. 6sts
Rnd 1: 2dc into each st to the end. 12sts
Rnd 2: (dc in the first st, 2dc in the next st) repeat to end. 18sts
Rnd 3: (dc in the first two sts, 2dc in the next st) repeat to end. 24sts
Rnd 4: (dc in the first three Sts, 2dc in the next st) repeat to end. 30sts
Rnd 5: (dc in the first nine Sts, 2dc in the next st) repeat to end. 33sts
Rnd 6: (dc in the first ten Sts, 2dc in the next st) repeat to end. 36sts
*Mark this round with a contrasting thread*
Rnd 7: (dc in the first eleven Sts, 2dc in the next st) repeat to end. 39sts
Rnd 8: (dc in the first twelve Sts, 2dc in the next st) repeat to end. 42sts
Rnd 9: (dc in the first thirteen Sts, 2dc in the next st) repeat to end. 45sts
Rnd 10: (dc in the first fourteen Sts, 2dc in the next st) repeat to end. 48sts
Rnd 11: (dc in the first fifteen Sts, 2dc in the next st) repeat to end. 51sts
Rnd 12: (dc in the first sixteen Sts, 2dc in the next st) repeat to end. 54 Sts
Rnd 13 — 14: dc in each st to the end. 54sts
*pause to insert the toy eyes. These go on the marked round 6 stitches apart*
Rnd 15: (dc2tog, dc in next seven sts) repeat to end. 48sts
Rnd 16: (dc2tog, dc in next six sts) repeat to end. 42sts
Rnd 17: (dc2tog, dc in next five sts) repeat to end. 36sts
Rnd 18: (dc2tog, dc in next four sts) repeat to end. 30sts
Rnd 19: (dc2tog, dc in next three sts) repeat to end. 24sts
Rnd 20: (dc2tog, dc in next two sts) repeat to end. 18sts
Rnd 21: (dc2tog, dc in next st) repeat to end. 12sts *stuff your toy now*
Rnd 20: (dc2tog) repeat to end 6sts
Cut the yarn leaving a long tail and pull through loop to secure.
Using a wool needle weave the yarn through the last 6 Stitches and pull tight to close. Weave in yarn ends and cut off remaining yarn.
Now attach the arms, legs and ears to body using the photo as a guide
Cut a small oval of grey felt and use grey thread to work long embroidery stitches to form the nose and mouth. Glue or sew onto face to finish.