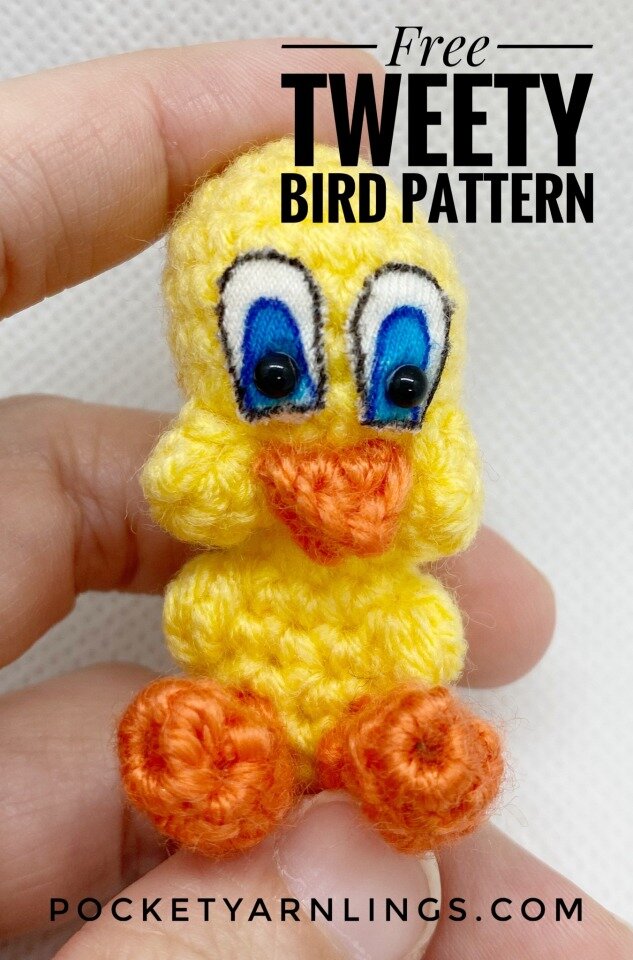
Crochet Tweety Bird
Crochet Tweety Bird is a delightful project that brings the beloved cartoon character to life in a cozy and charming way. With vibrant yellow yarn and some clever stitches, you can create a handmade Tweety Bird that will surely bring a smile to anyone who sees it. Whether you're an experienced crocheter looking for a fun new challenge or a beginner eager to learn, this project is a perfect choice. The finished Crochet Tweety Bird can be a lovely decorative piece for your home or a thoughtful gift for a fellow Looney Tunes fan. So, grab your crochet hook and yarn, and let's get crafting this adorable Tweety Bird together!

Terminology
Ch = chain
Sc = single crochet (2sc1 means 2 single crochet in same ch)Sl st = slip stitch
St = stitch (refers to number of stitches in one round)
Hdc = half double crochet
Dc = double crochet (yarn over 1x)
Sc2tog1 = single crochet decrease
Bobble stitch = 4 double crochet bobble
Materials and Tools
2.0mm Clover crochet hook
Orion Top Deluxe Yarn, Crown Yarn (or any equivalent acrylic yarn) — white, beige, light blue, baby blue, silver
Darning needle
Stitch markers
Filling – use leftover yarn or polyester fiberfill
Scissors
4mm glass eyes or safety eyes
Recycled white cloth
Blue pen or marker
Craft wires
Head – yellow
Round 1: Magic ring 6 – 6st
Round 2: 2sc6 – 12st
Round 3: (Sc1, 2sc1) x 6 – 18st
Round 4: (Sc2, 2sc1) x 6 – 24st
Round 5: Sc24 – 24st
Round 6: (Sc2, sc2tog1) x 6 – 18st
Round 7: Sc18 – 18st
Round 8: (Sc1, sc2tog1) x 6 – 12st
Round 9: Sc12 – 12st
Lightly stuff the head before closing it up in the next round.
Round 10: Sc2tog6 – 6st
Body (continue from head) – yellow
Round 11: Sc2, 2sc4 – 10st
Round 12: Sc10 – 10st
Round 13: Sc4, 5th arm, sc3, 9th arm, sc1 – 10st Arms (at 5th and 9th position): 4dc bobble stitch, top and bottom half all yellow
Round 14: Sc10 – 10st
Round 15: Magic ring 10, to join up to round 14 – 10st
Mouth / Beak x 2 – orange
Ch3, sl st 1, hdc1
Make 2 triangular pieces and sew 1 side of it together, so that it forms a sharp beak.
Cheeks x 2 – yellow
Round 1: Magic ring 5 – 5st
Round 2: Sc5 – 5st
Similarly using the same technique as above in crocheting a round to create a sphere.
Legs x 2 – orange
Round 1: Magic ring 5 – 5st
Round 2: Sc5 – 5st
Round 3: Repeat round 2 – 5st
Round 4: Sc2tog2, sc1 – 3st
Round 5: Sc3 – 3st
String a wire inside to make the legs bendable, on both sides.
Tail – yellow
Do a basic crochet cord:
Row 1: Ch2, sc1, turn work slightly clockwise
Row 2: Sc1 into horizontal bar on the side of previous sc, turn the work such that horizontal bars are facing forward towards you
Row 3: Sc1 into both horizontal bars on side of previous sc
Row 4-7: Repeat rounds 2-3 another 2 more times
This step is more complex, there’s also a whole tutorial here on how to make basic crochet stitches. Or if you are not ready to tackle this yet, you can try this simpler version to make the tail:
Round 1: Ch2 then sc3 – 3st
Round 2: Sc3 – 3st
Round 3-5: Repeat round 2 – 3st
Assembly
1. Mouth / beak
- Attach the beak over the bottom 1/3 of face in the midline.
2. Cheeks
- Attach the cheeks to either side of the beak, over the lower half of the face.
3. Eyes
- Use blue marker or blue pen to colour a small bottom oval section of the white oval cloth patches.
- Place the 2 white oval cloth patches just above the beak.
- Attach the glass eyes at bottom of the white eye patches, over the coloured blue region.
4. Legs
- Sew on the legs to round 14 of the main body, just below both bobble arms, such that they are facing outwards in a sitting position.
5. Tail
- Attach joint tail piece to the back of main body piece, at bottom and in the midline.