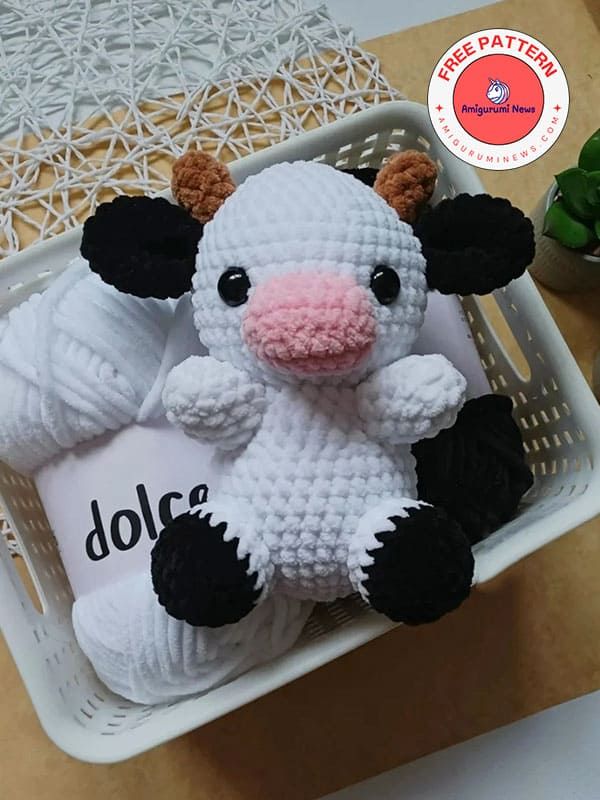
Crochet Coco the Cow Amigurumi
Coco the Cow is an adorable handmade creation that sparks joy and cuteness. With its soft yarn texture and charming design, this little friend is perfect for anyone looking to add a touch of whimsy to their life. Whether you're a seasoned crocheter or just starting to explore the world of amigurumi, this sweet cow is sure to bring a smile to your face. Embrace the art of crafting and let Coco the Cow be the delightful addition to your collection that you never knew you needed!

Abbreviations:
MR- magic ring
SC- single crochet
INC- increase
DEC- decrease
FO- fasten off
SLST- slip stitch
Materials:
Yarn (I used himalaya dolphin baby)
Crochet hook (I used 4.5mm)
Polyfill
Scissors
Yarn needle
Stitch marker
Head
In body color:
R1. 6 sc in a MR
R2. 6 inc (12)
R3. (sc,inc)x6 (18)
R4. (2sc,inc)x6 (24)
R5. (3sc,inc)x6 (30)
R6. (4sc,inc)x6 (36)
R7. (5sc,inc)x6 (42)
R8-14. 42 sc *7 rounds*
R15. (5sc,dec)x6 (36)
R16. (4sc,dec)x6 (30)
R17. (3sc,dec)x6 (24)
Slst and fasten off, stuff.
Place safety eyes between R11 and R12 about 7 visible stitches apart.
Body
In body color.
R1. 6 sc in a MR
R2. 6 inc (12)
R3. (sc,inc)x6 (18)
R4. (2sc,inc)x6 (24)
R5. (3sc,inc)x6 (30)
R6. (4sc,inc)x6 (36)
R7-12. 36 sc *6 rounds*
R13. (4sc,dec)x6 (30)
R14-15. 30 sc *2 rounds*
R16. (3sc,dec)x6 (24)
R17. 24 sc
Slst and fasten off, stuff. Leave a long tail for sewing.
Arms X2
In body color.
R1. 5 sc in a MR
R2. 5 inc (10)
R3-6. 10 sc *4 rounds*
Slst and fasten off, stuff. Leave a long tail for sewing.
Leg X2
Start with second color.
R1. 6 sc in a MR
R2. 6 inc (12)
R3. (sc,inc)x6 (18)
R4-5. 18 sc *2 rounds*
Change to body color.
R6. 18 sc
R7. (4sc,dec)x3 (15)
Slst and fasten off.
Stuffing.
Leave a long tail for sewing.
Now we move on to the small details.
Ear X2
In second color.
R1. 6 sc in a MR
R2. (sc,inc)x3 (9)
R3. (2sc,inc)x3 (12)
R4. (3sc,inc)x3 (15)
R5-7. 15 sc *3 rounds*
Don’t stuff. Fold the top of the ear flat and sc through both sides.
Connect first and last stitch to form and ear shape. Leave a long tail for sewing.
I used a different color here to show you, because it’s hard to see on this color.
Muzzle
In pink.
Make a slip knot and ch 7.
R1. Start from the 2nd ch from hook: 5sc, inc, now on the other side of ch: inc, 4sc, inc (15)
R2. inc, 4sc, inc, sc, inc, 5sc, inc, sc (19)
R3-4. 19 sc *2 rounds*
Slst and fasten off, stuff. Leave a long tail for sewing.
Horn X2
In brown.
R1. 6 sc in a MR
R2-4. 6 sc *3 rounds*
Slst and fasten off, stuff. Leave a long tail for sewing.
Assembly
1. First sew head to the body stitch by stitch. Add a little more polyfill at the end for better support.
2. Arms: sew them right under the head, R14-17, 6 visible stitches apart.
3. Legs: sew them between R5-9, 7 visible stitches apart.
4. Muzzle: between R12-15.
5. Ears: between R9-10, I like sewing them 3 stitches behind the eyes.
6. Sew horns between R6-7 just above the ears.