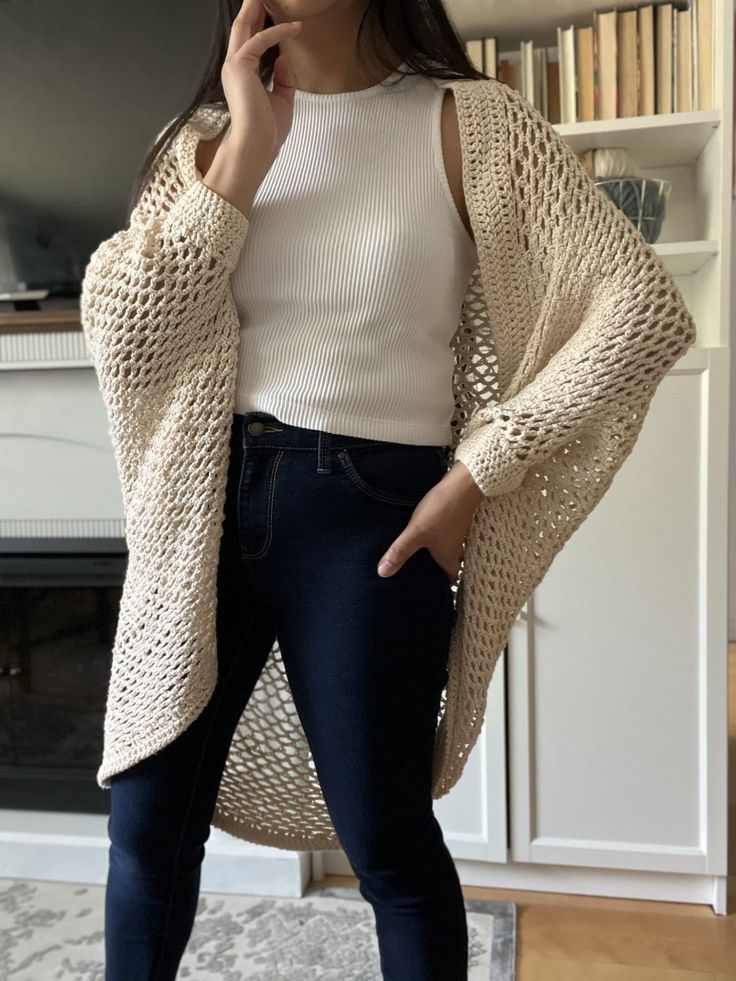
Crochet Lacy Cardigan for Summer
Get ready to add a touch of handmade charm to your summer wardrobe with a Crochet Lacy Cardigan! Perfect for those breezy summer nights or as a stylish layering piece, this cardigan is your go-to fashion staple. The delicate lace design adds an elegant touch to any outfit while keeping you cool and comfortable. Whether you're heading to the beach or a casual summer picnic, this versatile cardigan will surely become your new favorite go-to piece. So grab your crochet hooks and let's bring some handmade goodness to your summer style!

Materials:
- 4.0mm crochet hook size (I used Furls Crochet Streamline)
- Light worsted weight yarn or level 3 yarn weight (Pattern used Lion Brand’s 24/7 yarn which is a classified as a level 4 but on the thin side) approximately 1,000 yards for XS/S; 1,040 yards for M, 1,120 yards for L/XL
- Scissors
- Yarn needle
- Stitch counter (optional)
Abbreviations:
- Ch – chain
- Dc – double crochet
- Sc – Single crochet
- Dc2tog – double crochet two together
- St – stitch
- R – row
Gauge: do not forget to make your gauge swatch
Double crochet: 16st by 8rows = 4”x4”
Lace stitch pattern: 6 spaces by 12rows = 4”x4”
Special notes:
Pattern is done in rows, turn after each row
It is a good habit to count stitches and spaces frequently you can use stitch markers to help keep track of your progress and spaces
You may adjust the length of the shrug by adding on to the lace portion
Photo above is a size small pictured on a 5.1” female with a bust of 34 and weight of 125lbs
Photos are provided throughout the premium pattern to help you through your Sunset Cove Shrug Journey
The pattern is written in sizes S (M, L)
For multiple rep rows, the final st count reflects the st count for the last row
Border and Body
For this portion, you are essentially crocheting a long rectangle the first and last 3 rows are double crochet all throughout and the portion in between is a mesh chain stitch If you want a longer cardigan, add more mesh rows.
You are working on the border
Ch 154 (160, 172) +1
R1: dc in third ch from hook (this counts as your first and second st), dc in next ch and in each ch down the row (154, 160, 172 st)
R2-3: ch 2 (serves as first dc) dc in next stitch all the way down the row. (154 160 172 st)
You are now going to start the lace portion and body of the shrug
R4: *ch 3, skip two st, sc in next st. Repeat from * to end of the row. This should leave you with 51 (53, 57) spaces
R5: *ch 3, sc into the next space. Repeat from * to end of the row and sc into second ch from row below to finish
working row. (51, 53, 57 spaces)
You are now going to work on the border again
R6-101(103, 105): repeat row 5 (51, 53, 57 spaces)
You are now working on the border again
R102 (104, 106): ch 2 (this serves as first st), *2dc into space, dc into sc. Repeat from * to end of the row (154, 160, 172 st)
R103 (105, 107): ch 2, dc in next 153 (159, 171) st (154, 160, 172 st)
R104 (106, 108): repeat R103 (105, 107). (154 160 172 st)
Fasten off.’

Assembly
Lay your piece flat and guide the corners of the rectangle to the centre, the double crocheted border should be meeting and facing each other along the midline of the laid piece creating a diamond shape.
Seam from border until roughly 10 inches from end. This should count 13 spaces from end of fold on one side
Sleeves
For this portion you are going to add short sleeves on to the armhole opening. The directions are for all sizes – repeat on both arms
Attach yarn to the open end where you left 10 inches. You are now going to add on to this end and start shaping the wrist portion.
Please note, you are working in rows, not rounds. Turn work after every row.
R1: *ch 3, sc into space. Repeat from *around hole until back around opening (26 spaces) TURN
R2: *ch 3, ch into the next space. Repeat from * to end of the row and sc into second ch from row below to
finish working row (26 spaces)
R3-14: repeat R2 (26 spaces per row)
At this moment try to test if you are pleased with the length of this sleeve. You can adjust as desired.
R15: ch 2, 2 dc into each space (ch and 52 dc)
R16: ch 2, *dc, dc, dc2tog. Repeat from * until end of row (ch and 39 dc)
R17: ch 2, *dc, dc2tog. Repeat from * until end of row (ch and 26 dc)
R18-21: ch 2, dc in each st to end of the row (ch and 26 dc per row)
Fasten off with a long tail and seam up sides of arm to meet the initial seam you made earlier.