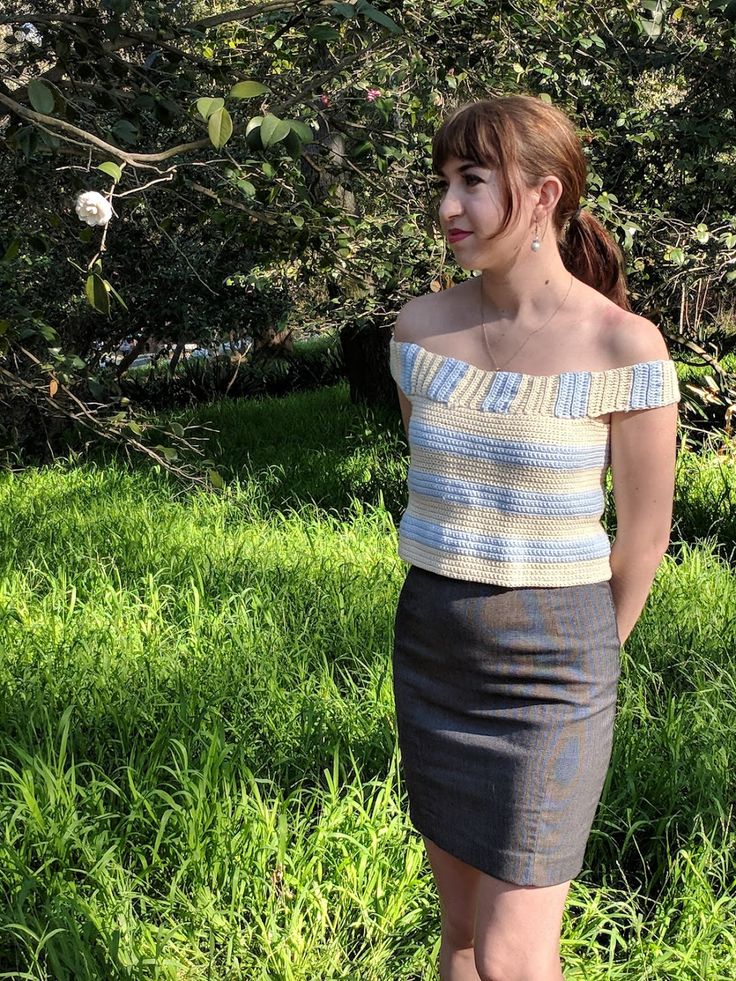
Crochet The Ariel Top
If you fancy trying out a fun and stylish crochet project, diving into the world of making the Ariel Top could be a delightful adventure! Crocheting this piece can be a rewarding experience, combining creativity with the joy of crafting your very own fashionable top. With your favorite yarn colors and some dedicated time, you can create a unique and charming top that suits your personal style perfectly. So, grab your crochet hook, put on some music, and let's get started on this exciting journey of crafting the Ariel Top!

Materials:
- Gazzal XL Baby Cotton in Mild Blue (3 DK Weight)
- Gazzal Baby Cotton in Beige (2 Sport Weight)
- 3.5mm Crochet Hook
- Set of Buttons OR a Zipper equal to the length of your top
Measurements:
Around Under The Bust (minus approximately 7 inches for the back zipper/button extension)
From underarm to the desired length
Around the shoulders (Minus a couple inches for the band to fit tightly around your shoulders)
From the “Front” of the armpit, to the “Back” of the armpit
Abbreviations
- SC – Single Crochet
- HDC – Half Double Crochet
- C1 – Color 1
- C2 – Color 2
(Obvious you don’t have to use the same colors that I chose to, so choose whatever two colors that you like together!)
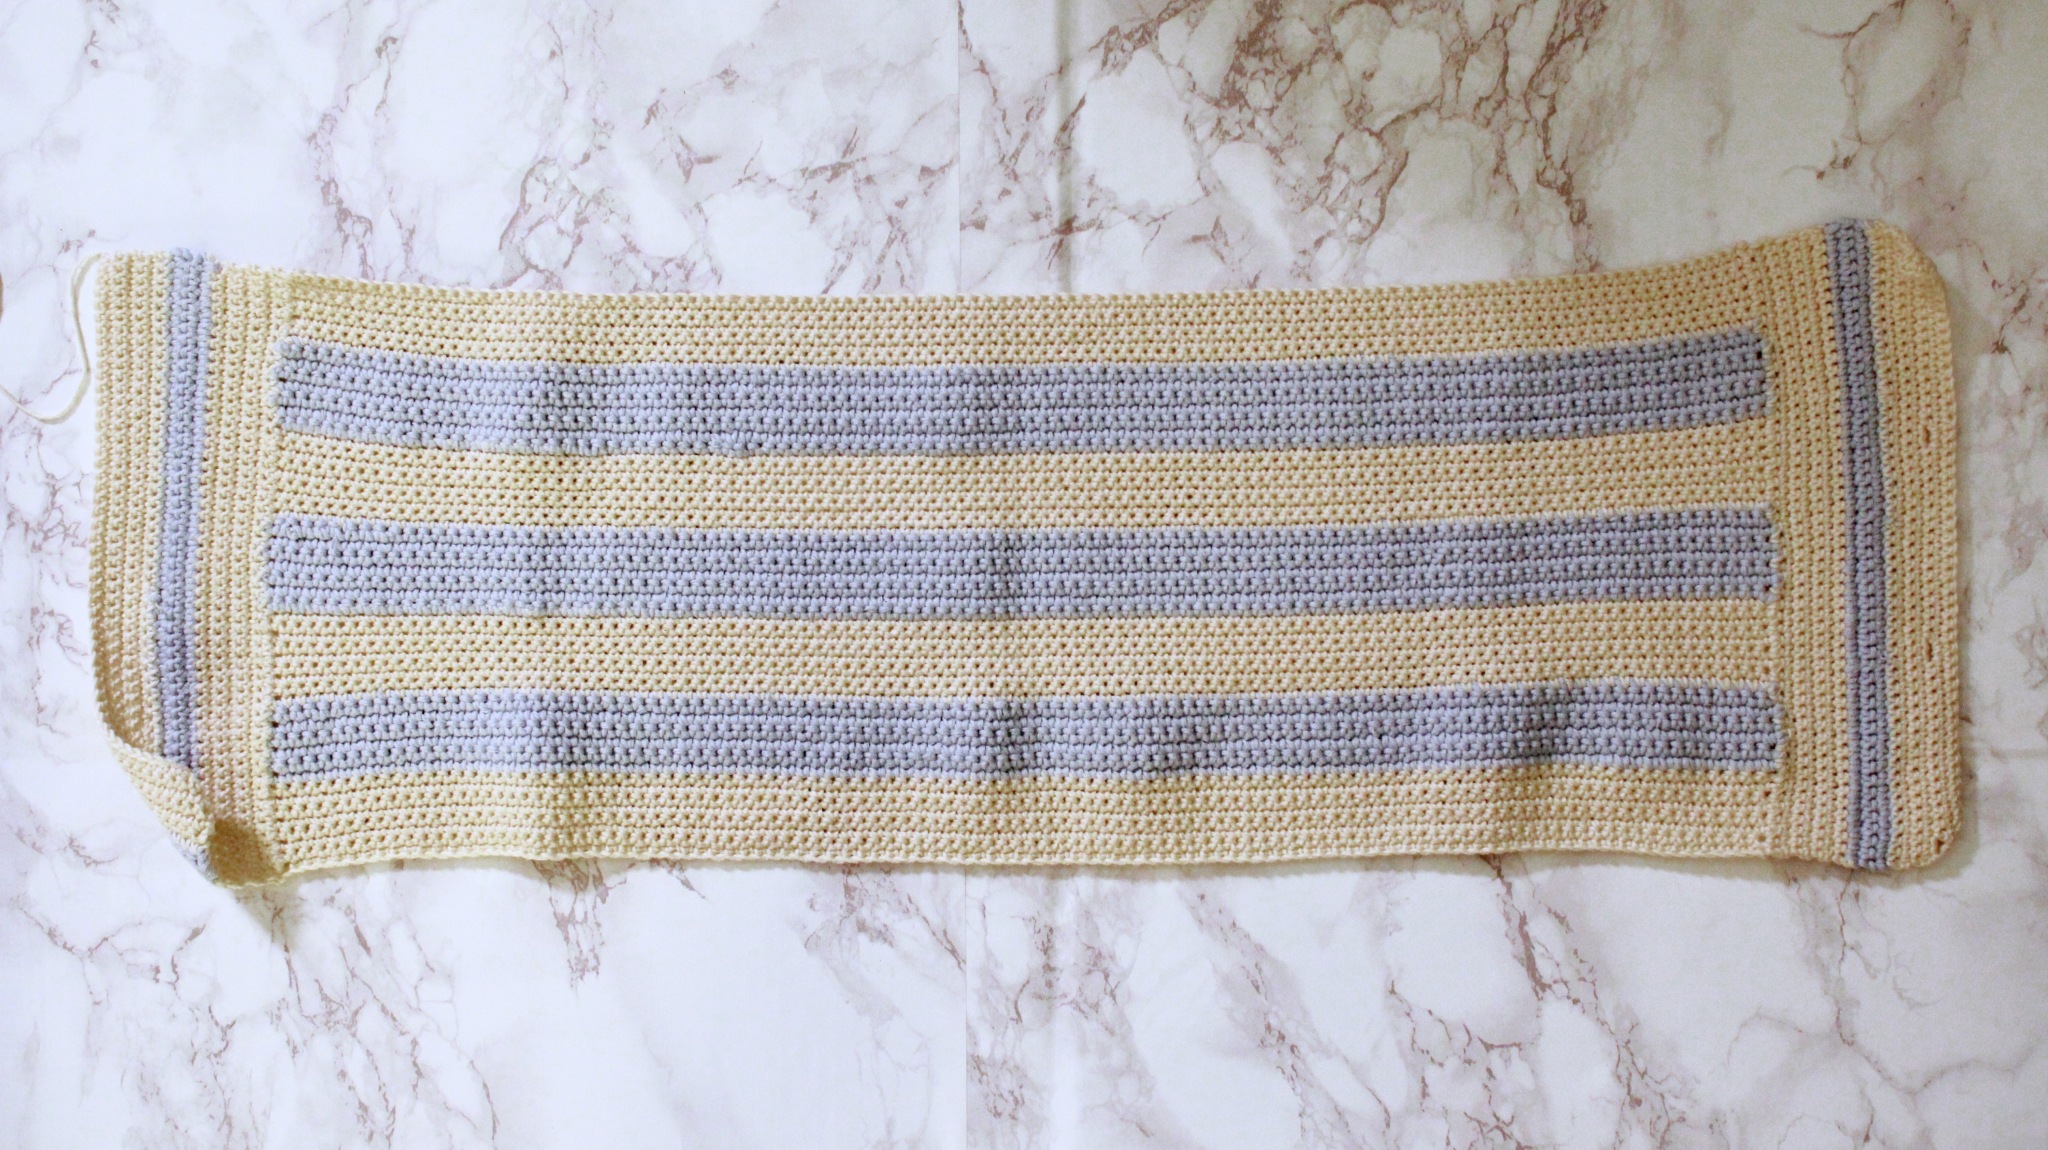
This top is comprised of two sections sewn together: “The Body Section” and the “Shoulder Band”. We will begin by creating the “Body Section” first.
The Body Section
This section is actually only worked in single crochet, so it is pretty simple, nothing fancy, it just involves some color changing.
Foundation :
Work a foundation chain that is close to the “Around Under The Bust (minus approximately 7 inches)” measurement. It does not need to be any particular multiple.
Row 1:
Work SC in C1 all along your foundation chain. Chain 1 and turn your work.
Row 2-8:
Work SC in C1 along each row, until the last stitch of row 8.
In order to switch to C2 in the next row, when working your last stitch in row 8, work your SC as normal until you pull up with two loops on your hook. Instead of pulling through with C1, pull through the loops with C2. This will make the color join relatively invisible.
As previously mentioned, I ended up working this top with two different yarn weights, my C2 (blue) was one weight higher than my C1 (white). Personally, I liked how this turned out, because of the weight difference, the blue stripes were a little thicker than the white which I thought added a lot of really interesting texture. However, in addition to the added texture, the yarn being thicker meant that it took less rows for the blue stripe to be as thick as the white stripe. Therefore I had to work 8 rows for the white but only 6 rows for the blue.
Row 9-15: (If you are working C2 with a yarn that is the same weight as C1, work 8 rows of C2 rather than the instructed 6)
Work SC in C2 along each row, until the last stitch of row 8.
In order to switch to C1 in the next row, when working your last stitch in row 8, work your SC as normal until you pull up with two loops on your hook. Instead of pulling through with C2, pull through the loops with C1. This will make the color join relatively invisible.
Continue repeating these steps between the two colors until the top is as close to your desired length as possible. When you have reached that length, tie off.

Back/Extension Section
This section will be added on next. I felt like the back portion needed another element rather than the stripes wrapping all the way around to meet in the back.
Row 1:
Working along the side/ends of the Body Section. Work SC’s in C1 as evenly as possible across the side of the body section. Chain 1 and turn your work.
Row 2-7:
Work 1 SC in C1 into each stitch across the previous row. Chain 1 and turn. Repeat this until the last stitch of the 7th row.
In order to switch to C2 in the next row, when working your last stitch in row 7, work your SC as normal until you pull up with two loops on your hook. Instead of pulling through with C1, pull through the loops with C2. This will make the color join relatively invisible. Chain 1 and turn
Row 8-11: (If you are working C2 with a yarn that is the same weight as C1, work 7 rows of C2 rather than the instructed 3)
Work 1 SC in C2 into each stitch across the previous row. Chain 1 and turn. Repeat this until the last stitch of the 11th row.
In order to switch to C1 in the next row, when working your last stitch in row 11, work your SC as normal until you pull up with two loops on your hook. Instead of pulling through with C2, pull through the loops with C1. This will make the color join relatively invisible. Chain 1 and turn.
This is the point where you can complete your top to be suited for buttons, or for a zipper.
If you choose to go with the buttons…
Row 12-16:
Work 1 SC in C1 into each stitch across the previous row. Chain 1 and turn.
Row 17:
This is where you would be adding your button holes. There is a little bit of math involved here, that I can’t guarantee will work for everyone since each top would be a different length and amount of stitches. However, the basic formula that I did for my button holes was to decide how many stitches I wanted to skip for each button (for me I skipped 2, but honestly skipping 1 might have worked better, but it depends on the size of your buttons), and subtract the TOTAL amount of stitches you would need to skip from the total stitches you have on your extension panel. Then divide that number by the amount of SPACES you would have between your buttons and that should give you the amount of stitches you should work between each of your button holes.
(TOTAL STITCHES ON EXTENSION – TOTAL STITCHES SKIPPED) / SPACES = STITCHES WORKED BETWEEN HOLES
For example, for my top, my extension panel was a total of 52 stitches across. Since I skipped 2 stitches per button and had 4 buttons, I subtracted a total of 8 from 52. This left me with 44, since I had 4 buttons, there would be 3 general spaces between those buttons. Therefore I divided 44 by 3 and got 14.66.
(52 – 8) / 3 = 14.66
Obviously I can’t make 14.66 stitches between the button holes so the spaces between the buttons weren’t perfectly even, but a stitch or two difference isn’t really noticeable. Like me, your top might not leave you with a number of stitches that will allow your button holes to be spaces out perfectly even, but just do the best you can and the difference will be very negligible.
Row 18-20:
Work 1 SC in C1 into each stitch across the previous row. When working your SC into your button holes, make sure you work the same amount of SC that you skipped to make the button-hole. Chain 1 and turn.
When you reach row 20, tie off.
** Repeat the same steps on the other side, but when you come to the row where you worked the button holes, instead work it as a normal row of SC like the rest**

If you choose to go with the zipper…
Row 12-20:
Work 1 SC in C1 into each stitch across the previous row. Chain 1 and turn.
When you reach Row 20, tie off.
** Repeat the same steps on the other side and then tie off, you will be adding the zipper later in the pattern**
At this point you will have finished the Body and Extension sections of the top, now the last part to construct is the Shoulder Band!
Shoulder Band
This is where you will be using your “Around the shoulders (Minus a couple inches for the band to fit tightly around your shoulders) measurement“. It is also up to your personal preference how thick you would like your band to be. This band is ribbed to give it texture and stretch, therefore it will be worked in HDC
Foundation:
Work a chain in C1 that is the length of how thick you would like your band to be, plus 2 chains.
Row 1:
Starting in the 3rd chain from the hook, work 1 HDC into each stitch across the row. Chain 1 and turn your work
Row 2:
Since the band will be ribbed, you will work 1HDC into each stitch across the row, but you will work them in the THIRD loop of the HDC stitches of the previous row. (Here is a good video from Yarnspirations to explain this if you aren’t familiar with this technique). Chain 1 and turn. (I know the video says to chain 2, but with HDC I find everyone has a different preference of chaining 1 or 2 to start a new row, personally I chain 1, but if you would prefer to chain 2, go for it!)
Row 3-6:
Repeat the steps of Row 2 for 4 more rows
When you reach your last stitch of Row 6, switch to C2 just like you did when working the body section.
Row 7-11:
Repeat the steps of Row 2 in C2 for 4 rows.
When you reach your last stitch of Row 11, switch to C1 just like you did when working the body section.
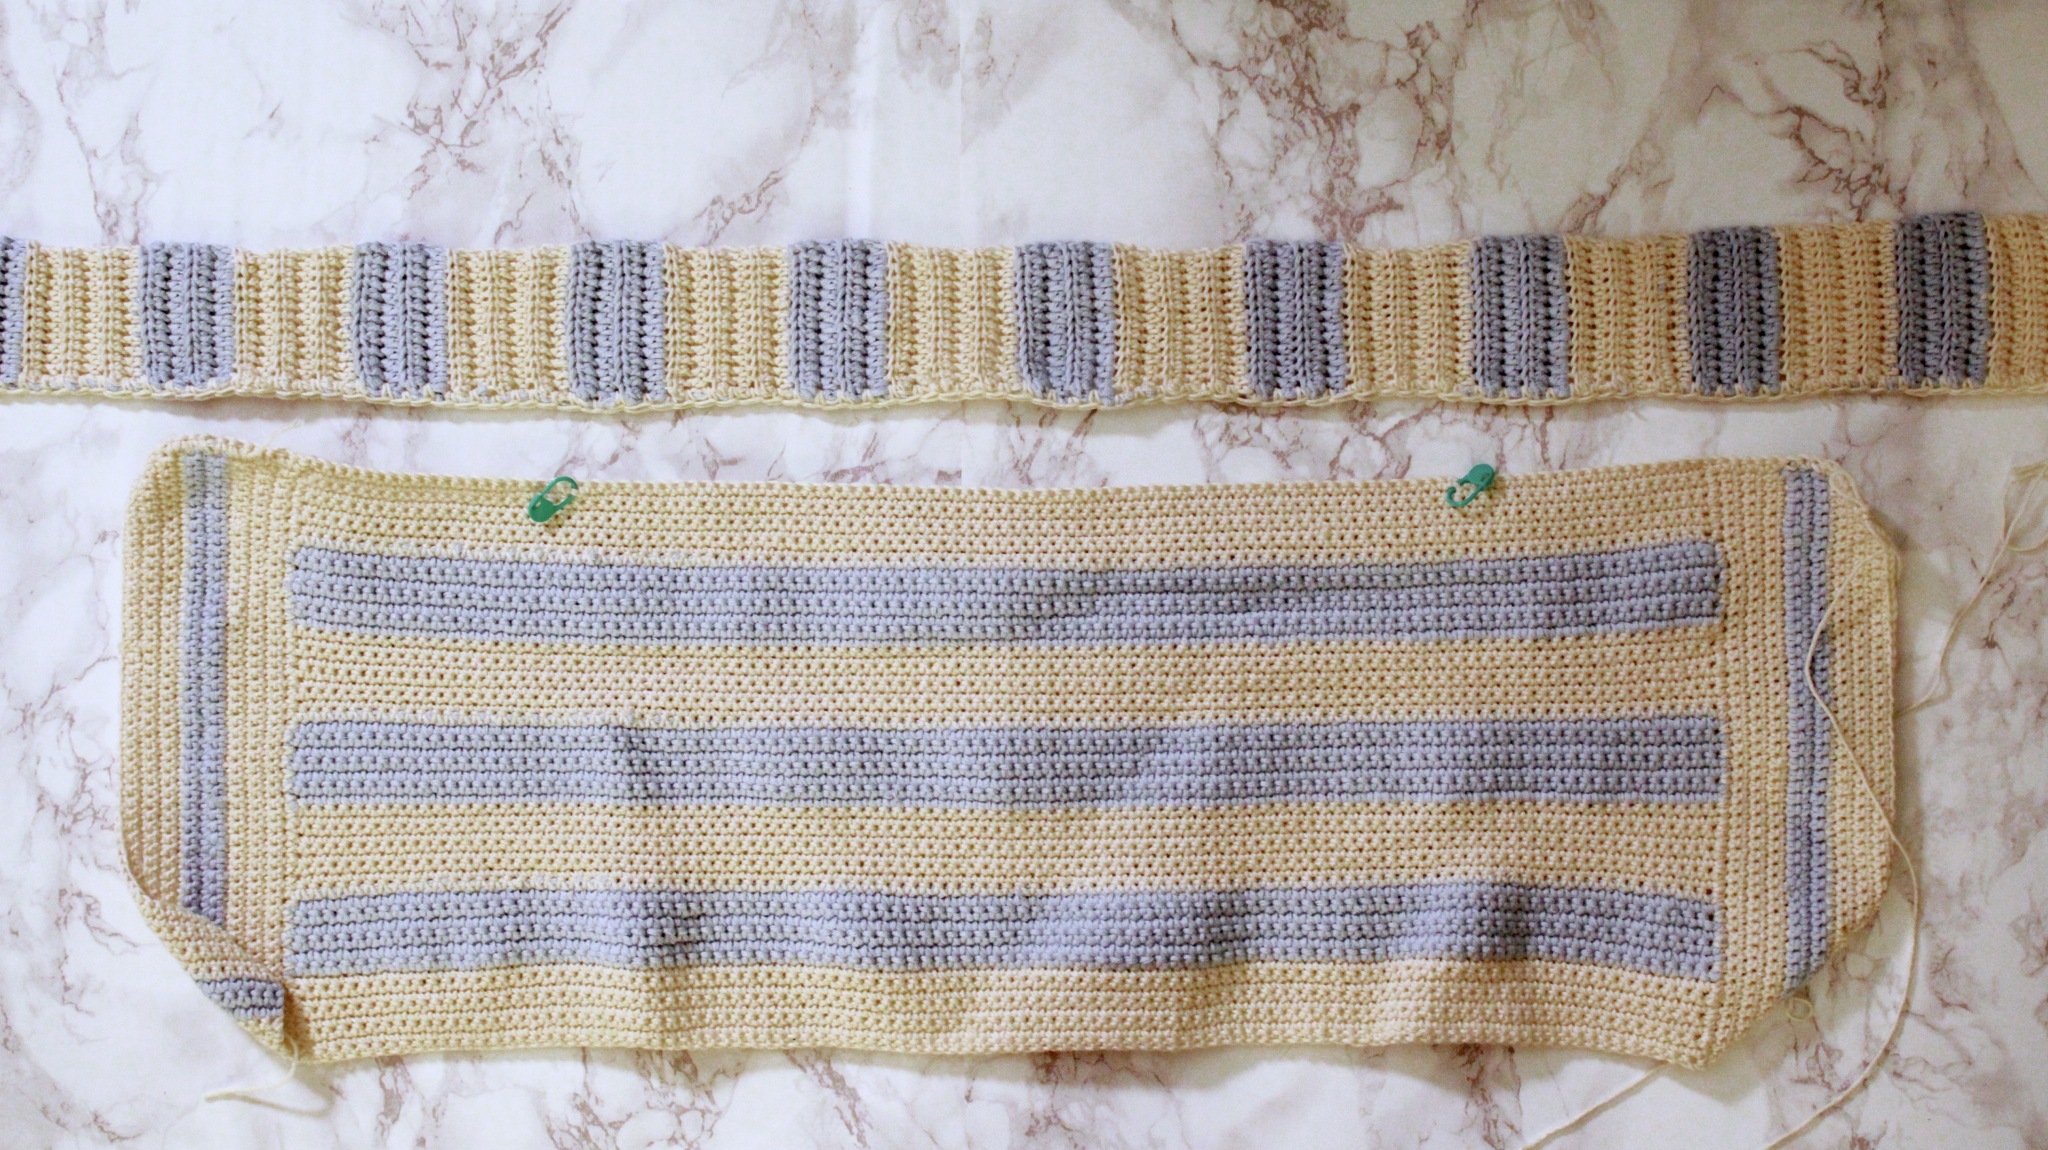
As you can tell, the C1 sections of the bands is worked for 6 rows, and the C2 sections is worked for 4 rows. Continue repeating that pattern until your band is equal to your “Around the shoulders (Minus a couple inches for the band to fit tightly around your shoulders) measurement“.

The band was too long to fit into the entire picture, but you get the idea haha. You may also notice that at this point I placed two stitch markers on the body section. These are marking the spots in which the arm holes will be located. I found these points by wrapping the piece around me and placing them as close to the very front of your armpit as possible. After placing them in approximate positions I balanced them out by making sure that they were both an equal amount of stitches from the ends of the piece, because they are likely to be a few stitches off from each other when you first place them.
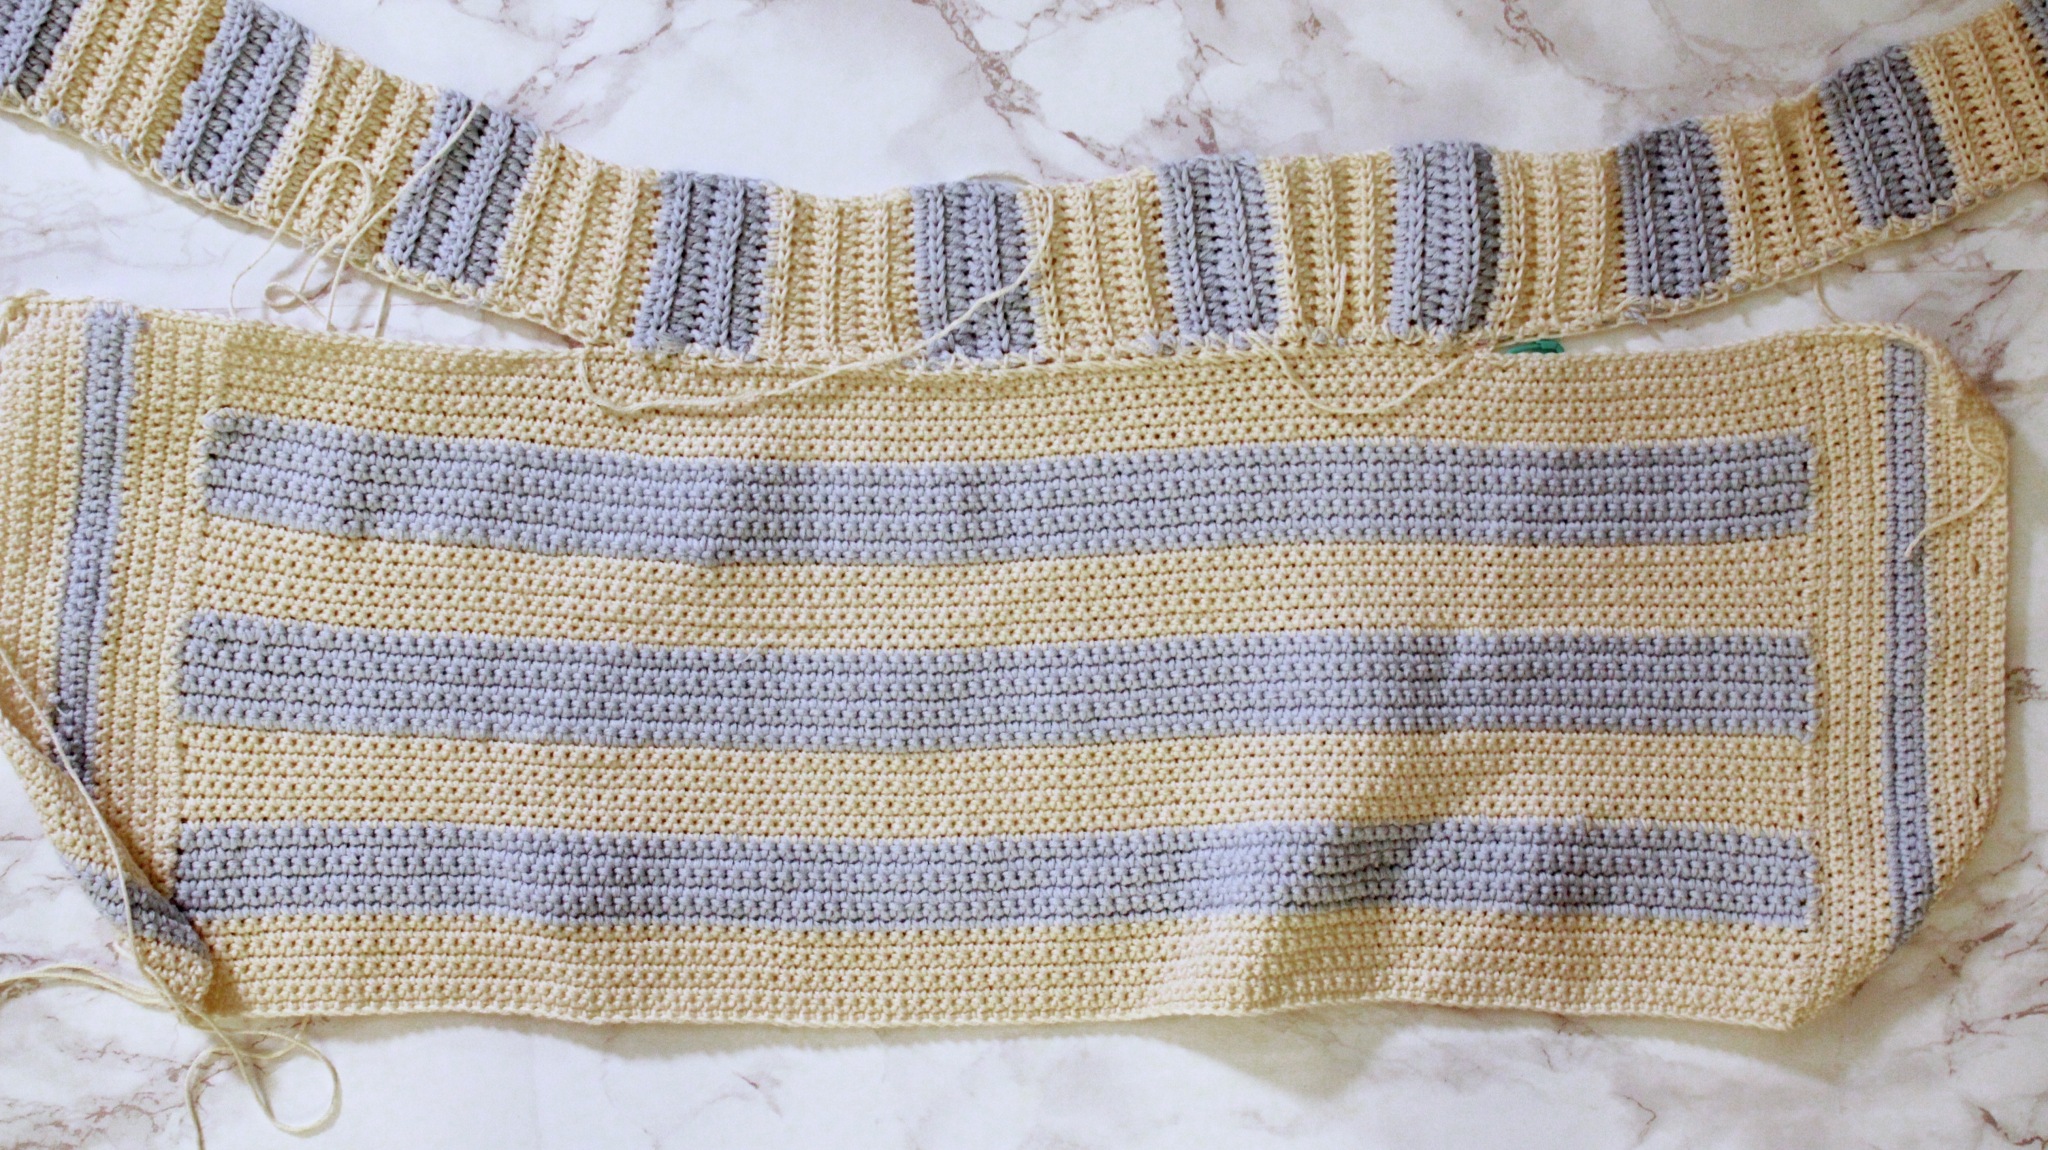
Now you will sew the band onto the Body Piece ONLY in between the two stitch markers. Try to line the band as evenly as possible to the body piece so you have an equal amount of the band left on either side of the stitch markers, in other words try to make the point of the band that meets one stitch marker mirror the other side, honestly I’m probably making it more confusing by saying that haha but hopefully you get the idea.

Now you will need to take your “Front” of the armpit, to the “Back” of the armpit measurement to find out how wide your arm hole needs to be. Take a measuring tape or ruler and starting at your stitch marker, take that measurement and place another stitch marker in the stitch that is that length away from your first stitch marker. Do the same on the other side and make sure that there are the same amount of stitches in between the stitch markers on both sides.
When you are sewing, your stitches are going to show, so be sure to work all of the sewing on the same side, this will be the “inside” of the top so no one can see the sewing work.
Now you are going to sew the ends of the bands onto the ends of the body section, because it is usually easiest to sew from right to left, sew on the ends as follows