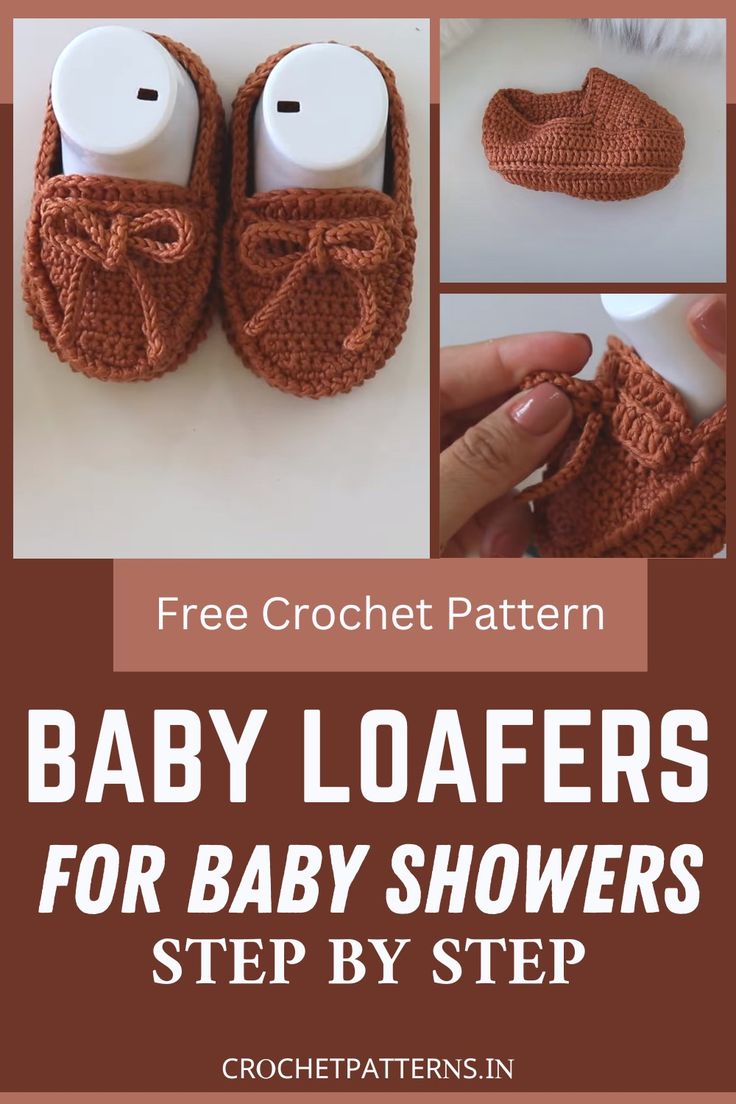
Crochet Baby Loafers
Crochet baby loafers are the cutest and coziest little shoes you can make for the tiniest feet in your life! Whether you're gifting them to a newborn or creating a handmade keepsake for your little one, these adorable little kicks are sure to put a smile on anyone's face. With their soft yarn and intricate stitches, these sweet baby loafers are not just a fashion statement but also a symbol of love and care. So grab your crochet hook and get ready to create a pair of these delightful baby loafers that will surely become a cherished favorite in no time!
Material List
- Yarn: Medium-weight yarn
- Crochet Hook: 2.2 mm hook or suitable size to achieve gauge relevant for yarn weight.
- Scissors: For cutting yarn.
- Yarn Needle: This is for weaving in ends and sewing pieces together.
- Stitch Marker: To mark the start of round or important stitch placements.
- Buttons or Embellishments (optional): For added decoration.
Abbreviations
- ch — Chain
- sc — Single Crochet
- hdc — Half Double Crochet
- dc — Double Crochet
- sl st — Slip Stitch
- bpSc — Back Post Single Crochet
- st(s) — Stitch(es)
- inc — Increase (two stitches in the same stitch)
- dec — Decrease (combine two stitches into one)
- rnd(s) — Round(s)
Pattern note: This list uses US terminology.
Step by step Pattern
Starting the Sole
Beginning Chain: Start with a slip knot and chain 19.
First Round: Skip 3 chains and into the fourth chain from the hook, make a double crochet. Continue with a double crochet into each chain until the last one. In the last chain, put 5 double crochets. Make your way back down the other side of the chain, putting double crochets in each, with the final chain receiving 2 double crochets. Join to the first double crochet with a slip stitch.
Shaping the Sole
Increasing Rounds: For the next rounds, increase at each end to shape the sole, including a combination of single crochets, half-double crochets, and double crochets. Specific stitch numbers adjust for the curve of the sole.
Upper Shoe
Building Sides: Work a row of single crochets around the edge of the sole without increasing. This creates the starting edge for the sides of the shoes.
Post Stitches for Texture: Introduce back post single crochets around the next row to add texture, indicating the beginning of the shoe's upper part.
Constructing the Upper Part
Double Crochet Rows: A few rows of double crochets are added atop the texturized edge, maintaining the stitch count to build the sides of the shoe upward.
Shaping the Toe and Heel
Toe and Heel Formation: Transition to shaping the toe by continuing with double crochet stitches but beginning to decrease, focusing the stitches towards the center portion of the toe area.
Top Edge: Finish the upper part's edge with a clean finishing stitch, either a slip stitch round or a reverse single crochet (crab stitch) for a neat border.
Final Touches
Cord Creation: Create a cord or strap for the loafer. Chain a length sufficient to wrap comfortably with a little excess for tying. Slip stitch to thicken if desired, then fasten off, leaving a tail for sewing.
Attaching the Strap: Sew the strap securely to the sides of the loafer at the desired height. Depending on the pattern, this could be a closure mechanism across the top foot or around the ankle.
Finishing: Weave in all ends securely. Consider adding a decorative button, bead, or similar embellishment to the strap for aesthetic purposes.