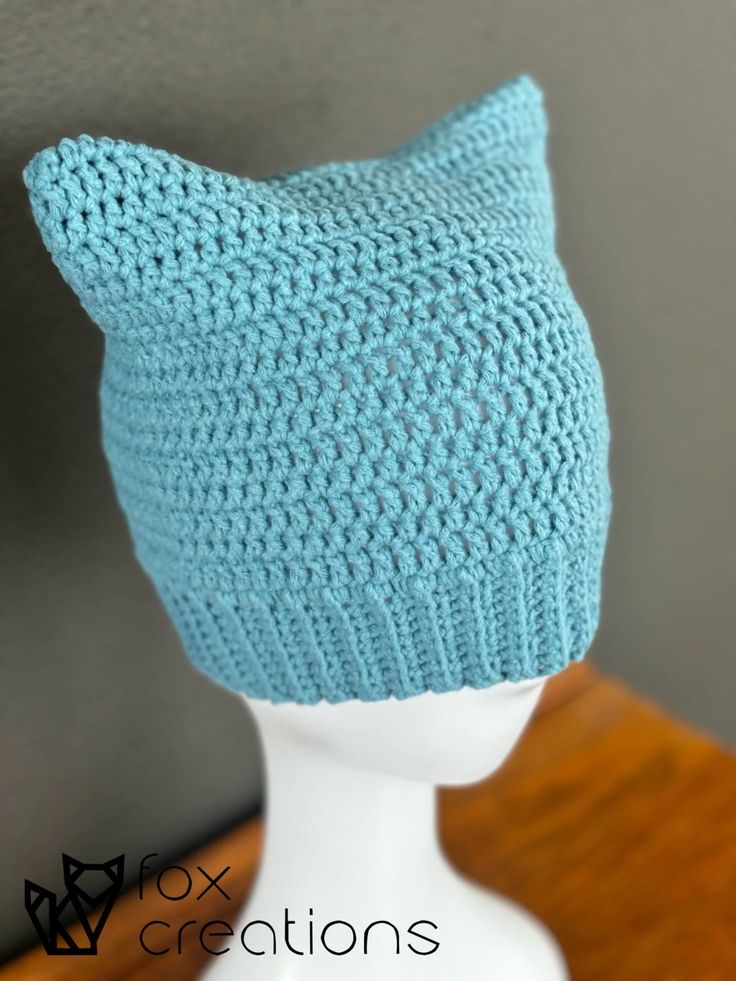
Crochet Cat Ear Beanie
The Crochet Cat Ear Beanie is an adorable and fashionable accessory that adds a touch of whimsy to any outfit. Not only does it keep you warm and cozy during the chilly months, but it also showcases your fun and playful personality. The cute cat ears are a delightful twist on a classic beanie, making it a standout piece that will surely turn heads wherever you go. Whether you're a cat lover or simply enjoy unique accessories, this beanie is the purr-fect choice for adding a stylish flair to your wardrobe.
MATERIALS
Aran weight yarn (Lion Brand Feels Like Butta)
– Dusty Blue 70g (approx. 150 metres) for Adult Small
5.5mm crochet hook (or size to suit your yarn)
Scissors
Tapestry needle
Ruler / Measuring Tape
Stitch Markers (Optional)
ABBREVIATIONS
sc – single crochet
dc – double crochet
blo – back loop only
ch – chain
sl st – slip stitch
fasten off – cut the yarn and pull through
Rd – Round
(#) – total number of stitches at the end of the round/row
The Pattern
Size Height(cm) Circumference(cm)
Adult Small (Teen). 19 – 20. 47.5 – 50
Adult Medium. 20 – 21. 50 – 52.5
Adult Large. 21 – 22.5. 52.5 – 55
Adult Extra Large. 22.5 – 24. 55 – 57.5
Notes:
- Repeat instructions between the * *
- Chain 1 and 2 do NOT count as a stitch
- DO NOT TURN at the end of each round unless stated otherwise (this will create a diagonal seam, which is completely normal)
Brim:
Starting with the Brim and working in rows:
Row 1: Ch 11, starting in the 2nd ch from the hook, sc in the back bump of each ch (10)
Row 2 – 72: TURN, Ch 1, sc in the BLO of each st (10)
Repeat this row until the brim length measures the Hat Circumference minus approx. 5cm, ending on an even number of rows
Our example is 72 rows and approx. 45cm
Joining the Brim:
Holding the first and last rows together, slip stitch across using the back loop of the LAST row and the loops closest to you for the FIRST row (this will connect the ribbing to become the brim)
Working in the round:
Rd 1: Ch 1, sc in the top of the ribbing (1 sc in each row), sl st to 1st sc, DO NOT TURN (72)
Alternating Rounds:
Rd 2: Ch 2, dc in each st, sl st to first dc
Rd 3: Ch 1, hdc in each st, sl st to first hdc
Repeat the above 2 rds (ending on a hdc rd) until the beanie is the same as the Beanie Height in the chart above – our example is 20cm high and 16 rounds
Fasten off and weave in ends
(We like to use the invisible fasten off method for beanies)
Seaming the Top:
Turn the beanie inside out (so the wrong side is facing)
Position the seam in the middle of the beanie so it can be on the back when worn
Working through both sides of the beanie:
Attach yarn to the right corner (or left corner if you’re left handed) with a slip stitch
Continue slip stitching across the top of the hat to seam the two sides together
Fasten off
Weave in all your ends and turn right side out