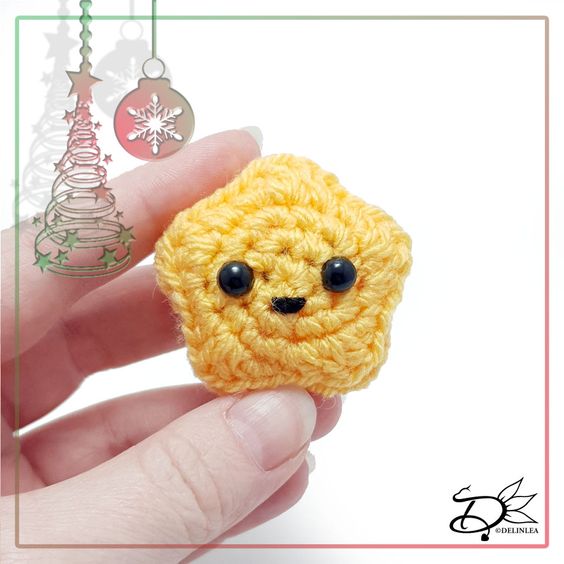
Crochet Star Amigurumi
Crochet Star Amigurumi is a delightful and creative project that allows crafters to make adorable star-shaped plush toys using crochet techniques. These mini stuffed toys can be a charming addition to your home decor or make wonderful handmade gifts for friends and family. The beauty of creating Amigurumi lies in the ability to personalize each piece with different colors, sizes, and facial expressions, making each one unique and special. With a bit of patience and creativity, you can bring these cute crochet stars to life, adding a touch of handmade charm to your world. So grab your crochet hooks and yarn, and get ready to craft some magical twinkling stars that will brighten up anyone's day!
For this pattern you’ll need:
♥ Yarn in the color Yellow (I used Stylecraft Special DK)
♥ A bit of extra Black yarn to create it’s mouth.
♥ Crochet hook. ( I used 3mm)
♥ Stuffing.
♥ Yarn Needle.
♥ Sewing Pins.
♥ Stitch Marker.
♥ Safety Eyes, 6mm.
Stitches used (US Terms):
Magic Ring.
CH = Chain.
SLST = Slip Stitch.
SC = Single Crochet.
HDC = Half Double Crochet.
DC = Double Crochet.
ST = Stitch.
Inc = Increase.
Dec = Decrease.
(…) = Repeat the space in brackets the given number of times.
[…] = Total number of stitches.
This pattern is made with continues rounds, unless stated otherwise. Use a stitch marker to mark your first/last stitch of your row.
♥ Pattern Star
Star (Make 2)
Use the color Yellow.
1: 5SC in a Magic Ring. [5]
2: 2SC in each st around. [10]
3: (1SC, inc) 5 times. [15]
4: (SC + HDC in the next st, 2DC in the next st, HDC + SC in the next st) 5 times. [30]
Fasten off and leave a long tail on one of the two parts, for the other you can weave in the tail.
Place the eyes on one of the parts, between row 2&3.
♥ Assembling
Whenever I start assembling Amigurumi, I’d like to use sewing pins to position all parts first until I’m happy. Then I will sew them on. I recommend you do so as well.
But for this satr one, there isn’t much to assemble, you only have to sew both parts together.
Then with the piece of black yarn, create his mouth.
If you want to hang it, don’t forget to add a loop to the top.