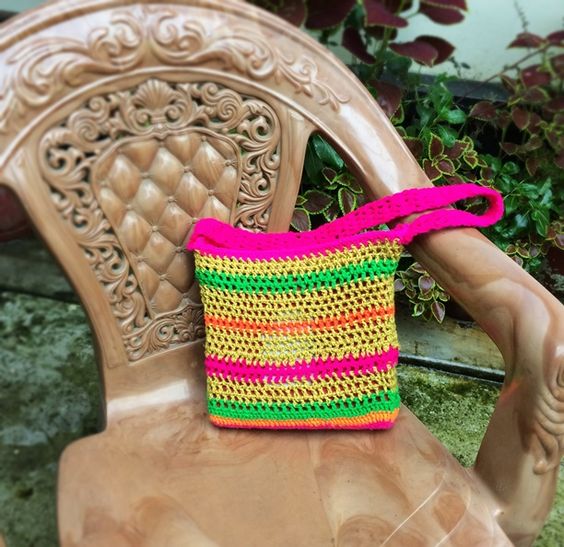
Crochet Sling Shoulder Beach Bag
The Crochet Sling Shoulder Beach Bag is an absolute must-have for your next beach day adventure! This stylish accessory combines practicality and flair, making it perfect for carrying all your beach essentials in a chic way. Its lightweight design and sturdy construction ensure that you can pack your sunscreen, towel, snacks, and more with ease. The intricate crochet detailing adds a touch of bohemian charm, making you stand out on the sandy shores. Whether you're soaking up the sun or strolling along the boardwalk, this beach bag will be your trusty companion. So, grab your sunglasses and flip-flops, and get ready for a day of fun in the sun with your new favorite accessory!
What you need
Materials-
1. Crochet hook
2. Crochet thread
3. Scissors
Instructions
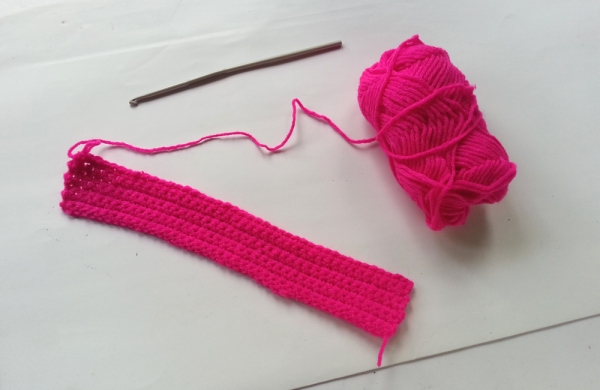
Step-1: Decide the width of the tote and then start doing chain stitches. CS as many as you’ll need to reach the required width of the tote. Once you’ve reached the required width start doing SC along the chain stitches. Do 4-5 rows of SC. This rectangular piece will be the side width of the tote. Do a slip knot and cut off extra thread.
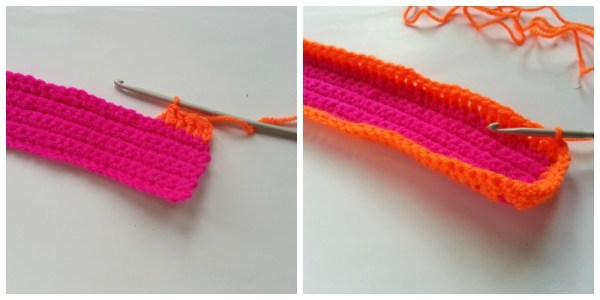
Step-2: Take a different coloured yarn or thread and attach it with the crocheted piece from where the previous thread ends. This time do DC all around the rectangular piece by keeping the number of stitches equal. By doing this step the crochet will start to move upwards. Once you’ve completed one row of DC you can do a slip knot and cut off extra thread.
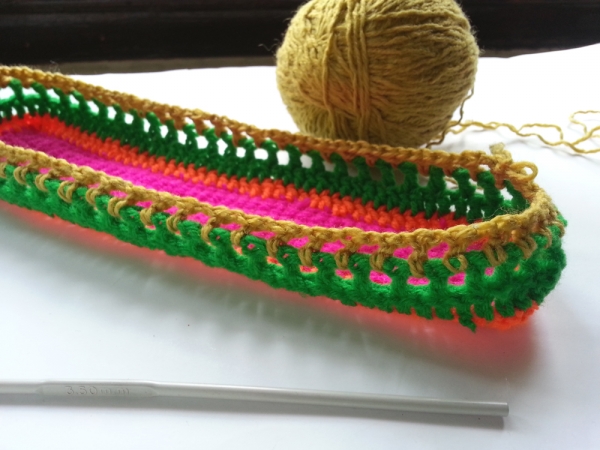
Step-3: Attach a different coloured thread for the next row. Do a row of single crochet. For the next row do 3 CS, skip one chain stitch from the previous row and then a DC through the next chain stitch. You will have to do a CS, skip one chain stitch from the previous row and then a DC through the next chain stitch. Continue to do the same until the row is complete.
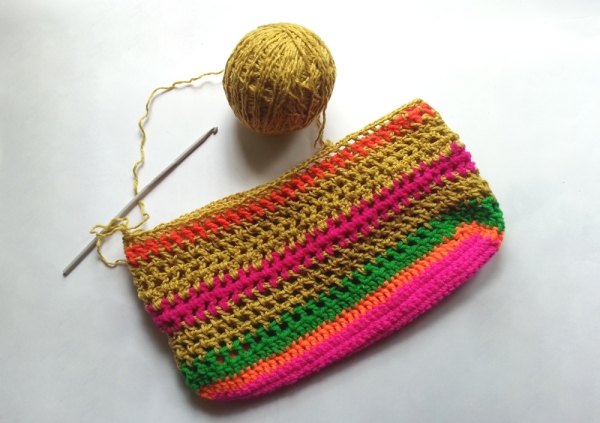
Step-4: Change colours after crocheting 2-4 rows to make the tote look colourful. Use bright colours such as yellow, green, pink, orange etc. We’ve crocheted half way through.
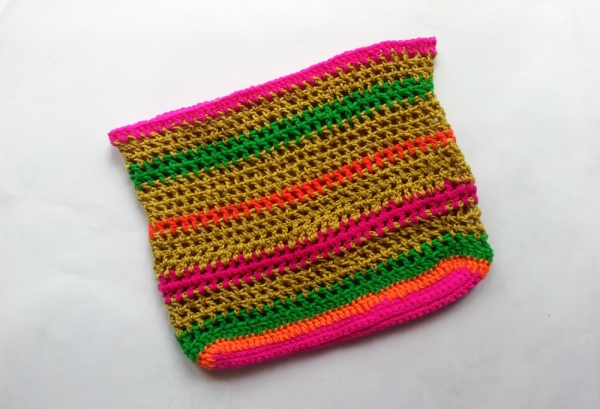
Step-5: Once it reaches the required height for the tote you can stop crocheting and simply crochet a border to give it a nice finished look. I used pink thread for the border. After attaching the thread for the border, do 3 CS and the do 2 DC through the loop below. Similarly keep doing 2 DC through each loops until completing the entire border. After reaching the end do a slip knot and cut off extra thread.
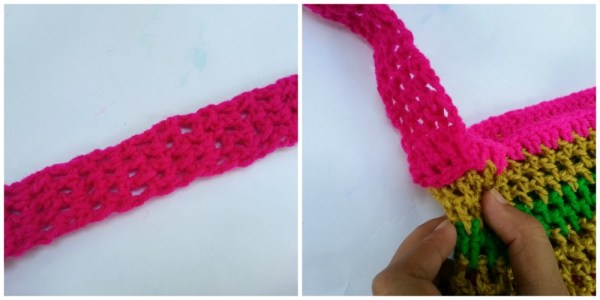
Step-6: Use a bright colour for the handle. You can crochet the handle as you want. Work with any stitch you want (SC, DC, TC etc.). All you need to do is crochet a line of chains until reaching the required length for the handle and then thicken the chain stitch with any type of stitches as you wish. After making the handle you can either stitch the both ends of it with the tote on both sides or crochet them.
Add embellishments to make the tote look more attractive.
