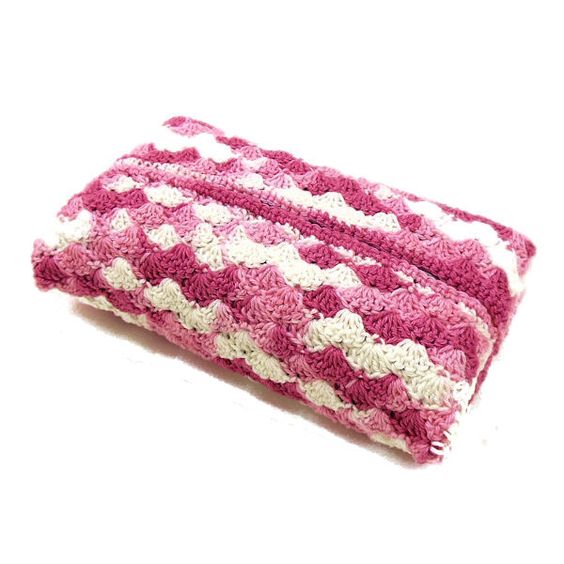
Crochet Shell Stitch Tissue Case
Creating a Crochet Shell Stitch Tissue Case is a fun and rewarding project that combines both functionality and creativity. This charming accessory not only keeps your tissues clean and easily accessible but also adds a touch of handmade charm to your everyday routine. The shell stitch pattern gives the case a delicate and elegant look, making it a perfect gift for yourself or a loved one. Whether you are a crochet enthusiast looking for a new project or a beginner eager to try something new, this tissue case is a delightful and practical way to showcase your skills and add a personal touch to your essentials. So grab your yarn and hook, and get ready to crochet your way to a stylish and functional accessory that will surely bring a smile to your face every time you reach for a tissue.

Materials Needed
Size 10 Crochet cotton *
Size 7 Steel crochet hook
1 small package facial tissues
4 large straight pins
Tapestry Needle for weaving in ends
Yarn Thickness: 10 thread
Gauge: 2 shells = 1"
Finished Size: 5-1/8" x 3-1/4" flattened
Skill Level: Intermediate
Instructions
ROW 1: Ch56. Sc in 2nd ch from hook and in each ch across. Ch3, turn.
ROW 2: 2dc in first sc. Sk 2 sc. Sc in next sc. Sk 2 sc. *5dc in next sc. Sk 2 sc. Sc in next sc. Sk 2 sc. Rep from * 6 times more. 3dc in last sc. Ch1, turn.
ROW 3: Sc in first dc. 5dc in next sc. Sk 2 dc. *Sc in next dc. 5dc in next sc. Sk next 2 dc. Rep from * 6 times more. Sc in top of ch3. Ch3, turn.
ROW 4: 2dc in first sc. Sk 2 dc. Sc in next sc. Sk 2 dc. *5dc in next sc. Sk 2 dc. Sc in next dc. Sk 2 dc. Rep from * 6 times more. 3dc in last sc. Ch, 1, turn.
ROW 5-38: Rep Rows 3 & 4 consecutively.
Perimeter
Lay the work in front of you so the place where you ended is in the upper left corner. You are now going to start stitching down the left side, across the bottom, up the right side and across the top in the following manner.
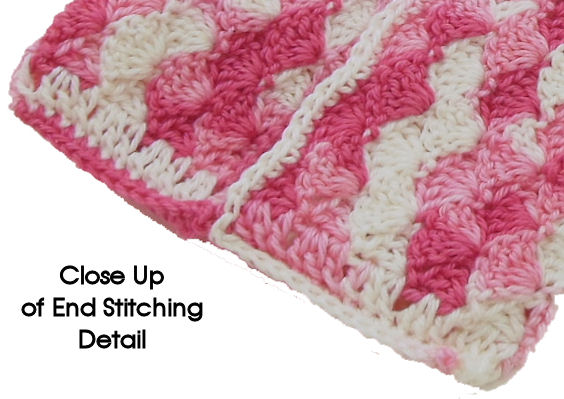
Down Left Side: Ch3, dc around post of first dc row. Dc in next sc row. *2dc in next dc row, 1dc in next sc row. Repeat from * to the next corner. Ch1 to turn corner.
Across Bottom: 2sc in last dc post just made. Sc in each stitch across bottom to next corner. Ch3 to turn corner.
Up Right Side: Dc in first sc dc row. Dc in next sc row. *2dc in next dc row. 1dc in next sc row. Rep from * up to next corner. Ch1, to turn corner.
Across Top: 2sc in last dc post just made. Sc in each stitch across to the starting corner. 2sc in post of ch3. Fasten off and weave all ends into back of work.

Final Assembly
Step 1: Lay the piece in front of you, right side facing up and so the first and last row are top and bottom.
Step 2: Get your straight pins ready. Fold the bottom up to meet the top and line them up evenly with each other. Press the fold flat with your fingers.
Step 3: Mark the center of your work by inserting a pin in each end of the fold so the points of the pins are facing each other.
Step 4: Making sure your work is oriented so that the pins are on the bottom and the open edges are at the top, open up your work so the pins are at the center and the bottom and top are at the bottom and top respectively.
Step 5: Fold the bottom edge back up but this time have the edge meet the point where the 2 pins are. Take the pins out and put them back through both layers of this bottom half to keep this fold in place.
Step 6: Fold the top half edge down to meet the bottom half edge in the middle and pin the top half in place using the other 2 pins.
Step 8: Lay your work in front of you so the folded edges are at top and bottom once again. Join thread in upper left corner through both thicknesses and while stitching through both thicknesses at the same time, work a row of sc in each stitch across to close this edge. Fasten off and weave these ends in place.
Step 9: Turn work to the other end is now on your left. Repeat the stitching to close as in Step 8.
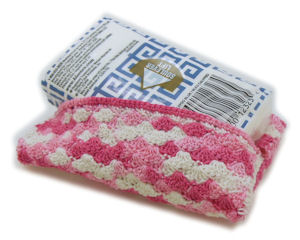
Step 10: Remove pins and turn work inside out. Insert pack of tissues into work so the opening of the tissue pack lines up with the opening in your case.
*Note: I used Caron Grandma's Best 100% Mercerized Cotton Crochet Thread in style #276A Color: 163 Cotton Candy. Any soft size 10 crochet cotton should work just fine.
