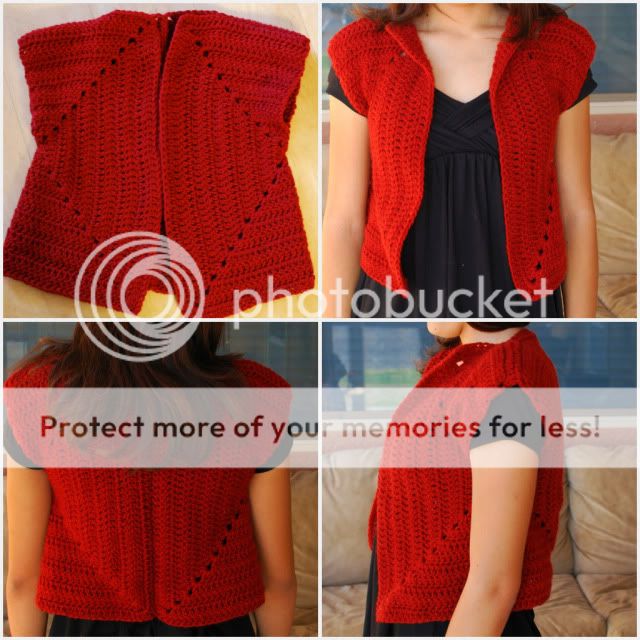
Crochet The Squared Vest
Crocheting the Squared Vest is a fun and rewarding project that allows you to create a stylish and versatile garment. With its unique square design, this vest is a great addition to your wardrobe that you can dress up or down for various occasions. The beauty of crocheting this vest lies in the process itself, as you can enjoy the rhythmic motions of stitching while watching your creation come to life. Whether you're a seasoned crocheter or just starting out, this pattern offers a great opportunity to showcase your skills and creativity. So grab your yarn and hook, and get ready to crochet your way to a fabulous new addition to your closet!"

US Terms
6mm/ J hook
worsted weight yarn
used Vanna's choice
how-to / pattern
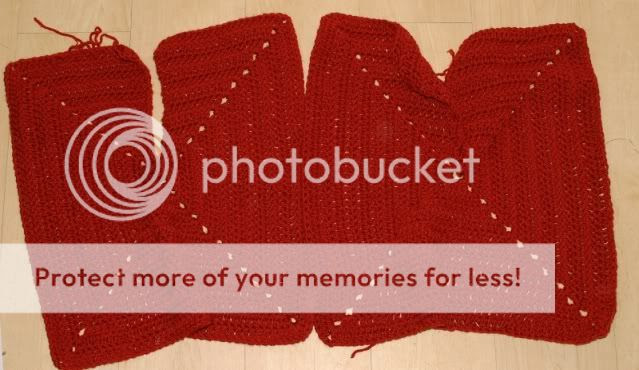
Basically you are working two Double crochet squares and with the exception of the first round you are not joining instead working back and forth creating a slit down the middle of one side of the square (these will be your armholes)
You will need to make 2 squares, for a small I worked 13 rounds, but this is easily up sized with more rounds. This used about 3skeins of Vanna's choice.
Pattern
Row 1: ch3, 3 dc in first ch. *ch 2, 4 dc in same space. Repeat from * twice more. slip stitch into starting chain.
Then slip stitch over following dc stitch to second dc.
Row 2: ch2 turn, dc in previous slip stitch [2dc ch2 2dc] in ch2 space, *dc in all dc's [2dc ch2 2dc] in ch2 space Repeat from * twice more. DC in last few dc's after 4th ch2 space (do not join). Ch2 turn.
Row 3: ch2 counts as dc, *dc in next dc and across to ch2 space [2dc ch2 2dc]
repeat from* around working dc's in remaining dc's after 4th ch2 space making sure to dc in the turning ch. remember it counts as dc.
repeat row 3 for square pattern til you've reached the size wanted.

I tried to get all angles of the vest to make assembly easy but if you have any questions don't hesitate to ask.
To assemble you simply sew the two squares together down one side (creating the back), with the slit sides on the top, then fold each half over so that the slits are on opposite ends which will create the armholes once the top of each side is sewn together starting from the outside and working in. I stopped 7 stitches short of each end toward the neck.weaved in all ends, and that's it!