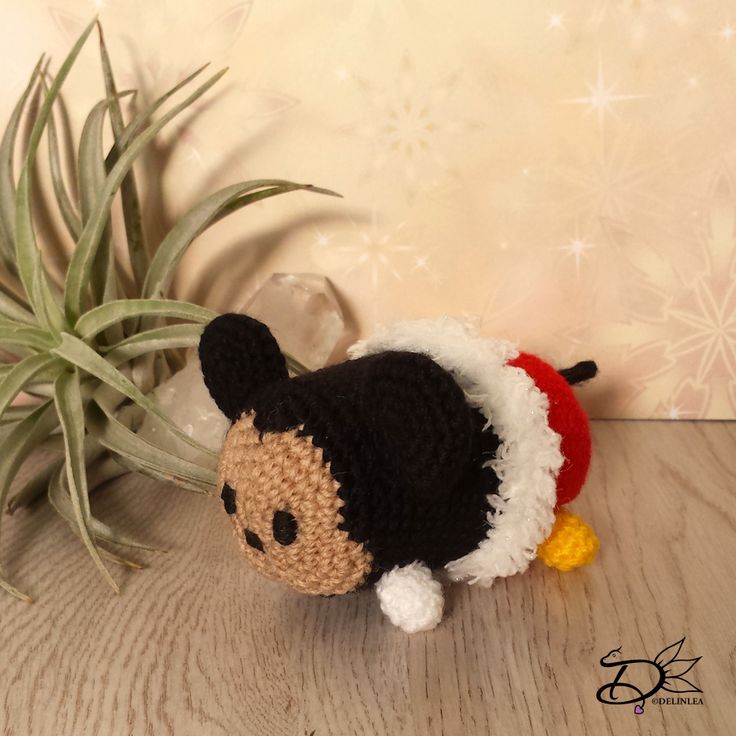
Crochet Mickey Tsum Tsum Amigurumi Toy
Crocheting your very own Mickey Tsum Tsum amigurumi toy can be a delightful and rewarding experience! This cute and cuddly creation brings a touch of Disney magic to your crafting projects. With its round shape and adorable details, this Mickey Tsum Tsum will surely bring a smile to your face. Whether you're a crochet enthusiast looking for a fun new project or a Disney fan wanting to add a unique piece to your collection, this amigurumi toy is a perfect choice. Get ready to dive into the world of crocheting and create a lovable Mickey Tsum Tsum that will charm everyone who sees it!

So for this DIY you will need:
Yarn: in the colors Beige, Black, Red, Yellow and White.
Cloud Yarn in white (optional).
Crochet hook.
Stitch marker.
Fiber fill.
Yarn needle.
Embroidery needle with black thread or black felt.
Scissors.
Stitches used:SC = Single Crochet.
ST = Stitch.
Inc = Increase.
Dec = Decrease.
Slst = Slip Stitch.
(…) = Repeat the space in brackets the given number of times.
[…] = Total number of stitches.
Pattern:
Body:Start with Beige.
1: 6SC in magic ring. [6]
2: Inc in each st around. [12]
3: (1SC, inc), 6 times. [18]
4: (2SC, inc), 6 times. [24]
5: (3SC, inc) 2 times, 3SC, (1SC Beige and 1SC Black in the same st) Change back to Beige, (3SC, inc)3 times. [30]
6: (4SC, inc) 2 times, 3SC, change to Black, 1SC, inc, 1SC, Change back to Beige, 3SC, inc, (4SC, inc) 2 times. [36]
7: 5SC, inc, 2SC, change to Black, 3SC, inc, (5SC, inc) 2 times, 3SC, change Back to Beige, 2SC inc, 5SC inc. [42]
8: 8SC, change to black, 24SC, Change to Beige, 10SC. [42]
Change to Black
9: SC in each st around. [42]
|
19: SC in each st around. [42]
Change to White Cloud yarn. (You can use regular white yarn as well).
20: SC in each st around. [42]
21: SC in each st around. [42]
Change to Red.
22: SC in each st around. [42]
|
29: SC in each st around. [42]
30: (5SC, dec), 6 times. [36]
31: (4SC, dec), 6 times. [30]
32: (3SC, dec), 6 times. [24]
33: (2SC, dec), 6 times. [18] Stuff the body here.
34: (1SC, dec), 6 times. [12]
35: Dec around. [6]
Fasten off and weave in tail.
Legs: (4)
Make 2 with white and 2 with yellow
1: 4SC in magic ring. [4]
2: Inc in each st around. [8]
3: SC in each st around. [8]
|
5: SC in each st around. [8]
Leave long tail for sewing the legs.
Ears: (4)
In black
1: 6SC in magic ring. [6]
2: Inc in each st around. [12]
3: (1SC, inc), 6 times. [18]
4: (2SC, inc), 5 times. [20]
Fasten off and leave long tail for sewing.
Now sew 2 of the ears together so you get nice puffy ears, don’t stuff them tho.
Tail:
Chain 9, insert in second chain from hook and mak 8 slst. Fasten off and leave long tail for sewing.
Assembling:
To make sure you sew all parts in the right place, you can use some sewing pins to position them. When you are happy with the position, you can sew them on.
Sew the legs on to the bottom of the body, the front legs are pointing to the front. The back legs are pointing to the side.
As for the ears, sew them about 2 or 3 layers from the face. Use my photo’s as a guideline to place them on the right spot.
The tail you’ll sew on his butt.
For the eyes and nose you can either choose to use felt or you can embroider them on. I chose to embroider them on, cause yeah why choose the easy way haha. But which way you choose, Mickey will look cute.