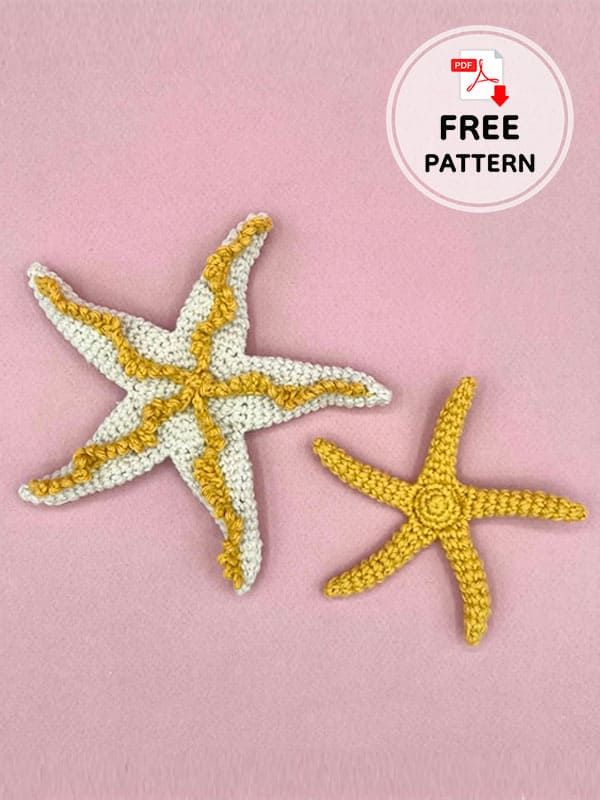
Crochet Beautiful Starfish
Crocheting beautiful starfish is not only a fun and creative activity but also a fantastic way to add a touch of seaside charm to your home decor. Whether you're a seasoned crocheter or just starting out, making these adorable starfish can bring a smile to your face with every stitch. The intricate details and delightful shape of the finished starfish make them a wonderful addition to any coastal-themed project or a lovely gift for a friend who adores the ocean. So grab your favorite yarn and crochet hook, and let's create some charming starfish that will brighten up any space with their whimsical charm!

Materials and tools
Yarn Ricorumi 061, 063• Crochet hook 2.5 mm
• Stitch marker
• Scissors
• Fiberfill
• Yarn needle
Abbreviations
Rnd: Round
MR: Magic ring
Ch: Chain
Slst: Slip stitch
Sc: Single crochet
FLO: Front loop
BLO: Back loop
Inc: Increase
Dec: Decrease
Tail size:
1. 15×15 cm.
2. 9×9 cm.
Big size
Center:
Make 2 parts.
Rnd 1. MR, 6 sc (6)
Rnd 2. (inc)* (12)
Rnd 3. (1sc,inc)* (18)
Rnd 4. (2sc,inc)* (24)
Rnd 5. (3sc,inc)* (30)
Fasten off the 1st part, don’t cut the 2nd, join by crocheting through both parts (wrong sides facing) to close:
Rnd 6. (5sc,inc)* (35)
Now you will start the arms.
Don’t cut the yarn.
Arms
R1. After rnd 6, continue crocheting 7 sc in front loops, then turn on the other side and crochet 7 sc on the visible back loops, which will be in front of you as you turned your work (14)
R2-R3. 14 sc (14)
R4. (5sc,dec)* (12)
R5-R6. 12 sc (12)
R7. (4sc,dec)* (10)
R8-R9. 10 sc (10)
R10. (3sc,dec)* (8)
R11-R12. 8 sc (8)
R13. (2sc,dec)* (6)
R14. 6 sc (6)
R15. (1sc,dec)* (4)
Fasten off and close.
Take the yarn on next stitch of Rnd 6 and repeat steps R1 to Rnd 15. Make it 4 times, so that you have 5 arms.
Details:
Make a ch 20. slst in 2nd ch from hook, then repeat (ch 2, 1 slst in 2nd ch, 1 slst in next st on the main chain)*. Fasten off. Crochet 4 more chains and sew on top of each arm.
Small size
Center:
Make 2 parts.
Rnd 1. MR, 5 sc (5)
Rnd 2. (inc)* (10)
Fasten off the 1st part, don’t cut the 2nd, join by crocheting through both parts (wrong sides facing) to close:
Rnd 3. (1sc,inc)* (15)
Now you will start the arms.
Don’t cut the yarn.
Arms
R1. After Rnd 3, continue crocheting 3 sc in front loops only, then turn on the other side and crochet 3 sc on the visible back loops, which will be in front of you as you turned your work (6)
R2-10. 6 sc (6)
R11. (1sc,dec)* (4)
Fasten off and close.
Take the yarn on next stitch of Rnd 3 and repeat steps R1 to R11.
Make it 4 times, so that you have 5 arms.