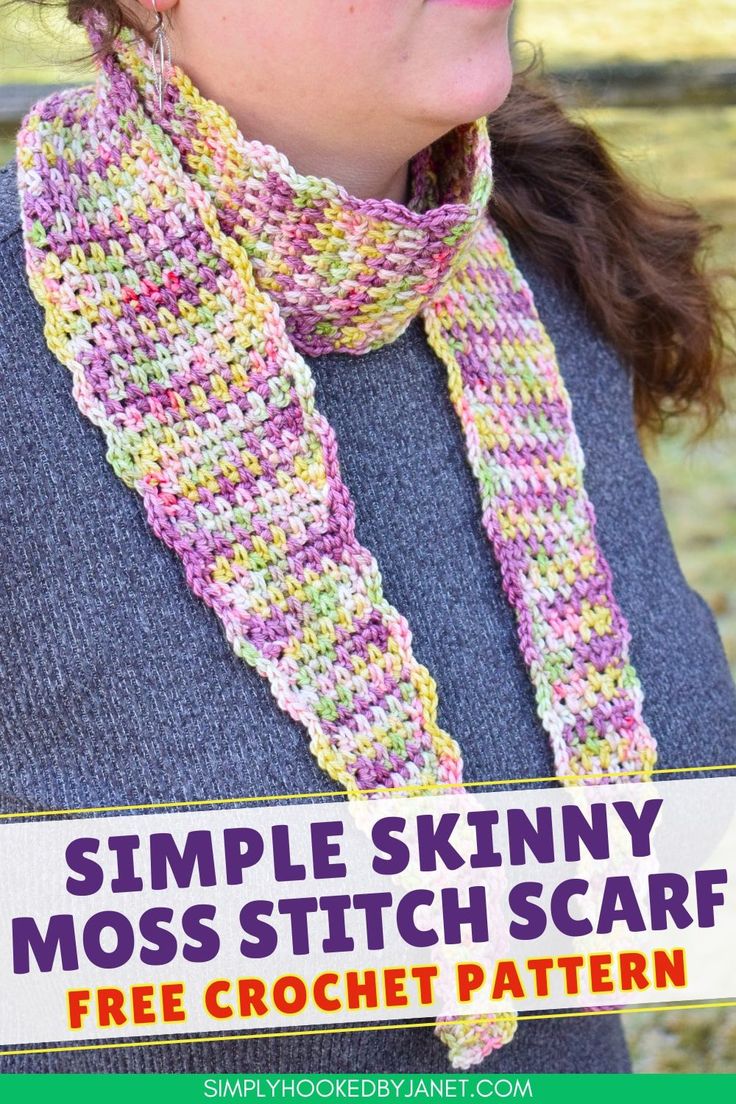
Crochet Moss Stitch Skinny Scarf
Oh, the Crochet Moss Stitch Skinny Scarf is a delight to create and wear! With its intricate moss stitch pattern, this scarf will keep you warm and stylish all season long. Whether you're a beginner or a seasoned crocheter, this project is perfect for honing your skills and creating a chic accessory that adds a touch of handmade charm to any outfit. It's a fun and rewarding project that will surely become a staple in your wardrobe. Happy crocheting!
Materials:
YARN:
#3 DK Weight, Raven Wool & Wear hand dyed DK – 70% Superwash Merino Wool, 30% Silk or suitable substitute; 205 yards total
TOOLS:
US Size (G/6) 4.0 mm crochet hook or size needed to obtain gauge
Yarn Needle, Scissors, Measuring Tape, Stitch Markers
Gauge:
Work 25 rows of pattern – piece should measure 5.75”/14.5 cm x 2”/5 cm
Dimensions:
Length = 56”/142 cm; Width = 3.5”/ 9 cm
Stitches/Abbreviations: US Terms
- ch – chain
- sl st – slip stitch
- sts – stitches
- sp – space
- sk – skip
- sc – single crochet
- hdc – half double crochet
- sc2tog – single crochet 2 stitches together
Special Stitches:
- Increase (inc) = (sc, ch 1, sc,) in indicated st/sp
- Decrease (dec) = sc2tog over 2 ch-1 sps skipping the sc st between the ch sps
Notes:
Parenthesis ( ) indicate a set of stitches worked into the same st/sp.
This scarf is worked starting at one tip with increases, then the body of the scarf, then the second tip is worked with decreases and lastly the edging.
Easily adjust the length longer by working more Body Rows of the scarf.
Stitch markers can be used to mark each increase/decrease to help with row count.
Instructions – Pretty Petal Skinny Scarf:
Increase (inc) = (sc, ch 1, sc,) in indicated st/sp
Decrease (dec) = sc2tog over 2 ch-1 sps skipping the sc st between the ch sps
INCREASE TIP
Row 1: Ch 2, in second ch from hook (sc, ch 1, sc), turn. 2 sc, 1 ch sp
Row 2: Ch 1, sk first sc st, (inc) in ch-1 sp, sc in last st, turn. 3 sc, 1 ch-sp
Rows 3-8 (6 rows): Ch 1, sc in first, ch 1, sk 1, sc in ch sp, sc in last, turn. 3 sc, 1 ch-sp
Row 9: Ch 1, sc in first, ch 1, sk 1, (inc) in ch sp, sc in last, turn. 4 sc, 2 ch sps
Rows 10-15 (6 rows): Ch 1, sc in first, *ch 1, sk 1, sc in ch sp; repeat from * across to last st, sc in last, turn. 4 sc, 2 ch sps
Row 16: Ch 1, sc in first, ch 1, sk 1, *sc in ch sp, ch 1, sk 1; repeat from * across until 1 ch sp remains, (inc) in ch sp, sc in last, turn. 5 sc, 3 ch sps
Rows 17-44: Repeat Rows 10-16. Row 44 stitch count – 9 sc, 7 ch sps.
SCARF BODY
Body Row: Ch 1, sc in first, *ch 1, sk 1, sc in ch sp; repeat from * across to last st, sc in last, turn. 9 sc, 7 ch sps
You can place a stitch marker on the first Body Row to keep track of where the Body started.
Repeat Body Row until Body section measures 34”
DECREASE TIP
Row 1: Ch 1, sc in first, ch 1, sk 1, *sc in ch sp, ch 1, sk 1; repeat from * across until 2 ch sps remains, (dec) over the 2 ch sps, sc in last, turn. 8 sc, 6 ch sps
Rows 2-7 (6 rows): Ch 1, sc in first, *ch 1, sk 1, sc in ch sp; repeat from * across to last st, sc in last, turn. 8 sc, 6 ch sps
Rows 8-42: Repeat Rows 1-7 of decrease tip. Row 42 stitch count – 3 sc, 1 ch sp.
Row 43: Ch 1 sc in first, ch 1, sk 1, sc2tog over the last ch sp and last st, turn. 2 sc, 1 ch sp
Row 44: Ch 1, sc in first, sc2tog over the last ch sp and last st. 2 sts. Do not turn or fasten off, continue to Edging.
EDGING
The edging is worked around the entire scarf. If you want the scallops to be more pronounced, you can replace the sc sts with hdc sts.
Ch 1, rotate to work along long edge of scarf, sl st in side of row, sk 1 row, 4 sc in side of next row, *sl st in side of next row, sk 1 row, 4 sc in side of next row; repeat from * around, at either tip you can sl st across to get to the next long edge of the scarf or work a scallop (4 sc) in the center of the tip.
Fasten off, weave in ends.