DIY Gingerbread Ornament
Looking for a creative and enjoyable way to add a touch of holiday cheer to your home? Why not try making your own gingerbread ornaments? This delightful DIY project is perfect for both kids and adults, and it's a fantastic way to get into the festive spirit. Now they're ready to be hung on your Christmas tree, garlands, or even as a charming addition to your holiday gift wrapping. These homemade gingerbread ornaments will add a personal touch to your decorations and bring joy to your family and friends. So, gather your loved ones, put on some holiday music, and enjoy a fun-filled afternoon of creating your own gingerbread ornaments. It's a delightful way to spend time together and make memories that will last for years to come.

Skill Level: Easy
Materials
- Lion Brand Vanna’s Choice: less than 30 yards of Taupe and less than 15 yards of Pink (for the bow)
- Crochet Hook: Size J 6 mm
- Yarn needle: metal daring needle
- Scissors: small craft scissors
Crochet Abbreviations
- ch = chain
- sl st = slip stitch
- hdc = half double crochet
- sk = skip
- st(s) = stitch(es)
Finished Size
- Varies, but about 3 inches (8 cm) tall
Notes
This pattern is written in standard US terms
The Pattern Steps
Tip: Before you start crocheting be sure to cut a 24″ piece of yarn – save for later
Gingerbread Body:
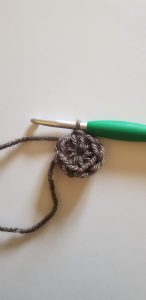
Ch 2, in the second ch from the hook hdc, hdc 7 more times in that same space, sl st to the top of the first hdc to create a circle. (8)

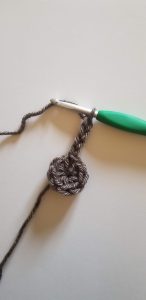
Ch 4, starting in the 2nd ch from the hook hdc, hdc into next st, dc into the last stitch


sl st into next st, sl st into next st
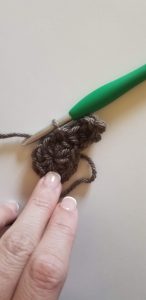
Ch 6, starting in the 2nd ch from the hook hdc, hdc once into the next 2 st’s, dc once into each of the last two sts. (5)
sl st into next st
Ch 6, starting in the 2nd ch from the hook hdc, hdc once into the next 2 st’s, dc once into each of the last two sts. (5)
sl st into next st, sl st into next st
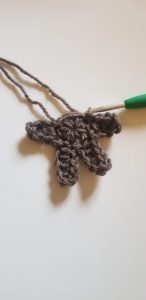
Ch 4, starting in the 2nd ch from the hook hdc, hdc into each remaining ch (3)
sk a st, sl st into next st.
**DO NOT FASTEN OFF YET**
Gingerbread Head:
Tip: Make this as a separate piece
using the 24″ piece of yarn that was cut earlier
Ch 2, in the second ch from the hook hdc, hdc 7 more times in that same space, sl st to the top of the first hdc to create a circle. (8)
Attach the gingerbread head with a yarn needle to the top of the body along the 3 open stitches (shown below). You can use any method you’d like to join. I prefer the whip stitch. Continue working the pattern as written below.

Finishing the Gingerbread Person:
Going back to the yarn you didn’t fasten off from the body, start by working along the outside of the gingerbread head. Put 2 sc into each st around the head for a total of 14 sc’s, end with a sl st into the other corner of the head and arm.
- 7 sc’s evenly around the first arm, ending with an sl st into the corner of the arm and leg.
- sl st once more into next st
- 9 sc’s evenly around the first leg, ending with an sl st into the corner of the two legs.
- sl st into next st
- 9 sc’s evenly around the second leg, ending with an sl st into the corner of the leg and second arm.
- sl st once more into the next st
- 7 sc’s evenly around the second arm, ending with an sl st into the corner of the arm and head.
- Fasten off yarn. Weave in loose ends with a yarn needle.
Some Final Touches…
Before you add any final touches you may want to block your newest creation.
I used the mini crochet bow pattern to finish off my gingerbread ornaments in Vanna’s Choice Pink and Mint Green.
Hot glue the bows to the head or neck of your gingerbread people.
If you’d like to use this little one as an ornament it’s easy to do! Using leather strips or extra yarn attach a 6-inch piece to the top of the gingerbread head.
You are done!