Crochet a Cute Snowman
Create an adorable snowman using the art of crocheting. Crafted with soft yarn and a crochet hook, this cute snowman will make a charming addition to your winter decor. This handmade snowman will not only be a festive decoration for your home but also a thoughtful gift for friends and family during the holiday season. Let your creativity shine as you crochet this cute snowman and enjoy the process of bringing a little winter magic into your home.

Stitch And Abbreviations Guide
Below are the quick guides for the abbreviations and techniques used in the pattern:
- Rnd – Round
- Sc – Single crochet: Insert the hook into the stitch, yarn over and pull up a loop. Yarn over and pull through both loops on the crochet hook.
- DC – Double crochet: Yarn over & insert the hook into the stitch, yarn over and pull up a loop. Yarn over and pull through both loops on the crochet hook.
- Sl st – Slip stitch: Insert the hook into the stitch, yarn over and pull up a loop. Pull through the first loop on the hook.
- Inc – Increase: It needs to work on specific crochet stitches more than once in the same stitch. For example, single crochet 1 inc means working two stitches in one stitch.
Decrease (dec): It means working a particular stitch incompletely in many stitches and then pulling through the loops at once. - BLO – Back loop only: This Means working the back loop of the V loop. This is behind where we insert the crochet hook.
- Ch – Chain: Yarn over and pull through the loop on the crochet hook.
Supplies You Will Need
Below are the supplies you have together before you start crocheting the amigurumi snowman:
- Medium worsted weight yarn(this weight of yarn is very easy to work and gives the stitches more dense.)
- Size C/2.75mm hook
- 10mm safety eyes
- Black buttons
- Polyester fiberfill
- Scissors
- Yarn needle
Yarn Colors
- Body + Pom (white)
- Nose (orange)
- Scarf (red)
- Mittens (green)
- Hat (Ombre)
Crochet Snowman Amigurumi Pattern
Now, you will find the free crochet pattern below:
HEAD
Rnd 1. 6 sc in magic ring
Rnd 2. Inc in each st around
Rnd 3. 1 sc, inc *6(18)
Rnd 4.2 sc, inc *6(24)
Rnd 5. 3 sc, inc *6(30)
Rnd 6. 4 sc, inc *6(36)
Rnd 7. 5 sc, inc *6(42)
Rnd 8. 6 sc, inc *6(48)
Rnd 9-16. Sc in each st(48)
• Place safety eyes 12 sts
Rnd 17. 6 sc, dec *6(42)
Rnd 18. 5 sc, dec *6(36)
Rnd 19. 4 sc, dec *6(30)
Rnd 20. 3 sc, dec *6(24)
Rnd 21. 2 sc, dec *6(18)
. Finish off with a sl st
• Cut a long yarn tail for sewing
• Stuff the head firmly
BODY
Rnd 1. 6 sc in magic ring
Rnd 2. Inc in each st around(12)
Rnd 3.1 sc, inc *6(18)
Rnd 4. 2 sc, inc *6(24)
Rnd 5. 3 sc, inc *6(30)
Rnd 6. 4 sc, inc *6(36)
Rnd 7. 5 sc, inc *6(42)
Rnd 8-16. Sc in each sc(42)
Rnd 17. 5 sc, dec *6(36)
Rnd 18. [4 sc in BLO, dec in(30)
Rnd 19. 3 sc, dec *6(24)
Rnd 20. 2 sc, dec *6(18)
• Stuff the body firmly
Rnd 21. 1 sc, dec *6(12)
Rnd 22. Dec *6(6)
. Sew the body closed
. Sew the head onto the body between rnds 3 & 4
• Glue or sew the black buttons onto the body
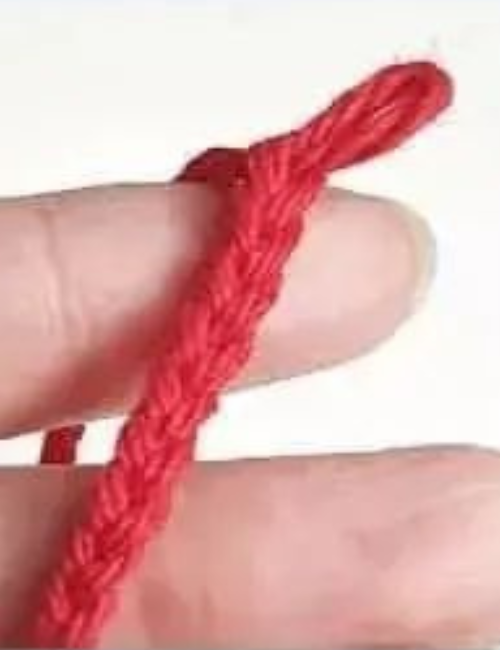
SCARF
Make a slip knot and chain 71.
Dc in the 4th ch from your hook in the back bump of the chain. Dc in each back bump across.
•68 dc total for the scarf
• Finish off by chaining 2 and cut a yarn tail for sewing.
• Sew the final 2 chains to the starting point of the scarf ch.
• Weave the ends in to the scarf
Front of a chain
Bumps on back
HAT
(Worked in joining rounds)
Rnd 1. 6 sc in magic ring(6)
Rnd 2. Ch 2, dc 3 in each st around(18)
Rnd 3. Ch 2, [dc, inc, inc] *6(30)
Rnd 4. Ch 2, [dc, dc, inc, dc, inc] *6(42)
Rnd 5. Ch 2, [6 dc, inc] *6(48)
Rnd 6-7. Ch 2, dc in each st around(48)
Rnd 8-9. Ch 1, sc in the BLO around (48)
•Sew the pom pom to the center of the hatARMS
• Start with Green
Rnd 1. 6 sc in magic ring(6)
Rnd 2. 1 sc, inc *3(9)
Rnd 3-4. Sc in each st around(9)
• Switch to White
Rnd 5. Sc in each st around(9)
Rnd 6-10. Sc in each st around (9)
• Finish off with a sl st
• Stuff the mitten lightly
• Sew to the body between rnds 5 & 6
NOSE
Rnd 1. 6 sc in magic ring(6)
Rnd 2. 2 sc, inc *2(8)
Rnd 3. Sc in each st around(8)
Rnd 4. 3 sc, inc *2(10)
in the BLO..
• Finish off with a sl st and cut a long tail for sewing • Stuff the nose lightly
• Sew onto the head with the top of the nose level with the top of the eyes
POM POM
1. Cut a long piece of yarn (at least 30cm/12in). 2. Wrap your yarn around 2 or 3 fingers until it is quite thick (a fork or toilet roll work well also). 3. When you are happy with the thickness, tie the long piece of yarn tightly around the center of your wrapped yarn.
4. Trim the rounded ends and trim the pom shape.