Crochet Over the Shoulder Mini Purse
Creating a Crochet Over the Shoulder Mini Purse can be a delightfully fun and rewarding project! This stylish accessory not only adds a charming touch to your outfit but also showcases your creativity. Whether you're a seasoned crocheter or a newbie, this project allows you to play with different crochet stitches and colors, adding your personal flair to the design. Imagine proudly wearing a trendy mini purse that you handmade yourself, receiving compliments and admiring glances wherever you go. Don't forget to enjoy the process, relax, and let your creativity flow while crafting this adorable fashion statement.

Materials and Tools needed:
- Cotton yarn (King Cole Bamboo Cotton DK)
- Steel hook size 2.5mm
- Scissors
- Optional: cotton fabric and zipper, similar colour with the yarn (+ sewing machine)
Final Size:
- Pocket purse: 15cm (5.9in) wide and 17cm (6.7in) tall
- Strap: 118cm (45.7in) long
Terms (US)
- ch: chain
- spst: split stich
- sc: single crochet
- hdc/s: half double crochet/s
- FPdc: front post double crochet
- BPdc: back post double crochet
- st/s: stich/es
PURSE’s POCKET
Chain 32 + 2. Total 34chs
Round 1: 1hdc into 3rd ch from hook, 1hdc into next 30chs, 2dc into next ch, turn the chain and work into the other side of the chain towards the starting point, 1hdc into next 31chs, spst into the 2ch (representing 1dc) at the beginning of the row.
Round 2: ch3 (counts as 1BPdc), turn (1FPdc in next 4sts, 1BPdc in next 4sts) times 7, 1FPdc in next 4sts, 1BPdc in next 3sts, spst into the top ch at the beginning of the row
Round 3: ch3 (counts as 1FPdc), turn, 1FPdc in next 3sts, 1BLdc in next 4sts, ( 1FPdc in next 4sts, 1BPdc in next 4sts) times 7, spst into the top ch at the beginning of the row
Round 4: same as row 2
Round 5: ch3 (count as 1BPdc), turn, 1BPdc in next 3sts, 1FP dc in next 4sts,(1BPdc in next 4sts, 1FPdc in next 4sts) times 7, spst into the top ch at the beginning of the row
Round 6: ch3 (count as 1FPdc), turn, (1BPdc in next 4sts, 1FP dc in next 4sts) times 7, 1BPdc in next 4 sts, 1FP dc in next 3sts spst into the top ch at the beginning of the row
Round 7: repeat row 5
Rounds 8 – 19: repeat rows 2-7 two times
Rounds 20 – 22: repeat rows 2-4
Rounds 23-24: repeat rows 5-6
Round 25: spst around, fasten off* and secure the thread
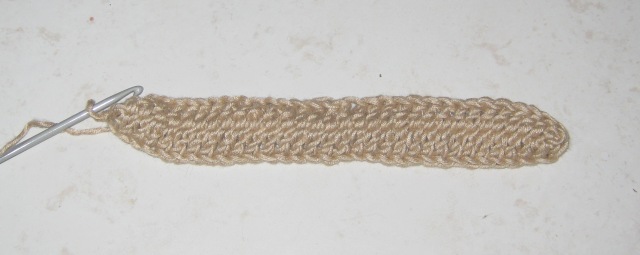
STRAP
Working in continuous rows!
Leaving approximately 25cm (10in) yarn create an adjustable ring
Round 1: Into adjustable ring* 2sc and 1hd
Round 2: (refer to the below photo) facing the right side of the stitches (the wrong sides are the outside) 1hdc into the back loop of the first sc of previous row (the back loop is facing you, the front loop is in the inside the work), continuous stitching 1hdc into the next two back loops (which are actually facing you)
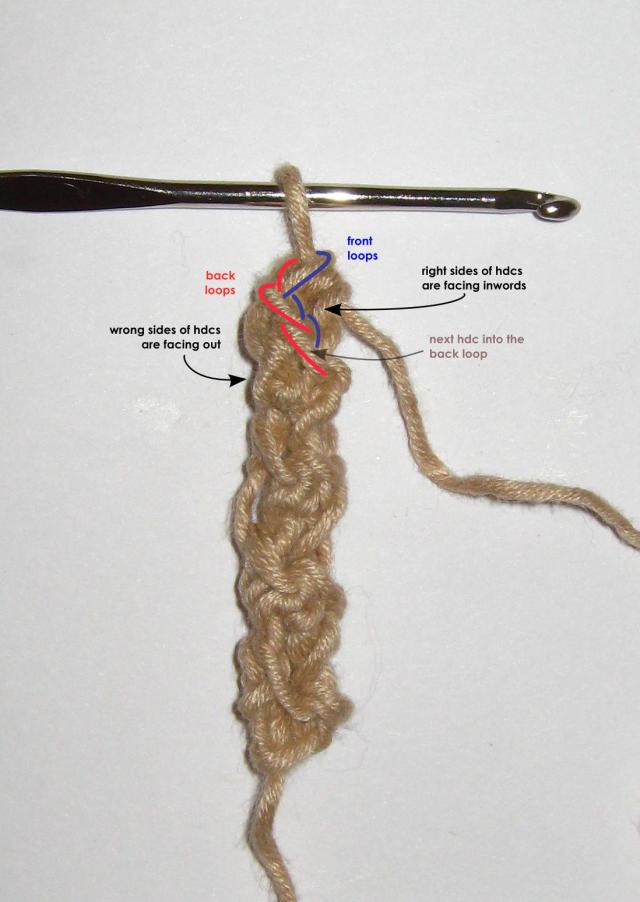
Repeat row 2 until you reach approximately 120cm (47.2in) length; to finish off, work 1sc into next 2sts, fasten off* leaving 25cm (10in) yarn.
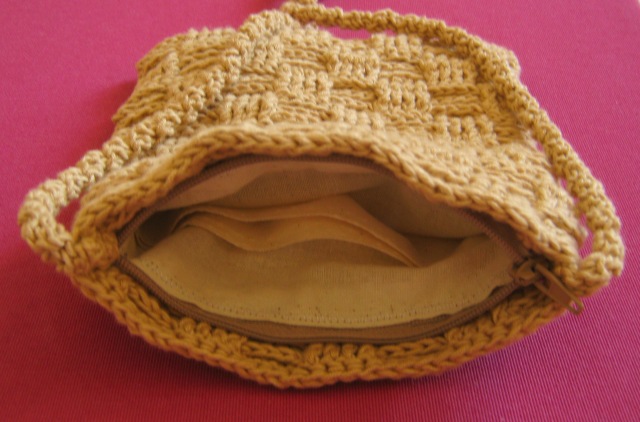
Sew 2.5cm (1in) of strap edge into inside of the bag at each side using the yarn left on the straps edges.
Optional: sew a mini compartment with a zipper and sew it inside the bag making sure it is sewed onto the straps edges inside; This way you will prevent downward stretching of the bag and of the upper sides close to strap in case you will be carrying any small but heavy items.