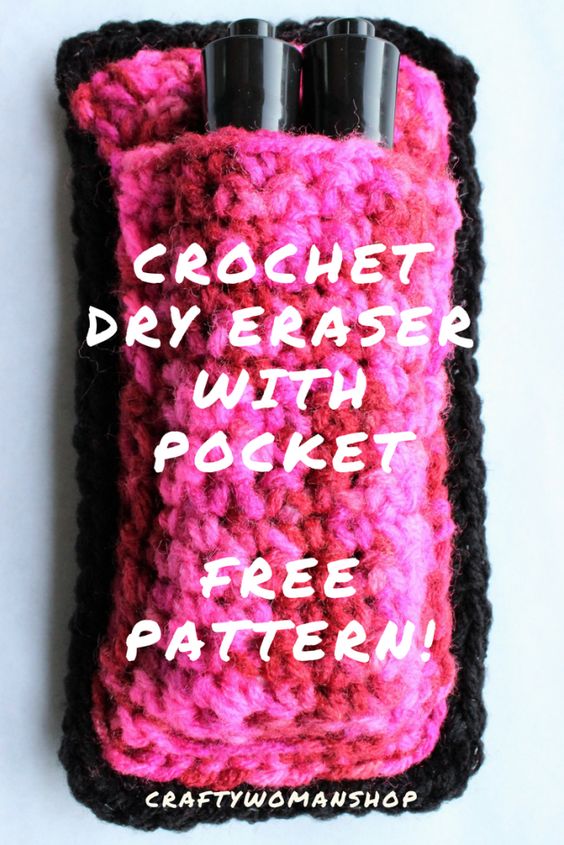
Crochet Dry Eraser with a Pocket
What could be more practical and adorable than a crochet dry eraser with a pocket? This clever invention combines creativity with functionality, making everyday tasks a little more enjoyable. With a charming handcrafted touch, this handy tool not only erases mistakes with ease but also keeps small notes or markers within reach in its convenient pocket. The soft and warm crochet material gives it a cozy feel, adding a touch of charm to any workspace. Whether you're a student, teacher, or just someone who loves unique stationery items, a crochet dry eraser with a pocket is sure to bring a smile to your face every time you use it.
- Difficulty: Easy
- Size 4 yarn (I used Red Heart Super Saver) in black for the erasing side and any color(s) of your choice for the top side and pocket
- Size I/9 (5.5mm) Hook
Pattern
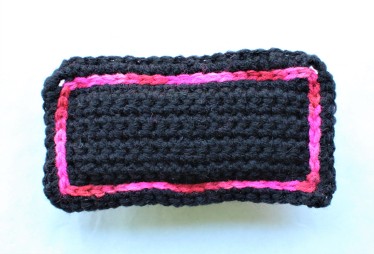
Bottom (eraser side) – use black
Ch 21
Row 1: SC in second chain from hook and in each st across. Turn. (20 sc)
Row 2: Ch 1. Sc in each sc across. Turn. (20 sc)
Rows 3-10: Repeat row 2. Do not fasten off.
Continue sc along sides and bottom of panel, making sure to sc 3 in each corner. Sl st to first sc made in row 10. Finish off.
Top
Ch 19
Row 1: SC in second chain from hook and in each st across. Turn. (18 sc)
Row 2: Ch 1. Sc in each sc across. Turn. (18 sc)
Rows 3-9: Repeat row 2. Do not fasten off.
Continue sc along sides and bottom of panel, making sure to sc 3 in each corner. Sl st to first sc made in row 19. Finish off.
Ch 10
Row 1: SC in second chain from hook and in each st across. Turn. (9 sc)
Row 2: Ch 1. Sc in each sc across. Turn. (9 sc)
Rows 3-17: Repeat row 2.
Fasten off, leaving long tail for sewing.
Assembly:
- Sew pocket onto top panel.
- If desired, cut 1-2 pieces of corrugated cardboard to fit between top and bottom panel. This adds some sturdiness when there are no markers in the pocket. If you want your eraser to be washable, skip this step.
- Sl st the top and bottom panels together as desired. I stitched through the sides of the top panel and just inside the edging of the bottom panel (Update 8/10/18: see picture below for reference).