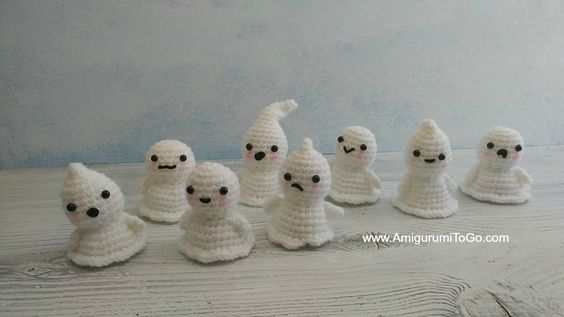
Crochet Pocket Ghost
The Crochet Pocket Ghost is an adorable and spooky companion that you can carry around with you wherever you go. Made with love and care by skilled crocheters, this little ghost is the perfect mix of cute and haunting. Its soft yarn texture makes it perfect for cuddling, while its cute expression adds a touch of whimsy to your day. Whether you place it in your pocket, hang it from your bag, or use it as a keychain, this ghost is sure to bring a smile to your face and maybe even some Halloween magic to your day. So, why not add a Crochet Pocket Ghost to your collection and let its friendly charm enchant you wherever you go?
Supplies:
worsted weight acrylic yarn. I'm using Red Heart Comfort white/opal. It has some glitter in it but any worsted weight white yarn will work.
4mm hook
blunt end yarn needle for sewing
scissors
polyester stuffing
7mm-8mm safety eye ~ you could use buttons or felt instead.
Black felt for the mouth and tacky glue to attach it.
Optional: battery operated tea light. I got mine at the dollar store.
Optional: Blush
Abbreviations:
st = stitch
sc = single crochet
hdc = half double crochet
ch1 = chain one
FLO = front loops only
sl st = slip stitch
2tog = crochet 2 stitches together
f/o = finish off
How to read the rows: add a maker at the end of row 2 and move that marker each time you finish a row. Each row has a sequence. Example: 1sc then 2sc in next st means repeat that sequence 1sc then 2sc in next st followed by 1sc then 2sc in next st over and over to the end of that particular row. The number inside the parentheses ( ~ ) is the number of stitches you should have at the end of that particular row.
Note: The arms are made the same way for all 3 versions of the Ghost.
Arms: make 2
1) magic circle with 4sc (4)
2) 2sc in each st (8)
3) fold circle in half then sc through both sides to close up the circle. You should be able to put in 1sc across the edge 3 times.
f/o leaving a tail for sewing
Spooks' Head and Body:
Starting at the top of the head working down to bottom of body:
1) magic circle with 6sc (6)
2) 2sc in each st (12)
3) 1sc then 2sc in next st (18)
4-8) 1sc in each st for 5 rows
install the eyes in between the 5th and 6th row with 3 visible stitch holes between them.
9) 1sc then 2tog (12)
10) 1sc in next 4st then 2tog (10)
11) 2sc in each st (20)
12) 1sc in next 3st then 2sc in next st (25)
13) 1sc in each st for 1 row
stuff and shape head.
14) 1sc in next 4st then 2sc in next st (30)
15) 1sc in each st for 1 row
16) in the FLO, 1sc in the next 2st then 2hdc in the next st (40)
17) sl st next st, ch2 and fold row 16 down to expose the outer loops inside the body. Starting in one of the outer loops inside the body, 1sc then 2 loops tog (20)
18) working in both loops again, 1sc in the next 2st then 2tog (15)
If you will be using a tea light then f/o and weave in yarn tail. Stuff the body lightly then push the tea light inside.
If you will not be using a tea light, stuff the majority of the body and carry on with row 19.
19) 1sc then 2tog (10)
f/o and weave in and out of the remaining stitches, stuff the body more as needed, then pull yarn tail to close gap. Knot off and hide yarn tail inside the body.
Spike's Head and Body:
1) magic circle with 6sc (6)
2) 1sc then 2sc in the next st (9)
3) 1sc in each st for 1 row
4) 2sc in each st (18)
5-6) 1sc in each st for 2 rows
7) 1sc in next 5st then 2sc in the next st (21)
8-9) 1sc in each st for 2 rows
10) 1sc in next 5st then 2tog (18)
install the eyes in between the 7th and 8th row with 3 visible stitch holes between them.
11) 1sc then 2tog (12)
12) 1sc in next 4st then 2tog (10)
13) 2sc in each st (20)
14) 1sc in next 3st then 2sc in next st (25)
15) 1sc in each st for 1 row
stuff and shape head.
16) 1sc in next 4st then 2sc in next st (30)
17) 1sc in each st for 1 row
18) in the FLO, 1sc in the next 2st then 2hdc in the next st (40)
19) sl st next st, ch2 and fold row 18 down to expose the outer loops inside the body. Starting in one of the outer loops inside the body, 1sc then 2 loops tog (20)
20) working in both loops again, 1sc in the next 2st then 2tog (15)
If you will be using a tea light then f/o and weave in yarn tail. Stuff the body lightly then push the tea light inside.
If you will not be using a tea light, stuff the majority of the body and carry on with row 21.
21) 1sc then 2tog (10)
f/o and weave in and out of the remaining stitches, stuff the body more as needed, then pull yarn tail to close gap. Knot off and hide yarn tail inside the body.
Spirit's Head and Body:
1) magic circle with 6sc (6)
2-3) 1sc in each st for 2 rows
4) 1sc then 2sc in the next st (9)
5-7) 1sc in each st for 3 rows
8) 1sc in next 2st then 2sc in next st (12)
9) 1sc in each st for 1 row
10) 1sc then 2sc in next st (18)
11) 1sc in next 5st then 2sc in the next st (21)
12-16) 1sc in each st for 5 rows
17) 1sc in next 5st then 2tog (18)
install the eyes in between the 14th and 15th row with 3 visible stitch holes between them.
18) 1sc then 2tog (12)
19) 1sc in next 4st then 2tog (10)
20) 2sc in each st (20)
21) 1sc in next 3st then 2sc in next st (25)
22) 1sc in each st for 1 row
stuff and shape head. Do not stuff the first 6 rows, stuff from row 7 downwards.
23) 1sc in next 4st then 2sc in next st (30)
24) 1sc in each st for 1 row
25) in the FLO, 1sc in the next 2st then 2hdc in the next st (40)
26) sl st next st, ch2 and fold row 25 down to expose the outer loops inside the body. Starting in one of the outer loops inside the body, 1sc then 2 loops tog (20)
27) working in both loops again, 1sc in the next 2st then 2tog (15)
If you will be using a tea light then f/o and weave in yarn tail. Stuff the body lightly then push the tea light inside.
If you will not be using a tea light, stuff the majority of the body and carry on with row 28.
28) 1sc then 2tog (10)
f/o and weave in and out of the remaining stitches, stuff the body more as needed, then pull yarn tail to close gap. Knot off and hide yarn tail inside the body.
ASSEMBLY of arms:
Sew the arms on, refer to photos or the video. The flat edge is sewn, vertically, facing the back of the ghost.
Color the cheeks:
Add a bit of blush to the cheeks using a q-tip to rub it in. Start off lightly and build the color up to your liking.
Mouth:
Cut black felt for the mouth and use tacky glue to attach it. Play around with different looks.