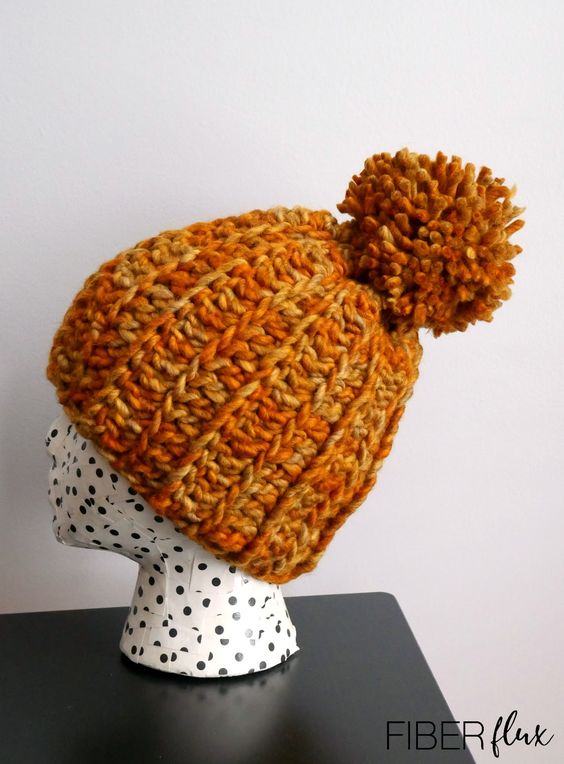
Crochet Sugar Maple Hat
The Crochet Sugar Maple Hat is a cozy and stylish accessory that will keep you warm and looking fabulous during the colder months. Handcrafted with soft yarn in warm tones reminiscent of the beautiful sugar maple trees, this hat is a perfect blend of comfort and fashion. The intricate crochet design adds a touch of elegance to any outfit, making it a versatile piece for casual outings or chilly evenings. Whether you're out for a casual stroll in the park or sipping hot cocoa by the fireplace, this hat will add a charming flair to your look. Embrace the cozy vibes and stay snug in style with the Crochet Sugar Maple Hat!
Materials:
- 9.0 mm N crochet hook
- 2 skeins of Vidalana Heathered Chunky by KnitCrate, 120 yards total, “Clementine” colorway, if you need to substitute yarn, a super bulky/6 with the 9.0 mm hook will work just fine.
- Tapestry needle
- Scissors
- Tape measure
Finished Sizing:
- 9 inches tall
- 20 inch circumference
- Pom pom is about 4 inches tall
Note: size can be customized, see instructions below for more info.
Instructions:
Note: Hat is constructed by working a rectangle, seaming up the sides, then cinching the top.
Ch 20
Row 1: In the 4th ch from the hook, work a dc. Work a dc in each ch across.
Row 2: Ch 3 and turn (counts as a dc). In the next st work a dc in the blo (back loops only). Work a dc in the blo in each stitch across. Work a dc into the topmost ch of the turning ch.
Row 3: Ch 3 and turn (counts as a dc). In the next st work a dc in the flo (front loops only). Work a dc in the flo in each stitch across. Work a dc into the topmost ch of the turning ch.
Repeat rows 2 and 3 until rectangle measures CCC inches from starting edge, do not cut yarn then continue to assembly section below.
Assembly & Finishing:
- Seaming-turn rectangle inside out (ribs facing inward) and line up the starting edge to the last row edge worked. Next, work a slip stitch into both layers of each stitch across, all the way across the row. As you work your slip stitch seam, be sure edges stay lined up as your work. Weave in ends.
- Cinching the top-cut a long piece of yarn about 18-24 inches long with a matching piece of yarn. Thread a tapestry needle and weave in and out all the way around the top edge of the hat around the top edge of the tube. Pull ends tightly to cinch up the hat and tie a strong knot to secure.
- Making the pompom-Cut a piece of yarn 12 inches long. Wrap yarn around all four of your fingers (I wrapped mine about 110 times). Slip bundle carefully off of your hand, then tie the strand of yarn around the bundle. Tie tightly. Cut all loops from your pompom, leaving the two long strands to act as a “handle”. Trim pompom down to give it a neat, dense look, leaving the two long ends. Tie pompom to the top of hat with a strong knot and trim ends from the inside of hat.