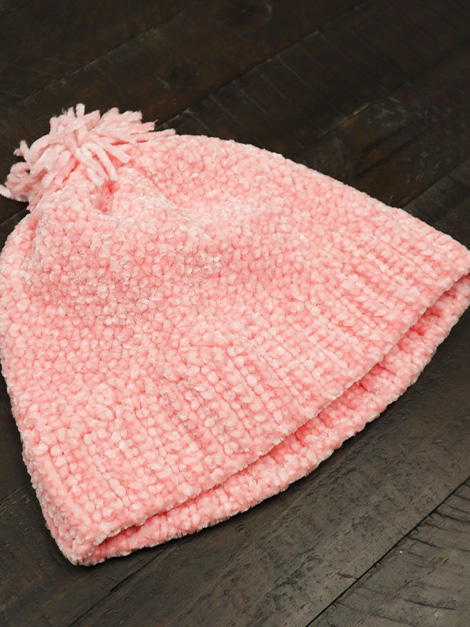
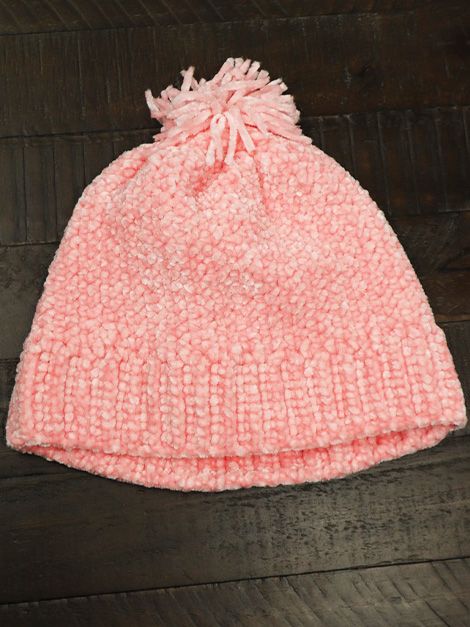
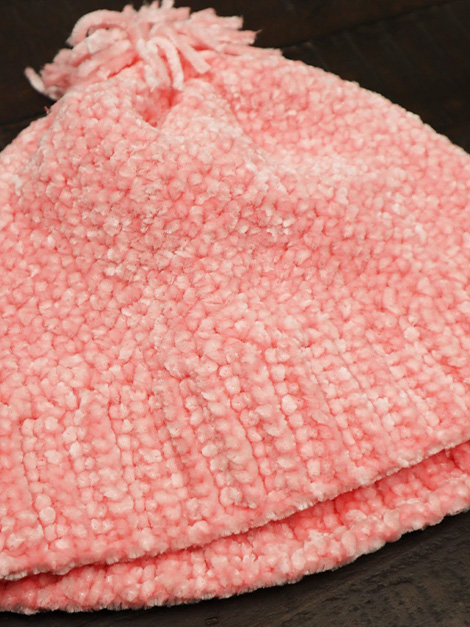
Crochet Adorable Hat
Crochet adorable hats are not just a fun project, they're like little bundles of joy for your head! Whether you're making one for yourself or a loved one, there's something special about creating a cozy accessory from scratch. The possibilities are endless with different colors, patterns, and styles to choose from. With a little bit of yarn and a hook, you can craft a hat that's as unique and charming as you are. So grab your supplies, get those creative juices flowing, and crochet your way to hat perfection!
Skill Level: Beginner crocheter
Materials You Need to Crochet a Hat
- 1 skein Bernat Baby Velvet yarn in Ever After Pink
- Size 7 crochet hook (4.5 mm)
- Yarn needle
- Stitch markers
- Scissors
- Pom pom (optional)
Abbreviations
- sl st – slip stitch
- st/ sts – stitch/ stitches
- ch – chain
- hdc – half double crochet
- hdc dec – half double crochet decrease
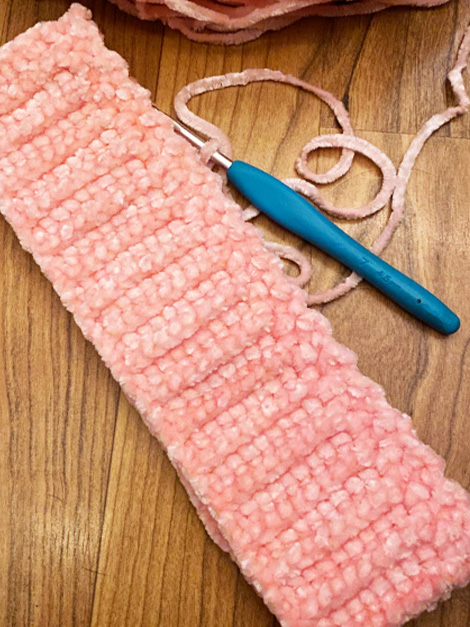
Hat Band
Row 1: ch 11
Row 2: in the 2nd ch from hook, make hdc, hdc in each ch sp across (10 st)
Row 3: ch 1, turn. Working in the 3rd loop, make hdc in each st across. (10 st)
Repeat row 3 until the band measures your desired length. Typically for a toddler’s head, you will want the band to be approximately 19 to 20 inches long.
Finishing the Band: When the hat band is your desired length, either sl st the two ends together to form a circle, or take a yarn needle and sew the two ends together. Now you can begin building the hat on top of the hat band.
Hat Body
Round 1: ch 1, working on the side of the hat band, make a hdc in each stitch around the side of the hat band. Join with a sl st.
Round 2: ch 1, in the first st (hdc, ch 1, hdc in the same stitch, skip the next st) repeat working the hdc, ch 1, hdc stitches in one st then skip the next st. Repeat these stitches around. When you get to the end of the round, join with a sl st to the top of the first hdc st made.
Round 3: sl st into the ch 1 space from the previous round. Ch 1, hdc, ch 1, hdc in that same space, *skip to the next ch 1 space from the previous round and work the hdc, ch 1, hdc in that same ch space*. Repeat from * to * around. Join with a sl st to the top of the first hdc st.
Repeat round 3 until the hat is as tall as desired. I like to make mine approximately 5 to 6 inches tall for a toddler’s hat.
Closing the Hat
After you have the hat as tall as you want it, you can begin closing the crochet hat. Follow these instructions to close the top of the hat.
Finishing Round 1: sl st into the ch 1 space from the previous round. Ch 1, hdc in the same space, skip to the next ch 1 space from the previous round, and work a hdc in that space. Repeat around. Join with a sl st to the top of the first hdc st.
Finishing Round 2: ch 1, work *hdc dec, then work a hdc st in the next 3 sts*. Repeat from * to * around. Join with a sl st to the top of the first hdc dec st.
Finishing Round 3: ch 1, work *hdc dec, then work a hdc st in the next 2 sts*. Repeat from * to * around. Join with a sl st to the top of the first hdc dec st.
Finishing Round 4: ch 1, work *hdc dec, then work a hdc st in the next st*. Repeat from * to * around. Join with a sl st to the top of the first hdc dec st.
Finishing Round 5: ch 1, work hdc dec in each st around. Join with a sl st to the first hdc dec.
Finishing Round 6: to close the top of the hat securely, cut the yarn, and use a yarn needle to weave through the top stitches. Then pull the yarn tight to close the hat. Sew securely and tie a knot. Weave in the ends of the yarn.
Finish the completed hat by adding a faux fur pom pom, making a yarn pom pom, or creating a crochet flower to decorate the crochet hat.