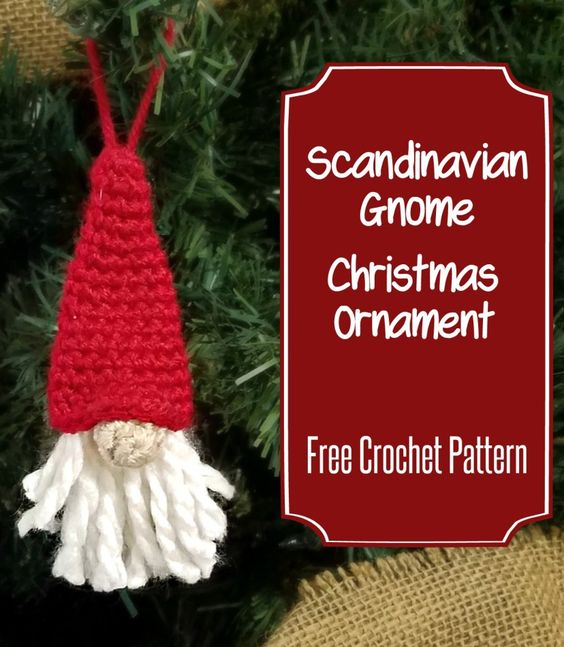
Crochet Scandinavian Gnome Ornament
Crochet Scandinavian Gnome Ornaments are the most adorable holiday decorations you can make with just a touch of yarn and creativity! These charming little gnomes add a whimsical and cozy touch to your Christmas tree or home decor. With their pointy hats and fluffy beards, they bring a smile to everyone who sees them. Making these gnomes is a fun and rewarding craft project that allows you to personalize each one with different colors and embellishments. Whether you're a beginner or an experienced crocheter, creating these handmade ornaments is a delightful way to spread some festive cheer and showcase your crafting skills. So, gather your crochet hook and yarn, and let's get crafting these enchanting Scandinavian Gnome Ornaments together!
Materials Used:G or 4.0 MM Hook
1 Ball Worsted Weight Yarn Each in Red and Nude
1 Ball Bulky Weight in White
Stitch Marker (to mark ends of rounds if needed)
Tapestry Needle
Stitches Used:CH – Chain
SC – Single Crochet
INC – Single Crochet Increase
DEC – Single Crochet Decrease
SLST – Slip Stitch
Notes:
This pattern is written using American crochet terms.
Hat and nose are worked in a continuous round with no joins. Do not join unless otherwise stated.
Approximate finished size is 3 inches tall and 2 inches wide.
Hat (In Red)
Row 1: Create a magic circle, CH 1 and SC 6 into the circle then pull tight. You may also use a CH 2 and 6 SC into the first chain then pull tight. Do not join. (6)
Row 2: SC in each stitch around (6)
Row 3: INC, SC 5 (7)
Row 4: SC 3, INC, SC 3 (8)
Row 5: INC, SC 7 (9)
Row 6: SC 4, INC, SC 4 (10)
Row 7: INC, SC 9 (11)
Row 8: SC 5, INC, SC 5 (12)
Row 9: INC, SC 11 (13)
Row 10: SC 6, INC, SC 6 (14)
Row 11: INC, SC 13 (15)
Row 12: SC 7, INC, SC 7 (16)
Row 13: INC, SC 15 (17)
Row 14: SC 8, INC, SC 8 (18)
Row 15: SC 8, 2 SC in next 2 stitches, SC 8 (20)
Row 16: SC 20 (20)
Finish off leaving a long tail for sewing.
Attach the loop for hanging the ornament now. I used an 8” piece of red yarn and ran each end of the yarn through opposite sides of Row 2 then tied them together inside the hat pulling the loop on the outside tight.
Nose (In Nude)
Row 1: Create a magic circle, CH 1 and SC 6 into the circle then pull tight. You may also use a CH 2 and 6 SC into the first chain then pull tight. Do not join. (6)
Row 2: *SC 2, INC* 2 times (8)
Row 3: *SC 2, DEC* 2 times (6)
Finish off leaving a long tail for sewing, slightly stuff with Fiberfill and close the end and weave in your tail.
The nose will be attached using the tail from your hat. It will be attached in Row 15 of the hat where the two sets of two single crochets in one stitch are. You will want the hat to drape gently over the nose coming down to about half way on both sides with a bit of overhang on the front.
Beards
Make a fringe using the Bulky Weight White yarn. To do this I wrapped the yarn around the widest part of my hand 12 times then used some scrap red yarn to tie the top of the fringe secure and cut the opposite sides ends. To attach the beard attach the scrap yarn tails you used to secure the fringe to Row 12 of the inside of the hat opposite the side with your nose. Weave in your tails and finish off.