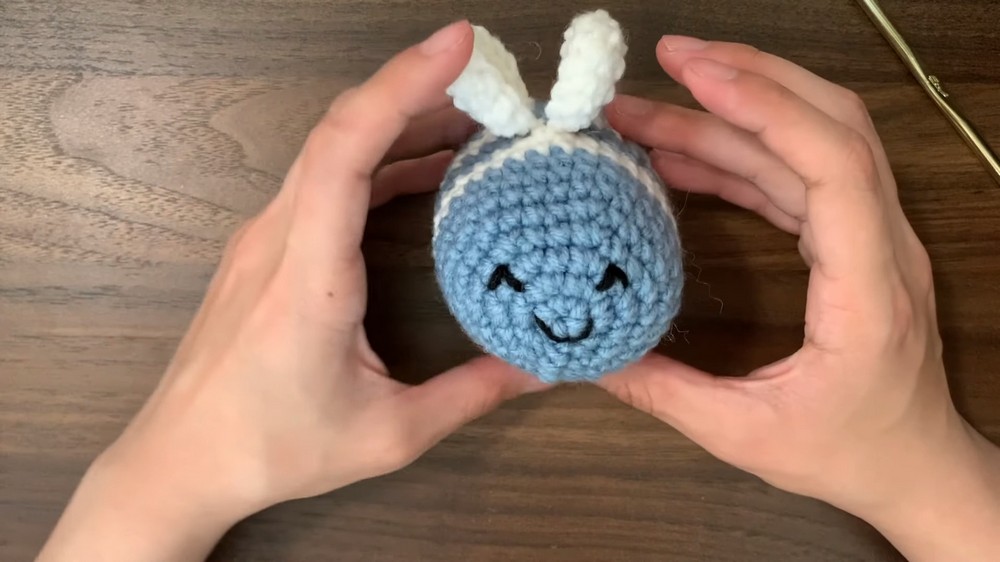
Crochet Bumblebee Amigurumi
Creating a Crochet Bumblebee Amigurumi is not just a craft project, it's a delightful journey filled with creativity and warmth. These little buzzing creatures come to life with just a hook, some yarn, and a sprinkle of imagination. As you carefully stitch each piece together, a sense of joy and accomplishment fills the room. The vibrant yellow and black stripes, along with the tiny details like the antenna and wings, add such charm to this bumblebee friend. Whether you're making it for yourself or as a thoughtful gift for a loved one, the process is as cheerful and inviting as the finished creation. So, grab your crochet hook and let's bring this adorable little amigurumi bee to life, one stitch at a time!

Materials:
- 5-millimeter hook
- Yarn needle
- Scrap blue, white, and black medium-weight yarn.
Stitches Used:
- Magic Circle (mc)
- Chain (ch)
- Single Crochet (sc)
- Slip Stitch (sl st)
- Single Crochet Increase (inc)
- Single Crochet Decrease (sc2tog or dec)
Gauge:
- 18 single crochets and 20 rows = 4 inches / 10 cm
Dimensions:
- Diameter: 2.5 inches / 6 cm
- Length: 3.5 inches / 9 cm
Pattern Tips:
- Tighten Your Slip Stitches: To make the seam smaller and less visible.
- Chain at the Start of Rounds: The chain 1 at the beginning of each round does NOT count as a single crochet.
- Trouble with Magic Circle? Consider making a slip knot, chain 2, then perform 6 single crochets into the 2nd chain from the hook.
- Hide Loose Ends: Pull them to the inside of the bee where they won't be seen.
Step by step Pattern
Body (Main Part):
- Magic Circle: Hold the yarn with the tail end at the bottom of your hand, and wrap the working end at the top around 2 fingers to form an X. Using your hook, go under and over to pull the yarn through. Grab hold of this part, remove fingers but keep it loose. Chain 1 (do not tighten or you'll get a slip knot).
- Round 1: 6 yarn-under single crochets (SC) into the magic circle. Pull the tail end to close up the circle. Slip stitch (SS) into the first SC, then chain 1 (CH 1).
- Round 2: Increase in every stitch (2 SC in each stitch). End with 12 stitches in total. SS to the first SC of the round, then CH 1.
- Round 3: Increase every second stitch. You will do 1 SC into the first stitch and then an increase into the next one (2 SC in the same stitch). This pattern repeats around. Total of 18 stitches at the end. SS and CH 1.
- Round 4: Increase every third stitch, with 1 SC in the first two stitches, then an increase in the third stitch. Repeat pattern around. Total of 24 stitches. SS and CH 1.
- Round 5: Increase in every fourth stitch. You should end up with 30 stitches. SS and CH 1.
- Round 6: Without increasing, 1 SC in each stitch around.
- Round 8: Continue without increasing to build the body. Adjust the amount of rounds based on desired size of bee.
- Color Change to White: After completing your last blue round, attach the white yarn by chaining with white yarn instead of blue. Secure the white tail to the blue yarn with a knot.
- Stripe Section with White: For the next two rounds with white yarn, no increases. Then switch back to blue yarn using the same method as the color change.
- Alternate Stripes: Continue with two rounds per stripe color (blue and white) until desired stripe pattern is achieved.
Wings (Make 2):
- Magic Circle with 6 SC.
- Round 2: Increase in every stitch (2 SC in each stitch) around.
- Round 3: No increases.
After making two wings, attach them to the body between the stripes.
Attaching Wings:
- Secure the wings in between the blue and white stripes using the tail ends of the wings. Weave the yarn into the body of the bee to fix the wings in place.
Face:
- Use black yarn to add details for the mouth and eyes.
- Create a V shape for the mouth and upside-down V's for the eyes.
- Secure the yarn ends on the inside and continue with body construction.
Finishing Body:
- Round 17: Decrease every fourth stitch (1 SC in the next 3 stitches, then decrease).
- Round 18: Decrease every third stitch.
- Round 19: Decrease every second stitch.
- Fill the bee with stuffing before closing.
- Round 20: Decrease in every stitch. Close the hole by threading the tail through the stitches' outer loops, pulling tight, and securing.
- Weave in the ends inside the bee.
Your crochet bee should now be complete with alternating stripes, attached wings, and a cute little face.