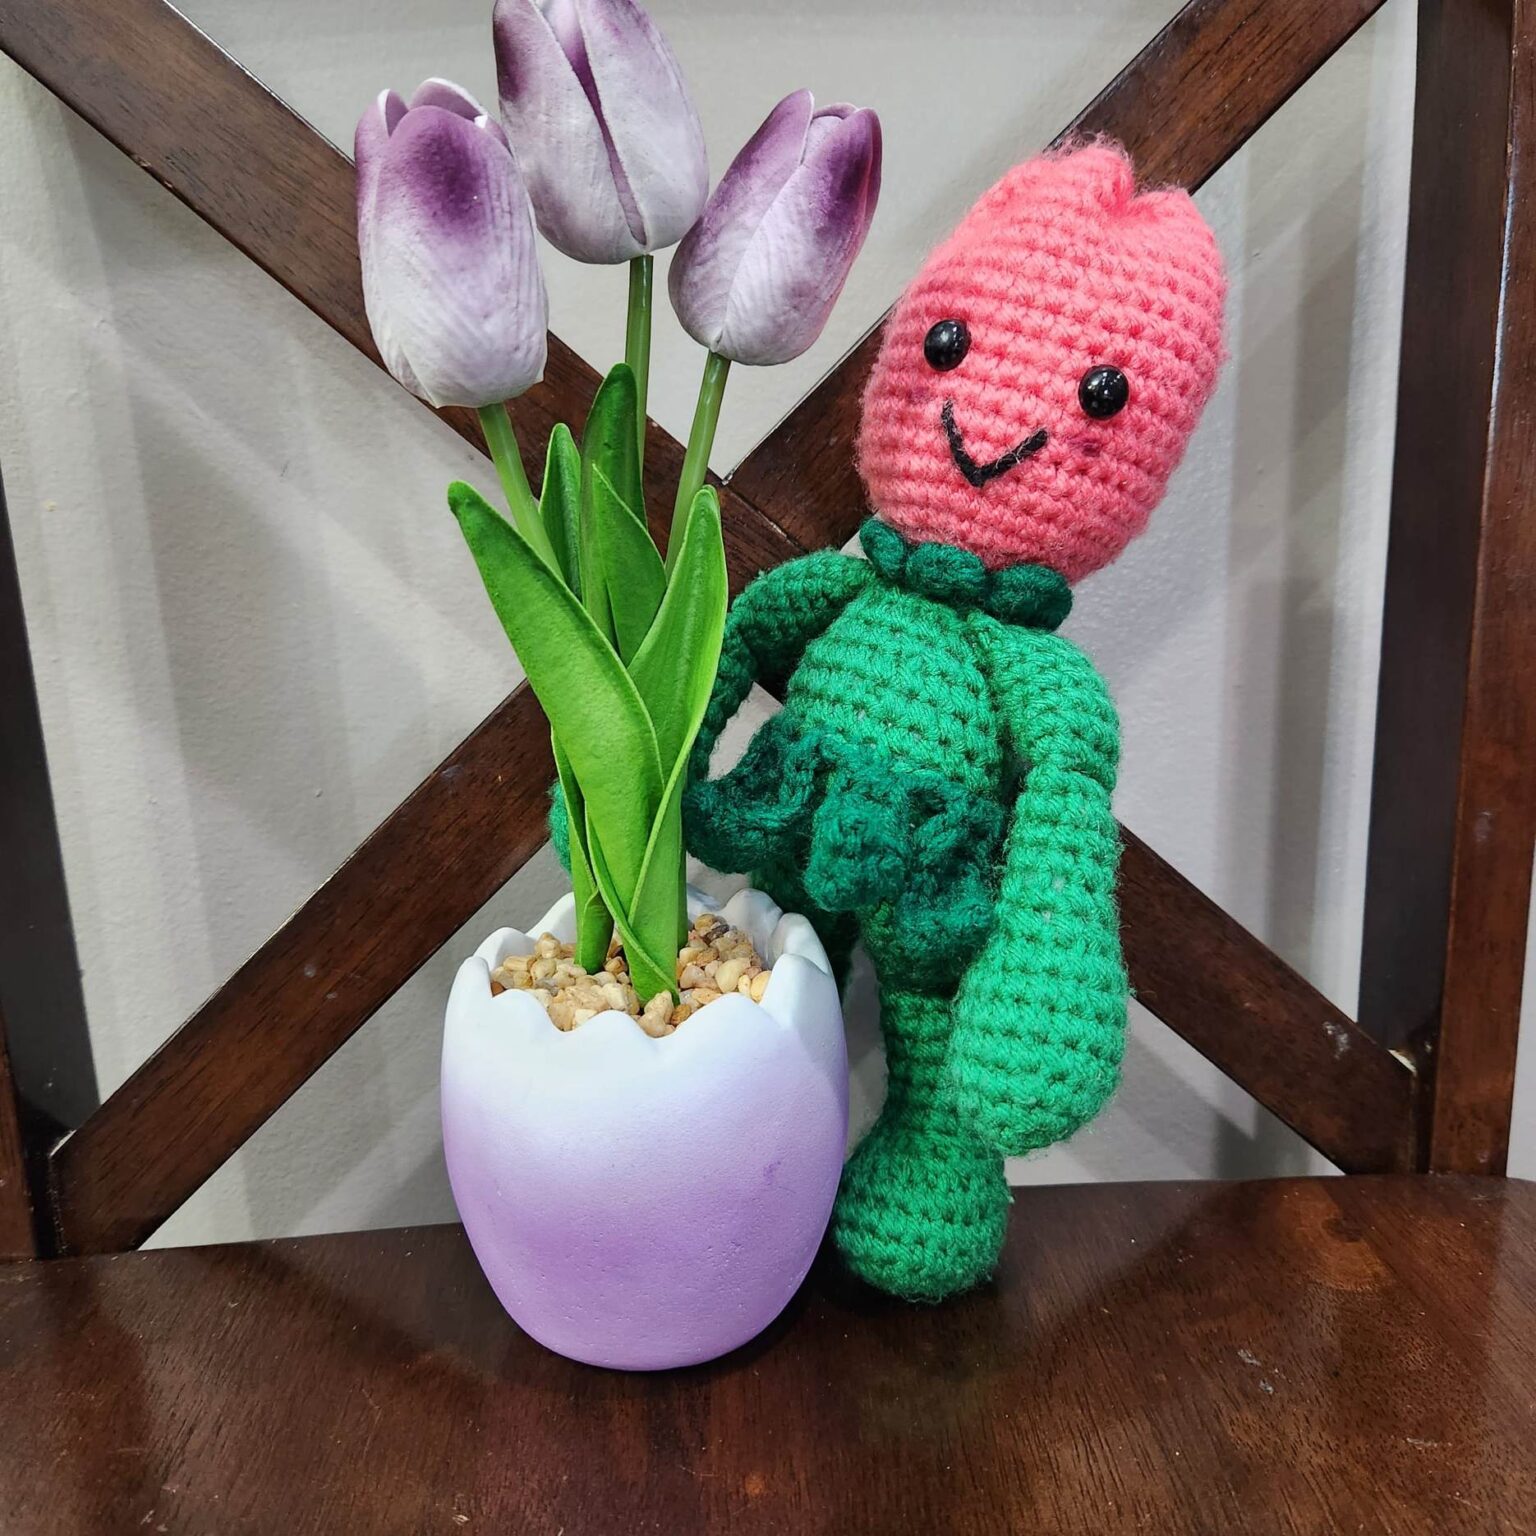
Crochet Tulip Buddy Amigurumi
Isn't the Crochet Tulip Buddy Amigurumi just the cutest little creation you've ever seen? This charming amigurumi design brings together the beauty of a tulip with the coziness of crochet, making it a delightful addition to any collection. With its vibrant colors and intricate stitches, crafting your very own Tulip Buddy is not only a fun project but also a great way to add a touch of whimsy to your space. Whether you're an experienced crocheter or just starting out, this adorable amigurumi is sure to bring a smile to your face and brighten up your day!

Materials-
- Worsted weight yarn
- Light and Dark Green, Pink
- Hook size 3.5mm (E)
- 10mm Safety Eyes, or an alternative form of eyes
- Stitch Marker
- PolyFill
- Tapestry Needle
- Scissors
- Sewing Pins
US Terminology
Abbreviations-
- Rd(s)- Round(s)
- MR- Magic Ring
- St(s)- Stitch(s)
- Sc- Single Crochet
- Inc- Increase
- Dec- Invisible Decrease
- In front loops only, pick up the next two loops, yarn over, and pull through 2 loops.
- YO- Yarn Over
- Fhdc- Foundation Half Double Crochet
- Ch 2 (for this pattern you will only ch 1), *YO, insert hook into the 2nd ch from the hook (into the ch space), YO, pull through ch, YO, pull through 1 loop to create the ch, YO, and pull through all 3 loops, repeat from * for the desired number of fhdc, but insert hook into the ch created before.
- P- Picot
- Ch 3, sl st in the 3rd ch from the hook.
- FO- Fasten Off
- FLO- Front Loop Only- for closing up holes.
Notes-
- Magic Ring Alternative- chain 2 and single crochet in the 2nd chain from the hook.
- This will be crocheted in the round.
- If not specified or in () repeat to the end of the round.
- Stuff as you go.
Tulip Head-
Pink-
Rd 1: sc 6 in MR
Rd 2: inc (12)
Rd 3: sc, inc (18)
Rd 4: sc 2, inc (24)
Rd 5: sc 3, inc (30)
Rd 6: sc 4, inc (36)
Rds 7-20: sc around (36) (14 rounds) Insert your eyes between rds 11 and 12, 6 sts apart.
FO, leaving a tail to sew the top closed. Stuff, add a mouth and cheeks.
Fold to create an X with the top of the tulip, and sew only the center touching parts together.
Wait to attach the head until after you add the dark green necklace.
Arms (make 2)-
Light Green-
Rd 1: sc 5 in MR
Rd 2: inc (10)
Rd 3: sc, inc (15)
Rds 4-7: sc around (15) (4 rounds)
Rd 8: sc, dec (10)
Rd 9: sc, dec, sc 3, dec, sc 2 (8)
Rds 10-20: sc around (8) (11 rounds) Stuff the hand firm and the arm loosely.
Rd 21: fold in half and sc through both sides. Sc 4 times to close.
FO, leaving a tail for sewing. Sew a seam between rds 14 and 15 to create an elbow.
Body-
Light Green-
Rd 1: sc 6 in MR
Rd 2: inc (12)
Rd 3: sc, inc (18)
Rd 4: sc 2, inc (24)
Rds 5-6: sc around (24) (2 rounds)
Rd 7: BLO sc around (24)
Rds 8-9: sc around (24) (2 rounds)
Rd 10: sc 2, dec (18)
Rd 11: sc around (18)
Rd 12: sc. This is where you will add the 1st arm. Insert your hook through the 1st st of the arm and body by doing a (dec, sc) x2, dec, sc (weaving your ends in as you sc). This is where you will add the 2nd arm. Insert your hook through the 1st st of the arm and body by doing a (dec, sc) x2 (as you continue to crochet, weave in your ends), dec (12)
Rd 13: sc around (12)
FO, leaving a tail for sewing on the head.
Foot (make 2)-
Light Green-
Ch 6
Rd 1: sc in the 2nd ch from the hook. Sc 3. 4 sc in the last ch, and continue working around the ch, sc 3, 3 sc in the first st you sc in. (14)
Rd 2: inc, sc 3, inc x4, sc 3, inc x3 (22)
Rd 3-5: sc, around (22) (3 rounds)
Rd 6: sc 3, dec 8, sc 3 (14)
Rd 7: sc 3, dec 4, sc 3 (10)
Rds 8-21: sc around (10) (14 rounds) Stuff the foot firmly and the leg loosely.
Rd 22: fold in half and sc through both sides. Sc 4 times to close.
FO, leaving a tail for sewing. Sew a seam between rds 14 and 15 to create a knee.
Attach by lining the feet up and start in the middle hole at the bottom and go out on either side of the body.
Necklace-
Dark Green
In the FLO of rd 13 of the body (sl st, ch 5, sl st in the 2nd ch from the hook, sc 3 in the last 3 ch, sl st in the next FLO) x6
FO and sew in the end.
Now you can sew the head onto the BLO and weave in your ends.
Leaf Skirt-
Dark Green
Ch 12 (this is a strand to be tied later), at the back of the body and centered, (sl st in the FLO of rd 7 of the body, {leaf starts here} ch, fhdc 6, sc in the ch space of the last fhdc, P, sc and hdc in the same ch space, continue up the underside of the fhdc and hdc 5, hdc in the ch where the fhdc started, sl st in the ch and FLO, sl st) x8 leaves, ch 13.
FO and trim. Tie the 2 ch strands together.