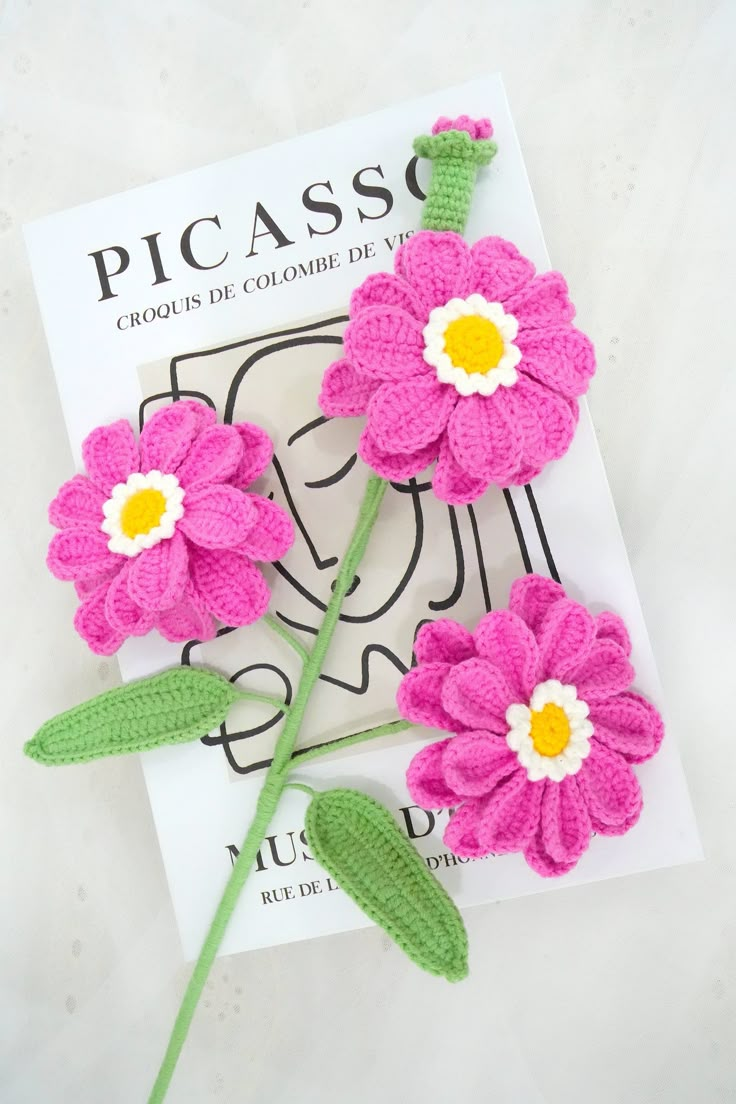
Crochet Zinnia Flower
Crocheting a zinnia flower can be such a joyful and delightful experience! The intricate loops and stitches come together to create a lovely bloom that adds a pop of color and charm to any project. Whether you're a seasoned crocheter or just starting out, crafting a zinnia flower is a fun way to explore your creativity and bring a touch of nature into your creations. So grab your crochet hook and favorite yarn colors and let's get crafting a beautiful zinnia flower that will surely brighten up your day!
Materials Needed
- Yarn – Loopara 4ply combed cotton (White 02, Green 09, Yellow 43, Pink 59 )
- Hook – 2.0mm
- Flower Rod – No.2 (30cm)
- Iron wire – 0.4mm diameter
- Iron wire – 0.6mm diameter
- Hot Melt Adhesive
- Stitch Marker
- Scissors
Step By Step Tutorial
How to Crochet a Zinnia First Layer Petal (Make 9)
- r1: Magic ring, 9 sc in ring, sl
- r2: (In front loop, ch 9, 8 sc in 2nd ch from hook, sl) 9 times
- r3: Add wire, [sl, 3 sc, hdc, dc, dc inc, (dc, hdc, ch), at tip (sl, ch), (hdc, dc), dc inc, dc, hdc, 3 sc, sl] 9 times
How to Crochet a Zinnia Second Layer Petal (Make 9)
- r1: (In back loop, ch 11, 10 sc in 2nd ch from hook, sl) 9 times
- r2: Add wire, [sl, 3 sc, hdc, 3 dc, dc inc, (dc, hdc, ch), at tip (sl, ch), (hdc, dc), dc inc, 3 dc, hdc, 3 sc, sl] 9 times
How to Crochet a Zinnia Flower Center (Make 3)
- r1: 6 sc in magic ring, sl, ch
- r2: 6 sc inc, sl, ch
- r3: 12 sc, sl, ch, turn
- r4: FLO 12 sc, sl
- r5: Change color, FLO (sc, ch 3, sl) 12 times, sl
How to Crochet a Zinnia Flower Bud (Make 1)
- r1: Magic ring, (ch 3, 2 tr, ch 3, sl) 5 times, sl
How to Crochet a Zinnia Flower Base (Make 3)
- r1: Magic ring, 8 sc in ring, sl, ch
- r2: 8 sc, sl, ch
- r3: 8 sc inc, sl
- r4:(FLO) 16 sc,sl
How to Crochet a Zinnia Flower Bud Base (Make 1)
- r1: Magic ring, 5 sc in ring, sl, ch
- r2: 5 sc inc, sl, ch
- r3-r9: 10 sc, sl, ch
- r10: (ch 2, dc), (dc, ch 2), [(sl, ch 2, dc), (dc, ch 2)] 4 times, sl
How to Crochet a Zinnia Leaf (Make 2)
- r1: Ch 20, sc in 2nd ch from hook, hdc, dc inc, 8 dc, 4 hdc, 3 sc, (sc, ch, sc), 3 sc, 4 hdc, 8 dc, dc inc, hdc, sc, sl, ch
- r2: Add wire, sc, hdc, hdc inc, hdc, hdc inc, hdc, 14 sc, (sc, ch 2, sc), 14 sc, hdc, hdc inc, hdc, hdc inc, hdc, sc, sl
Zinnia Assembly
- Add wire to the flower buds, wrap thread around the bud base, add wire to the flower center, assemble with the petals and wrap with thread, wrap thread around the leaves.
- Attach the buds to the stem, then add the flowers in sequence, secure the leaves, and finish by gluing and wrapping the bottom of the flower stem.
Notes
Crochet Tips:
1. When crocheting petals, be careful to wrap the wire well to avoid exposing it, which would affect the appearance.
2. Crochet the leaves a bit tighter, this way the wire won't show through and it will look more beautiful.
3. When wrapping the stem, wrap several extra rounds at the base of the flower to prevent the stem from showing through, which would affect the appearance.
4. For the last stitch when crocheting leaves, you can wrap around the wire a couple extra times to ensure the wire doesn't show.