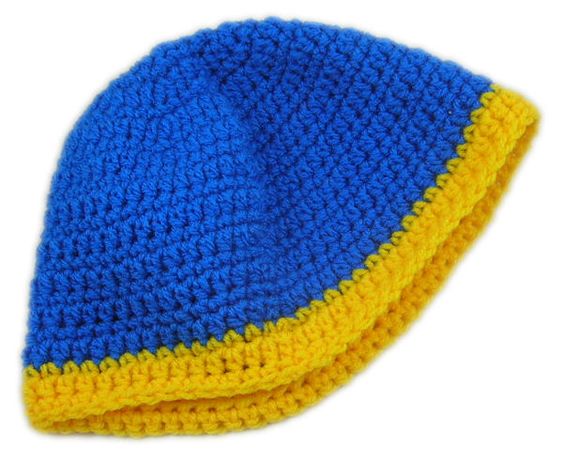
Crochet Simple Beanie Cap
Crocheting a simple beanie cap is a delightful way to add a personal touch to your winter wardrobe. With just a hook and some colorful yarn, you can create a cozy accessory that is not only stylish but also handmade with love. Whether you're a seasoned crocheter or just starting out, this project is perfect for practicing basic stitches like single crochet and double crochet. The best part is, the possibilities are endless when it comes to customizing your beanie cap — from choosing your favorite yarn colors to adding pom-poms or a cute brim. So, get your crochet hooks ready and let's create a beanie that will keep you warm and fashionable all season long!

Materials Needed
Sport Weight Acrylic yarn in Skipper Blue and yellow
Size H/8 or 5mm aluminum crochet hook
Yarn needle for weaving in ends.
Yarn Thickness: 3mm
Gauge: 4hdc =1"
Finished Size: Fits an adult head
Skill Level: Beginner to Intermediate
Instructions
Pay close attention to the hdc rounds. You are going to ch1 at the beginning of each round but then work 2 hdc in the same st as slst to avoid a hole that would be formed if you chained 2 at the beginning instead.
RND 1: With blue. Ch4. Join w/slst to first ch to form ring. Ch1. 10sc in ring. Join w/slst to first sc. (10sc)
RND 2: Ch1. 2Hdc in same st as slst. 2hdc in each sc around. Join w/slst to top of first hdc. (20hdc)
RND 3: Ch1, sc in same st as slst. Sc in next hdc. *2sc in next hdc. Sc in next hdc. Rep from * around. Join w/slst to ch1.
RND 4: Ch1. 2hdc in same st as slst. Hdc in each of the next 2 sc. *2hdc in next sc. Hdc in each of the next 2 sc. Rep from * around. Join w/slst to first hdc.
RND 5: Ch1, sc in same st as slst. Sc in each of the next 3 hdc. *2sc in next hdc. Sc in each of the next 3 hdc. Rep from * around. Join w/slst to ch1.
RND 6: Ch1. 2hdc in same st as slst. Hdc in each of the next 4 sc. *2hdc in next sc. Hdc in each of the next 4 sc. Rep from * around. Join w/slst to first hdc.
RND 7: Ch1, sc in same st as slst. Sc in each of the next 5 hdc. *2sc in next hdc. Sc in each of the next 5 hdc. Rep from * around. Join w/slst to ch1.
RND 8: Ch1, hdc in same st as slst and in each sc around. Join w/slst to top of first hdc.
RND 9: Ch1. Sc in each hdc around. Join w/slst to ch1.
RND 10: Rep RND 8.
RND 11-15: Rep RNDs 9&10. At the end of RND 15, fasten off blue.
This next rnd is a little different at the beginning because you are joining a new color.
RND 16: Join yellow to same st as slst. Ch1. Sc in same st as slst. Sc in each st around. Join w/slst to first sc.
RND 17: Repeat RND 8.
RND 18: Ch1. Sc in each st around. Join w/slst to ch1. Fasten off and weave all ends into back of work.