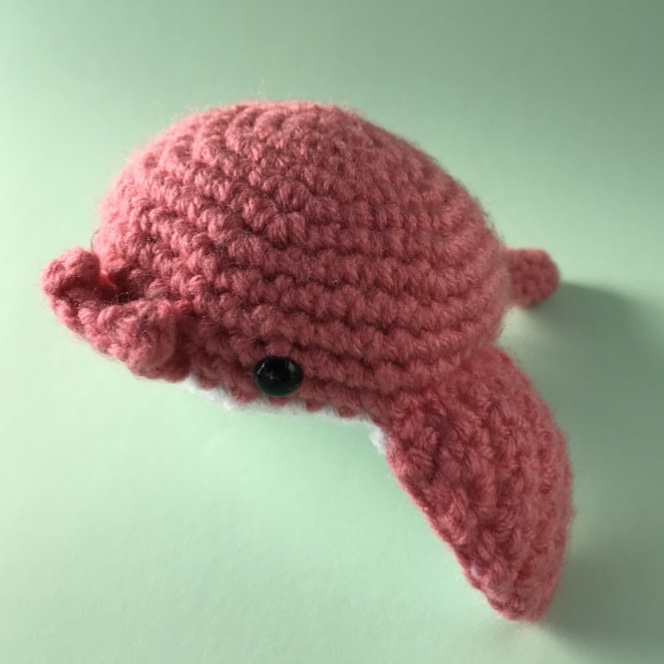
Crochet Millie the Manta Ray Toy
Meet Millie the Manta Ray — a delightful crochet toy ready to bring joy and whimsy into your life! This adorable creation is not just a toy; it's a cuddly companion that will swim its way into your heart. With intricate detailing that captures the essence of a real manta ray, Millie is a charming addition to any collection. Whether you're a seasoned crocheter looking for a new project or someone searching for a unique gift, Millie the Manta Ray is a perfect choice. Embrace the creativity and warmth that this enchanting toy brings, and let Millie become a treasured part of your world.

Materials
• DK or 8ply yarn in pink (main body) and grey (belly)
• 3.5 mm crochet hook*
• Tapestry needle and scissors
• Polyfill*
• 2x 8 mm safety eyes (not meant for children under 3 y.o.)
Abbreviation used (U.S. terms)
ch: chain
sc: single crochet
st: stitch
*…*: repeat
inc: increase, single crochet 2 stitches in the same stitch
dec: decrease, single crochet 2 stitches together
All pieces are worked through both loops of the stitches and the body and tail are worked in the round without joining.
Body – starting in pink make 1
Work in rounds
Round 1. sc 6 in a magic ring
Round 2. inc x6
Round 3. *inc, sc 1* x6
Round 4. *inc, sc 2* x6
Round 5. *inc, sc 3* x6
Round 6. *inc, sc 4* x6
Round 7. *inc, sc 5* x6
Rounds 8-11. sc in each st around
Change to grey
Round 12. sc in each st around
Round 13. *dec x2, sc 3* x6
Round 14. sc in each st around
Round 15. *dec x2, sc 1* x6
Round 16. sc in each st around
Add safety eyes between round 10 and 11 and stuff the body to desired firmness
Round 17. *dec, sc 1* x6
Round 18. dec x6
Fasten off and weave in ends.
Tail – in pink make 1
Work in rounds
Round 1. ch 8, join to first st with a slip stitch to form a round
Rounds 2-4. sc in each st around
Round 5. *dec, sc 1* x2, dec
Rounds 6-9. sc in each st around
Fasten off leaving a very long tail for sewing.
Sew the end of the tail shut and thread the yarn through the tail.
Mouth piece – in pink make 1
Work in rows
Row 1. Ch 4
Row 2. sc 3 starting in second chain from hook
Row 3. *ch 3, then sc 2 down the chain starting from the second chain from hook, sc in foundation st* sc 1 in middle sc from previous row, repeat the sequence between **
Fasten off leaving a long tail for sewing.
Wings – in pink make 2 and in grey make 2 (4 total)
Work in rows
Row 1. Ch 2
Row 2. 2sc in second chain from hook, ch 1, turn
Row 3. 2sc, sc, ch 1, turn
Row 4. 2sc, sc, 2sc, ch 1, turn
Row 5. 2sc, sc 3, 2sc, ch 1, turn
Rows 6-7. sc across, ch 1, turn
Row 8. 2sc, sc 5, 2sc, ch1, turn
Row 9. sc across, ch1, turn
Row 10. sc across
Fasten off leaving a really long tail for sewing.
Assembly
1. Sew the tail to the back of the body and the mouth piece between the two eyes at the front of the body.
2. For the wings, align 1 pink and 1 grey with the tails together and sew them along two sides of the triangle. Then, turn them inside out (to put the seam on the inside). Repeat with the second wing, making sure to put the opposite colour on top (grey if you put pink on top first and vice versa). Sew the wings on both sides of the body, trying to have them as symmetrical as possible.
Note: Do not stuff the tail and the wings.
You are done!