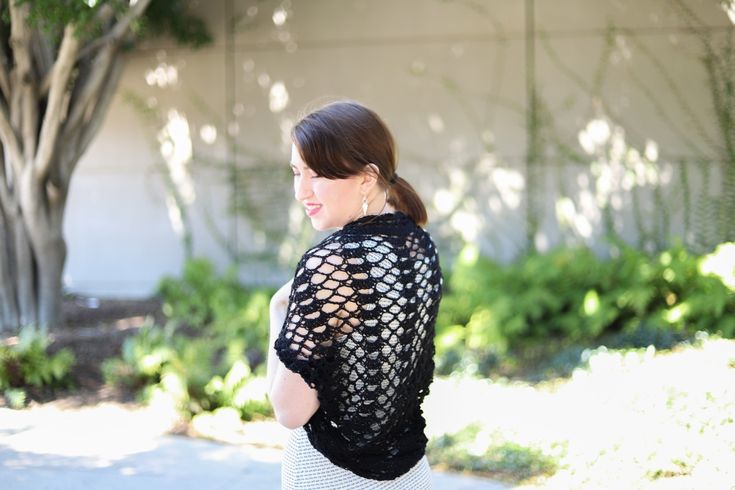
Crochet Regina Shrug
If you're looking to add a touch of effortless elegance to your outfit, the Crochet Regina Shrug is a fabulous choice! This versatile piece exudes charm and coziness perfect for any occasion. The intricate crochet details and flattering fit make it a must-have for those chilly evenings or stylish layering. Don't be surprised if you find yourself reaching for this shrug time and time again, as it effortlessly elevates your look with a sprinkle of warmth and style!
Materials:
- 3-5 Skeins of DROPS Safran Cotton Yarn in Black (16) (or any 4 ply weight yarn)
- Approximately 525 – 875 Yards
- 6.00 mm Crochet Hook
Gauge:
1 Shell to the Next Shell X 4 Rows = 5in X 2 in
Abbreviations
- CH – Chain
- SK- Skip
- SC – Single Crochet
- DC – Double Crochet
The general base of a cocoon shrug is a simple rectangle in which the corners are brought together and seamed to create a type of sleeve.
Shrug Base
Foundation
XS-M: Chain 96 (+1)
L-1XL: Chain 120 (+1)
Row 1: SC into the 2nd CH from the hook, * CH 5, SK 3 CH, 1 SC into next CH * repeat from * to *, until you come to the last 2 CH. End with CH 2, SK 1 CH, 1 DC into last CH. CH 1 and turn.
Row 2: 1 SC in first stitch, SK CH 2 space, * 7DC into next CH 5 space, 1 SC into next CH 5 space, CH 5, 1 SC into the next CH 5 space *, repeat from * to *, until you come to the last CH 5 space. End with CH 2, 1 DC in last stitch. CH 1 and turn.
Row 3: 1 SC in first stitch, * CH 5, 1 SC into the 2nd DC, CH 5, 1 SC into the 6th DC, CH 5, 1 SC into next CH 5 space *, repeat from * to *, end with, CH 2, 1 DC into last SC, CH 1 and turn.
XS – M: Repeat Rows 2-3 until you have 39 rows (should end on a CH 5 sequence row
L – 1XL: Repeat Rows 2-3 until you have 49 rows (should end on a CH 5 sequence row)
Sewing Up The Cocoon
Creating the cocoon out of the rectangle you just made is incredibly easy. You simply have to fold all for corners into the middle of the rectangle to there are two point on each side. These point will be the “sleeves”. All you have to do is seam up the point in which the corners meet in the middle.
Sewing from the inside of the rectangle to the outside, you with seam up until you have about 5 – 7 inches left open at the end of the point. Leaving these few inches un seamed with create arm holes for the sleeves.
Shrug Base Trim
While you could wear the cocoon as is, I wanted to add a little bit or character and flare by adding a trim to the collar area of the shrugX
Row 1: (Starting at any point on the collar of the shrug) Work 4 SC into each CH 5 space around the collar Slip Stitch into the 1st SC of the round
Row 2-3: 1 SC into each SC in the round Slip Stitch into the 1 SC of the round
Row 4: CH 3 (counts as DC), 1 DC into the next SC, SK 1 SC, CH 1, *1 DC into the next 2 SC, SK 1 SC, CH 1 * repeat from * to *, slip stitch into the top of the first CH 3
Row 5: Slip Stitch into the 1st CH 1 Space, CH 5 (counts as 1 DC, CH 2), 1 DC in next CH 1 space, * CH 3, 1 DC into the next CH 1 space * rep from * to *, until the last 2 stitches. CH 3, slip stitch into the 3rd stitch of the beginning CH 5
Row 6: 1 SC, *5DC into next CH 3 space, 1 SC into the next CH 3 space* repeat from * to * all the way around. Slip stitch into the first SC of the round.
Shrug Sleeve Trim
We will also be adding a very simple trim to the sleeves just to clean up the edges. Just about 3 rows of SC should do the trick!
Row 1 – 3: Work SC stitches evenly all around the arm hole. Slip stitch into the first SC stitch.
That is all there is to it! You are now finished with your Regina Shrug!