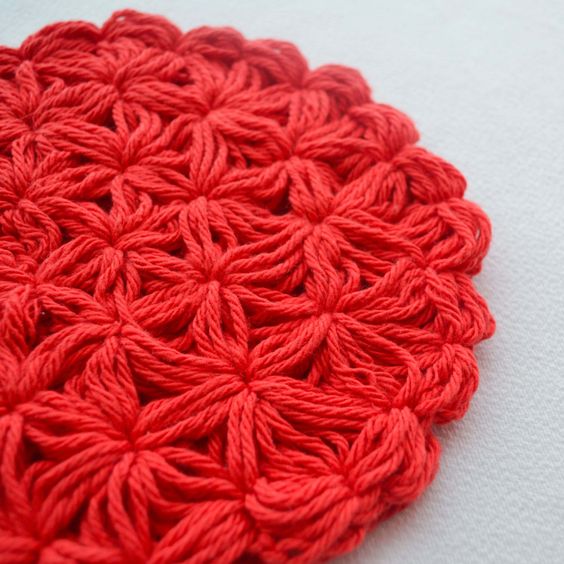
Crochet The Puffy Star Trivet
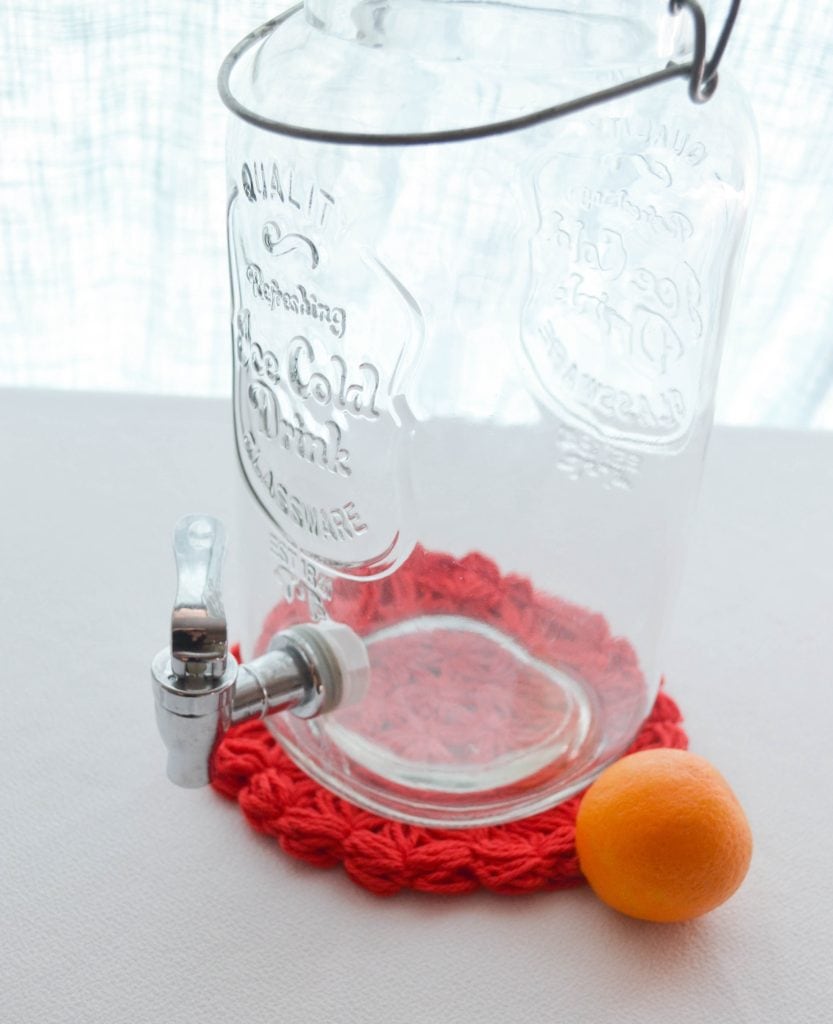
If you're looking to add a touch of charm and warmth to your kitchen, why not try crocheting the Puffy Star Trivet? This delightful little project not only serves a functional purpose by protecting your countertops from hot pots and pans but also adds a whimsical flair to your kitchen decor. With its puffy star shape and lovely texture, it's sure to catch the eye of anyone who enters your kitchen. Plus, the satisfaction of creating something handmade and practical with yarn is truly unbeatable. So grab your crochet hook, some yarn in your favorite colors, and let's get crafting!
Materials Needed
- H/5mm hook
- <45 yards of heavy worsted or aran weight yarn(cotton is a good choice)
- Scissors
Abbreviation
- ss-slip stitch
- ch-chain
- Ch-space- the space created from chains (and in this case, yarn overs).
- yo-yarn over
- rep-repeat
Gauge
Gauge: 4 puffs wide and 3 rows of Jasmine Stitch makes a 4×4″ square
Directions
Round 1: ch2 pull the yarn on your hook out about 1”. *yo, and insert your hook in the second chain from your hook(the first chain you made). Pull the yarn through so that all the loops of yarn are the same size(again, about an inch is good).* Rep 2x (3x total). You should end up with a total of seven loops on your hook.
yo. Use a finger to keep this yarn over separate from the others .Keeping that yarn separate, use your hook to draw the rest of that yarn through all of your other loops. Now, insert your hook under the yarn that you are holding with your finger. yo and bring a loop/stitch from behind. yo and bring it through the two loops on your hook. yo and ch1. This completes one puff.
yo. Use a finger to keep this yarn over separate from the others .Keeping that yarn separate, use your hook to draw the rest of that yarn through all of your other loops. Now, insert your hook under the yarn that you are holding with your finger. yo and bring a loop/stitch from behind. yo and bring it through the two loops on your hook. yo and ch1. This completes one puff.
Now, work into the first chain in your work again. *yo, insert your hook and pull a loop through the same place as the start of your first puff* 3x.
To close the two puffs together: yo. Use a finger to keep this yarn over separate from the others .Keeping that yarn separate, use your hook to draw the rest of that yarn through all of your other loops.Now, insert your hook under the yarn that you are holding with your finger. yo and bring a loop/stitch from behind. yo and bring it through the two loops on your hook. yo and ch1. }
Repeat the entire section in brackets 3x, so that you have 5 puffs coming from the center of your first round(with other puffs connecting them at the top).
To finish the round, work the last 3 puffs together: work a puff from the top of your last puff, one into the center of the round, and work one in the top of the first puff in the round. Close all three together.
Round 2: Round two sees us doing more combinations of puffs together. When it is done, you should have three puffs coming out of each ch-space(the join between the puffs) from the edge of round one. Puffs will also continue to join those “vertical” puffs across the top.
Start by working one puff(following the same steps that started round 1). Puffs continue to be worked in the same manner. The only things that change are their placement and how many are worked together.
[work a puff from the top of your last puff, without closing it. Work another puff/set of loops into the join where your last vertical puff joins with round 1. Close the two puffs together.
work a puff from the top of your last puff, without closing it. Work another puff/set of loops into the join where your last vertical puff joins with the previous round. Finally, work a new puff into the next join/ch-space from the puffs of the previous round. Close all three puffs together.]
Repeat the entire section in brackets (two puffs together, and then three puffs together) 4x more. Then, do the section of two puffs together one more time.
To finish the round: Work another two puffs together-one from the top of the puff you just finished, and one into the last ch-space/join in the top of the previous round(to give it 3 puffs like the others). Before you close the two puffs together, slip stitch through the top of your first two puffs in round two. Close the two puffs together, keeping the round connected.
Round 3: Round 3 (and any additional rounds of Jasmine Stitch you might want to do). Uses the exact
For round 3, you need to repeat the section in brackets 10x, keeping all the other instructions the same.