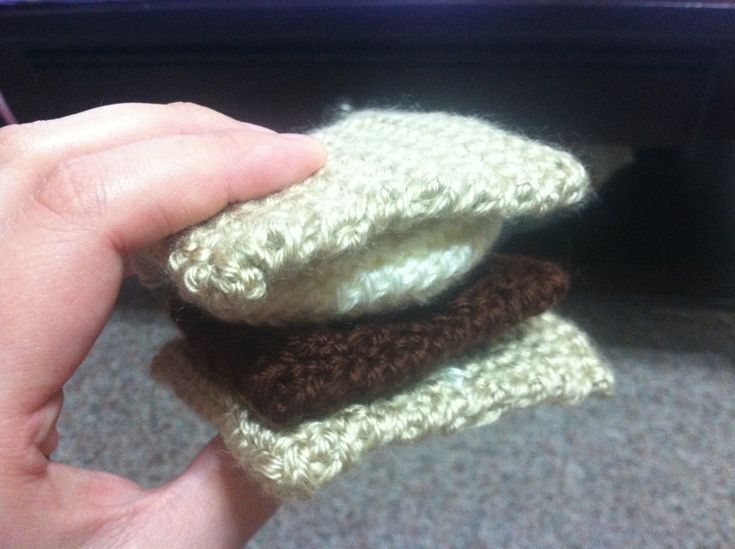
Crochet Chocolate Bar and S’mores
Crocheting a chocolate bar or s'mores is a delightful and creative project that adds a touch of sweetness to your crafting time! Imagine working with soft, brown yarn to recreate the scrumptious layers of a chocolate bar, or using fluffy white and brown yarn to make a cozy s'mores plushie. With some basic crochet skills and a lot of imagination, you can bring these delicious treats to life in a fun and whimsical way. Whether you're a beginner or a seasoned crocheter, this project is sure to bring a smile to your face and make your crafting sessions even more enjoyable. So grab your yarn and hook, and get ready to crochet yourself some sweet and cuddly chocolate bar and s'mores creations!

Supplies
-food colored yarn (I use caron simply soft which is a worsted weight yarn)
-G hook, or equivalent for your yarn
-yarn needle
-stuffing
Full Chocolate Bar
I tried out a couple of different methods for my chocolate bar. I tried stitching in various patterns (just through the back loop, or through the front and alternating) and the pattern was just too subtle. I thought about making large sections like I saw in another pattern, but I wasn’t really sure how I’d do that, and I’m not quite fond of the look. So instead I made two large flat pieces and then single crocheted a ridge for each section. I happened to have a Hershey bar as my model, so I tried to make it look like the ridges you would see on there. My aim was a little off and so isn’t that even, but if you have the patience, I’m sure yours can look neater.
I went the long ways so I did fewer rows.
R1: chain 25 (add one to turn)
R2: 1 sc in each chain
R3-13: 1 sc in each stitch across
Tie off and make your second one. You can also just make one large piece and fold it, then you would need 26 rows instead.
Then for the decorating. Hershey bars have 3×4 sections. I started my stitches 1 stitch in from both corners then stitched 5, turned, stitched 1, turned, stitched 5, turned stitched 1, then joined and tied off. The stitches are spaced so it should go 1, 3, 1, 3, 1, 3, 1 (ones being borders and threes being where the ridge goes). Then long ways it goes 2, 5, 1, 5, 1, 5, 1, 5, 2 (ones and twos being borders and fives being where the ridge goes).
For Half a Chocolate Bar
Follow the directions for the full bar, only chain 13. This will make a square instead of a rectangle. Repeat the steps for adding the detailing.
Marshmallow
I wanted to make a s’more with a smashed marshmallow. I’m not quite sure how to make a squishy shape, so I went more for a rounded pillow shape. I suppose another way you could do it is make two oval ends and a cylinder side so it has a smashed straight down look.
R1: 6 sc in magic circle loop
R2: 2 sc in each stitch (12)
R3: (1 sc, 2 sc in next stitch)* repeat (18)
R4: 1 sc in each stitch (18)
R5: (1 sc, 2 sc in next stitch)* repeat (27)
R6: 1 sc in each stitch (27)
R7: (1 sc, 2 sc in next stitch)* repeat, 1 sc in last stitch (40)
Tie off and make another. There should be two halves. Stitch them together and add stuffing so it rounds. Smash to soften the edge so it isn’t quite like a frisbee anymore.
Graham Crackers
I made the graham crackers by making 16×32 stitch rectangles. Then I folded them in half and stitched around all sides (even the folded side).
R1: chain 16 (add chain to turn)
R2: sc in each chain across
R3-32: sc in each stitch across
Tie off and make another one. Fold and stitch edges.
For an added detail I took cream and made stitches down the center of the cracker so that it looked more like the impression between the halves. I used a lighter color so it doesn’t show up very well.
Sewing
To sew I didn’t really do anything fancy. I stacked everything up and just made a huge loop through the center with the same color as the graham cracker. When I got back to where I started I took the two ends and tied them together and tucked them into the cracker. You can loop around a couple of times to make it sturdier.