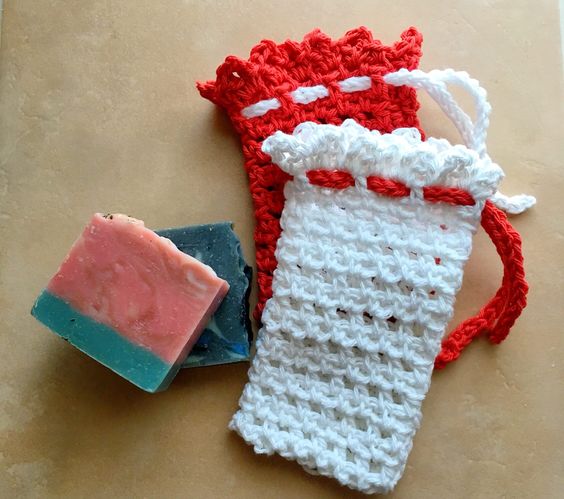
Crochet Bar Soap Holder for Shower
A crochet bar soap holder for the shower is not only practical but adds a charming touch to your bathroom decor. This handmade accessory keeps your soap dry between uses, prolonging its life and reducing waste. The soft yarn material is gentle on your skin and easily absorbs excess water, preventing soap scum buildup. Plus, the variety of colors and patterns available allow you to customize your shower experience to match your style. Say goodbye to slippery soap bars sliding around in your shower — with a crochet soap holder, you can conveniently hang your soap up after each use, ensuring it stays within arm's reach and ready to use. It's a small yet delightful way to elevate your daily routine with a touch of handmade charm.
Pattern
Skill Level
Confident beginner.
Gauge
4″ x 4″ (10 cm x 10 cm) 13 SC and 14 rows with a 5 mm (U.S. H/8) crochet hook
Finished Size
Approximately 7 inches wide X 6 ½ inches long.
Materials
1 skein of 100% cotton yarn (I made 3 washcloths out of one skein) Here is a link to Peaches & Cream Cotton yarn
Size H 5.0 mm Crochet Hook
Tapestry Needle to weave in the ends
Scissors
Abbreviations
CH = Chain
DC = Double Crochet
HDC = Half Double Crochet
SC = Single Crochet
SL ST = Slip Stitch
SP = Space
ST = Stitch
TR = Treble Crochet
[ ] = Repeat Between
Pattern Notes
There is a video tutorial showing how to work this pattern near the bottom of this post.
This pattern is written in US terms.
Begin
CH 30
Row 1:
SC in the second CH from the hook, [CH 1, SK next ST, SC in next SP] continue the pattern between [ ] ending with a SC in the last ST.
Row 2:
CH 2, HDC in the first SK ST from the previous row [CH 1, SK next ST, HDC in next SP] continue working stitches between [ ]. Ending with a HDC in the last ST.
Row 3:
CH 2, SC in the first SK ST from the previous row [CH 1, SK next ST, SC in next SP] continue between [ ] ending with a SC in the last ST.
Rows 4-17:
Repeat rows 2 and 3.
Row 18:
SC, Then in the first CH 1 SP, SC, CH 2, TR, DC. [In the next CH 1 SP, SC, CH 2, TR, DC] Repeat between [ ] to the end. SC in the last ST.
Don’t cut off the yarn yet. Make sure that you have enough yarn to go around the side and bottom of the Simple Soap Holder and about 10 inches to weave in at the end. Once you have that, go ahead and cut the yarn. Go ahead and join now.
Joining Edges of the Soap Bag
Fold lengthwise (right sides together if you plan on turning the bag inside out when done. If not, set the wrong sides together) sew the side and bottom by just weaving the yarn back and forth through the loops on the end of the crochet stitches. Using the yarn needle, weave in the yarn tail. Cut off any excess yarn. If you plan on turning the bag inside out like I did, now is the time to do that before you add the tie.
Crocheting the Tie Closure
CH 60 and SL ST into each CH. This helps give the tie a bit more of a finished look. Before you weave in the yarn ends, use that to help pull the tie through the holes created by the HDC and the SC. Once done, weave in the ends and cut off the excess yarn.
Weave the tie through the top holes created by the HDC and SC.