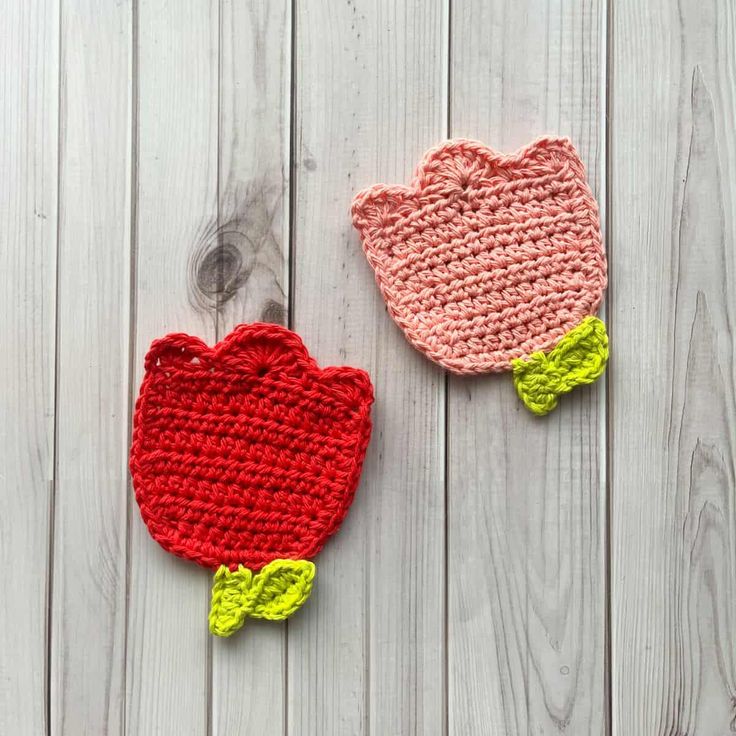
Crochet Tulip Coaster
Looking to add a touch of charm to your home decor? The Crochet Tulip Coaster is a delightful way to brighten up your space and protect your furniture at the same time! This cute and practical coaster features a lovely tulip design that will bring a smile to your face every time you reach for your favorite drink. Handcrafted with care and creativity, this coaster is not just a functional accessory but also a piece of art that can add a pop of color to your living room or kitchen. So, why settle for plain coasters when you can have these adorable crochet tulip coasters to accompany your beverages with a touch of whimsy and style!
Materials
Lily Sugar n Cream yarn — hot green
Lily Sugar n Cream yarn — country red
4.5 mm hook
Tapestry needle
Abbreviations (US terms)
Chains — ch
Single crochet — sc
Half double crochet — hdc
Double crochet — dc
Slip stitch — sl st
Increase — inc
Notes
Beginner-friendly: This pattern is designed for crocheters of all skill levels, especially beginners.
Multiple Uses: While it's a coaster, you can also use this pattern as a crochet flower applique on blankets, pillows, or other home decor projects.
Yarn Choice: Use a medium-weight cotton yarn for the best results, but you can adjust the yarn thickness based on your preference.
Instructions
Crochet Tulip Flower Pattern:
Row 1: Ch 10 and turn
Row 2: In the second chain from the hook make a hdc. then hdc for the rest of the row. Then ch x1 and turn.
Row 3: Make a hdc inc, then hdc x7 and in the last ch make another hdc inc (11). Then ch x1 and turn.
Row 4: Make a hdc inc, then hdc x9 and in the last stitch make another hdc inc (13). Then ch x1 and turn.
Row 5-9: Hdc in every stitch. Then ch x2 and turn.
Row 10: You will make the top of the tulip. Dc x3 in the first stitch in the row, then skip 2 stitches and make a sc in the 3rd stitch from the last stitch worked.
Then skip 2 more stitches and dc x8 into the same stitch, then skip 2 stitches and make a sc in the 3rd stitch from the last stitch worked.
Then skip 2 more stitches and in the last stitch in the row dc x3, ch x2 and then sl st to the same stitch you made the dc stitches from.
Lastly, sc around the edge of the tulip BUT NOT THE TOP, just around the U-shape of the flower. Try and make a 1-2 sc for each row, you may need more if it doesn’t lay flat and is curling. You will need less sc if the edge becomes wavy. Sometimes this isn’t an exact science as it is based on tension.
Fasten off and weave in any ends.
Crochet Stem:
Flip your tulip over so the top of the flower is at the bottom right-side facing you. Join your green yarn to the middle stitch (or what looks closest to the middle stitch — it doesn’t have to be exact).
Ch x5 and in the second ch from the hook hdc x4. Then sl st to the next stitch at the bottom of the flower to anchor the stem.
Fasten off and weave in any ends.
Crochet Leaf:
With your green yarn, ch x6. In the second ch from the hook make a sl st, in the next make a sc, in the following a hdc inc, and then another sc and sl st in the next 2 stitches. Ch x1 and turn.
Repeat the sequence of stitches for the other side of the chain — sl st, sc, hdc inc, sc, and sl st.
Fasten off and leave a long tail for sewing. Then, sew the leaf to the side of the tulip’s stem. You may need to also tack down the leaf top to the bottom of the flower, so it lays flat.
I hope you enjoyed making this crochet tulip coaster pattern and that it adds a touch of brightness to your home!