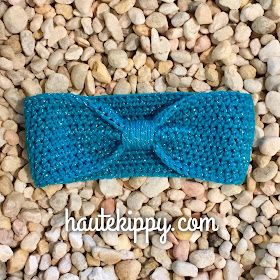
Crochet The Tisha Bow Headband
Crocheting «The Tisha Bow Headband» is such a delightful project! This charming headband is a fantastic choice for adding a touch of handmade warmth and style to any outfit. With its cute bow design, it's perfect for keeping your ears cozy in the chilly weather while looking absolutely adorable. The pattern is enjoyable to follow, making it a lovely choice for beginners and experienced crocheters alike. You'll love the versatility of this headband, whether you're running errands or having a cozy night in. Don't forget to choose your favorite yarn colors to make it truly unique and personalized! Happy crocheting!

Hook: H8/5MM
Yarn: any Worsted
Gauge: 7 sts = 2” in HDC
Notions: Yarn needle
Difficulty: Easy
Note: To make band wider for ear warmers, make more than 8 rows. To make a summer headband, make fewer rows. When making for child/toddler- 5 rows is usually wide enough. Feel free to get creative when making your own headbands, they can be as wide or as narrow as you want.
Round 1: FHDC 63, join to top of first fhdc with a sl st.
(For Child size 57, toddler 53)
Round 2: Ch 1, hdc in same st as join, and in every stitch around, join. (63 sts)
Rounds 3-8: Repeat round 1. FO at end of round 8.
Finishing: Use the starting tail to close the small gap at the first join and attach the bottom ends of the foundation row together. Then take the starting and ending tails, and tie them together over top of the right side of the headband, trim ends. Take extra yarn and wrap around tied/joined section of headband repeatedly to form a bow's «knot». Wrap to apx. 1" wide to hide the seam. Break yarn, and thread tail with a yarn needle. Turn headband to wrong side and secure end of wrapping yarn by sewing back and forth under the «knot» and through headband, taking care stitches do not bleed through to right side. Sew back and forth several times to permanently secure it in place. Cut yarn close to «knot».