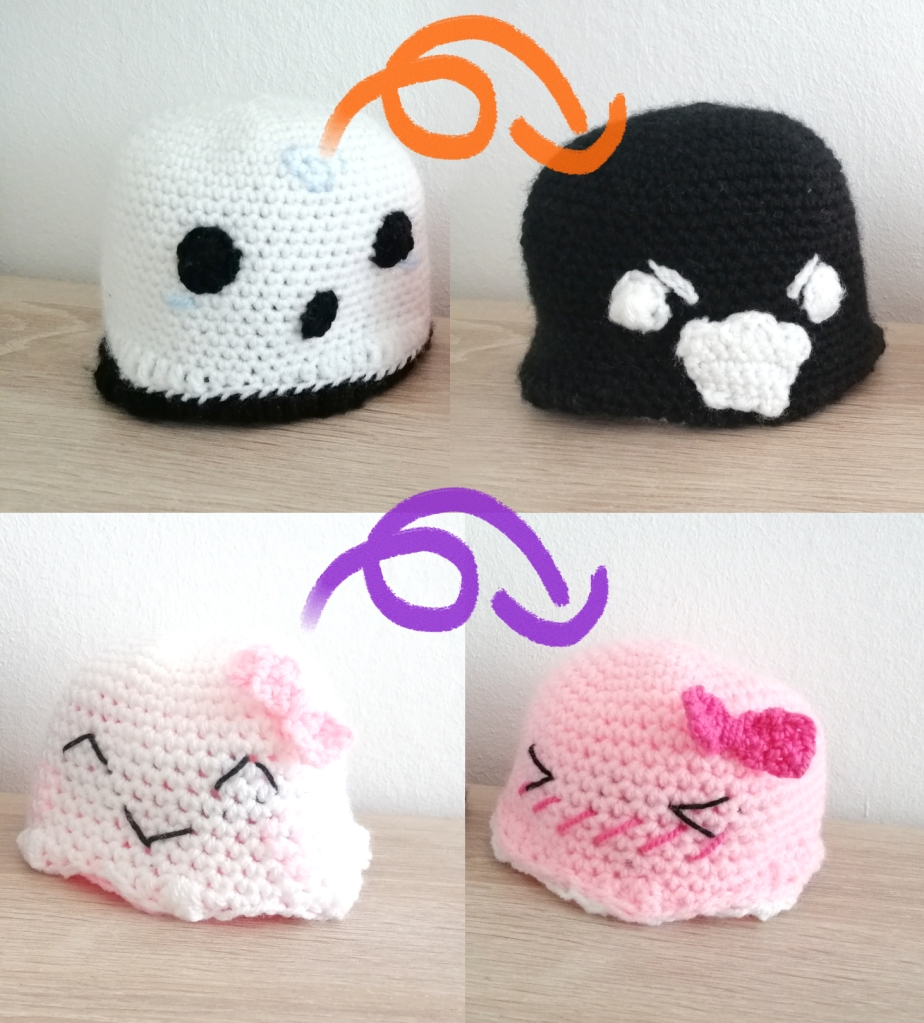
Crochet Reversible Ghost
Crochet Reversible Ghosts are a fun and adorable addition to any Halloween décor! These charming little spirits can be made in various sizes and colors, perfect for adding a touch of spookiness to your home. What makes them extra special is their reversible feature – simply flip them around to reveal a different facial expression, adding versatility to your spirited decorations. Whether you're a seasoned crocheter or just starting out, creating these playful ghosts is a great way to get into the spooky spirit of the season. So grab your crochet hook, some yarn, and let's get stitching up some reversible ghostly delights!

Materials
To make the ghost you will need:
– A 2.5mm crochet hook
– yarn in your prefered 2 colors plus yarn for the facial features
– A tapestry needle and scissors
– A stitch marker to help you keep track of the start of the round
Please note that you can make the ghost using any size crochet hook and yarn weight for a smaller or bigger result. I like using DK as it’s most commonly available. If you make amigurumi, it is usually recommended to go down a bit from the recommended hook size for the yarn to allow for a no-hole look (we don’t want to see the stuffing show through in between stitches)! Using DK yarn and a 2.5mm crochet hook, the ghost should be about 10-15cm tall.
Stitches & Abbreviations
The pattern is written using US crochet terms in continuous spirals. You will need to know the following kinds of stitches to make him:
– Magic Ring (MR)
– Chaining
– Single crochet (sc)
– Half double crochet (hdc)
– Double crochet (dc)
– Trebble crochet (tc; optional)
– Decrease (dec); preferably using the invisible decrease method
– Increase (inc)
– Slip stitch (sl)
– Crocheting in front loops only (FLO; optional))
And now, let’s get started!
Body (the only part, really)
Note: Since I made the boy ghost first and the girl ghost at a later time, they slightly differ in how I made them. The difference lies mostly in the edging, which I will be giving you 2 options for. I also made the girl ghost a bit smaller, which can be achieved by simply crocheting less increasing rounds (in my case to 48) and decreasing the number of sc around rounds as well (in my case, 11).
Double note: If you’re like me, you’re likely not only using yarn from one brand. This can cause your yarn thickness to differ slightly (even if they’re both dk and list the same gauge), adding up over all the rounds we’re working. If you are using yarns from different brands you might want to omit a round or two of the (sc around) rows for the piece that has slightly thicker yarn, or else it will turn out a tad bit bigger and will be visible on the bottom, which is what happened to my boy ghost.
Round 1: In a MR, sc 6
Round 2: Inc around (12)
Round 3: (Sc, inc) around (18)
Round 4: (Sc 2, inc) around (24)
Round 5: (Sc 3, inc) around (30)
Round 6: (Sc 4, inc) around (36)
Round 7: (Sc 5, inc) around (42)
Round 8: (Sc 6, inc) around (48)
Round 9: (Sc 7, inc) around (54)
Round 10: (Sc 8, inc) around (60)
Round 11-27 (17 rounds): Sc around (60)
Edging option A (boy ghost)
Round 28: In FLO, (sc, hdc 2, dc 3, tc 3, dc 3, hdc 2, sc) around, fasten off
Edging option B (girl ghost)
Round 28: (Sl, sc, hdc, (2 dc in same stitch), hdc, sc, sl) around, fasten off
Now, make a 2nd piece just like this, ideally in a different color.
For the round eyes of the boy ghost, sc 6 into a MR, then increase around to 12 on the 2nd round and slip stitch to the starting point. For the small mouth, which I wanted to be more oval, I worked 3 sc and 3 dc into a MR, then sl and fasten off. For the angry eyebrows, ch 3.
For the angry mouth (Sections written in () should be worked into the same stitch):
Row 1: Ch 6, sc 5
Row 2: Sc 2, inc, sc 2 (6)
Row 3: Inc, sc 4, inc (8)
Row 4: Sc across (8)
Row 5: Sc 4, inc, sc 3 (9)
Row 6: (Hdc, dc), (sc, sl), sl, dc 3, sl, (sl, sc), (dc, hdc, sl)
For the ribbon, simply chain a number of stitches for the width of the ribbon (I chained 5), then sc across for a few rounds until you have your desired length. Fasten off with a long tail, then weave the tail through the stitches to the middle of the ribbon and tie it around a few times to scrunch it together.
Assembly
Whether you add your facial features before or after you sew your two pieces together doesn’t really matter and depends on personal preference. To make your amigurumi reversible, flip one of them inside out and allign the pieces, making sure to try (and not fail like I did on the boy ghost, haha) and have both the edging and the facial features allign. It doesn’t matter if it’s not perfect since you won’t see both sides at the same time anyways, I just find it more satisfying when the faces are in the exact same place haha. Once you’ve alligned them, all you need to do is sew the pieces together. For a smoother look I recommend sewing through one loop of each amigurumi only each instead of both (which I did not to on the girl ghost). If you’re unsure, there are tons of tutorials on reversible amigurumi on youtube, so feel free to check those out!