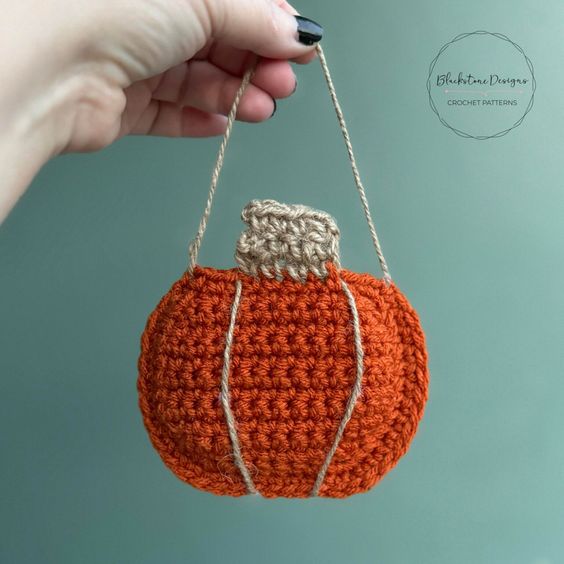
Crochet Pumpkin Treat Pouch
Get ready to add some festive charm to your Halloween decorations with the Crochet Pumpkin Treat Pouch! This adorable and functional crochet creation is perfect for holding your favorite candies or small treats. With its vibrant orange color and delicate details, it's sure to delight both kids and adults alike. Whether you're looking to add a touch of handmade warmth to your home or searching for a unique gift idea, this crochet pumpkin treat pouch is a must-have. So grab your crochet hook and yarn, and get ready to bring a little pumpkin magic into your life!
Materials
Worsted Weight Yarn (#4)
- Amount varies by size
G/6/4.00mm Hook
Jute Twine
Yarn Needle
Scissors
Gauge
Not Critical for this Project
Finished Measurements
5”W x 5”H (bottom of pumpkin to top of stem)
Stitch Guide
ch = chain
sc = single crochet
sl st(s) = slip stitch(es)
Skill Level
Beginner
Written in U.S. Terms
Pattern Notes
- Beginning chains do not count as stitches.
- Where asterisks appear, repeat the instructions between them.
- For size reference, this pouch fits 8 Reese’s Miniature Cups.
Instructions
PUMPKIN (Make 2)
With Any Color,
R1. Working in the back bump of the chain across: Ch 11, sc in 2nd ch from hook and across, turn (10)
R2. Ch 1, 2 sc, sc x 8, 2 sc, turn (12)
R3. Ch 1, 2 sc, sc x 10, 2 sc, turn (14)
R4-10. Ch 1, sc across, turn (14)
R11. Ch 1, sc in 1st sc, skip 1, sc x 10, skip 1, sc in last sc, turn (12)
R12. Ch 1, sc in 1st sc, skip 1, sc x 8, skip 1, sc in last sc; do not turn
R13. Ch 1, sc in the end of each row and in each st arnd; Fasten. (10)
Join Panels:
Hold panels wrong sides together, matching up the stitches. Attach yarn to top stitch of left side and single crochet around to top stitch of right side (working through both layers). Do not crochet across the top.
STEM
With Jute,
R1. Find center 4 sts at top of front panel, attach to 4th st on the right, ch 1, sc in same space and in next 3 sts, turn (4)
R2-3. Ch 1, sc across, turn; Fasten at the end of R3. (4)
Finishing
- Add sections to pumpkin using jute twine (see tutorial below): Insert jute from inside to outside in stitch to the right of the stem. Bring jute down the front, wrap it around the bottom, and up the back. Find 4 center sts on top of back panel, then insert jute from outside to inside of 1st st from the left, cross over to the 4th stitch and insert jute to the outside, down to the back, wrap around the bottom, and up the front, then insert jute from outside to inside in stitch left of the stem. Cross over to the left corner stitch (skipping 2 stitches) and insert jute from inside to outside, then insert jute from outside to inside of the right corner stitch, leaving a long string for a hanger. Tie the beginning and ending tails together. Tack jute lines down with small dabs of hot glue.
- Hide all strings.