Crochet Adorable Pumpkin
Looking to add a touch of charm to your fall decor? Why not try crocheting adorable pumpkins! These cute and cuddly creations are perfect for adding a festive feel to your home or giving as thoughtful handmade gifts. With just a few simple crochet stitches and some soft yarn in autumn hues, you can have a whole bunch of these little pumpkins ready to adorn your space in no time. Whether you're a seasoned crocheter or just starting out, this fun project is sure to put a smile on your face and bring a cozy vibe to your surroundings. So grab your crochet hook, pick out your favorite yarn colors, and get ready to create a whimsical pumpkin patch that will brighten up any room!

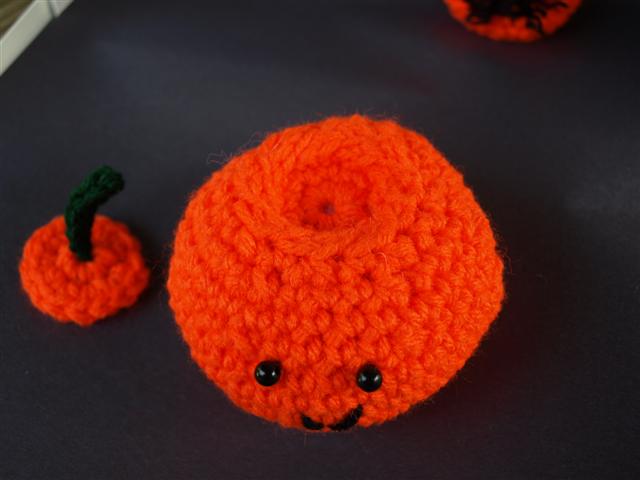
Larger Pumpkin on left. Smaller Pumpkin on right (with mustache!)
Smaller Pumpkin
I did not stuff this pumpkin. It seems to keep it’s shape pretty well. I made a separate lid because I like that you can lift it off!
Size: approximately 2 inches tall, 2 inches wide
Materials:
- Worsted Weight Yarn. I used Red Heart Super Saver in Vibrant Orange, Hunter Green and Black
- Size G Hook
- Stitch marker (I use a small piece of a contrasting color yarn)
- 6 mm half round Darice Round eyes – 2
Gauge: Not important
Abbreviations: sc = single crochet, ch = chain, sc dec = single crochet decrease, st = stitch
Notes: Rounds are worked in continuous spirals, do not join. Do not turn at the end of each round.
Pumpkin
- With orange, ch 2
- 8 sc in 2nd ch from hook. Mark first st for beginning of round and move marker up for each round.
- Work 2 sc in each sc around – 16
- In back loops only, *2 sc, 1 sc in each of next 3 sc* around – 20
- sc in each sc – 20
- *2 sc, 1sc in each of next 4 sc* around – 24
- *2 sc, 1 sc in each of next 11 sc* twice – 26
- sc in each sc – 26
- *sc dec, sc in each of next 11 sc* twice – 24
- *sc dec, sc in each of next 4 sc* around – 20
- *sc dec, sc in each of next 3 sc* around – 16
- At end of last round work a slip stitch, finish off and weave in yarn end.
Using black yarn sew on face, and glue on eyes if you are using 6mm half round eyes. I use a low temperature glue gun.
Lid # 1
- With orange, ch 28 sc in 2nd ch from hook.Work 2 sc in each sc around – 16Slip stitch, finish off and weave in yarn end.
Stem
- With green, ch 5Slip stitch in 2nd ch from hook and in next 3 chFinish off and sew onto lid.
Larger Pumpkin
I did stuff this pumpkin. I wanted to still be able to have a lid that you can take off so I make an inner lid that will be hidden inside the pumpkin to contain the fiberfill stuffing.
Size: approximately 2-1/4 inches tall, 3-1/2 inches wide
Materials:
- Worsted Weight Yarn. I used Red Heart Super Saver in Vibrant Orange, Hunter Green and BlackSize G HookStitch marker (I use a small piece of a contrasting color yarn)6 mm Pearl beads in black – 2small amount of black embroidery threadsmall amount of fiberfill stuffing
Gauge: Not important
Abbreviations: sc = single crochet, ch = chain, sc dec = single crochet decrease, st = stitch
Notes: Rounds are worked in continuous spirals, do not join. Do not turn at the end of each round.
Pumpkin
- With orange, ch 28 sc in 2nd ch from hook. Mark first st for beginning of round and move marker up for each round.Work 2 sc in each sc around – 16*2 sc, 1 sc in each of next 3 sc* around – 20In back loops only *2 sc, 1sc in each of next 4 sc* around – 24*2 sc, 1 sc in each of next 3 sc* around -30*2 sc, 1 sc in each of next 4 sc* around – 36sc in each sc – 36sc in each sc – 36*sc dec, sc in each of next 4 sc* around – 30sc in each sc – 30*sc dec, sc in each of next 3 sc* around – 24*sc dec, sc* around – 16At end of last round work a slip stitch, finish off and leave a long tail for sewing later.
Using black yarn sew on face. For the eyes, I used 6mm black beads and sewed them on with black embroidery thread.
Make Lid # 1 from Smaller Pumpkin instructions.
Make Stem from Smaller Pumpkin instructions.
Attach stem to Lid #1.
Inner Lid — This lid will keep the fiberfill in the pumpkin and it has a small depression so that you can add a tiny treat or surprise on top of it!
- With orange, ch 28 sc in 2nd ch from hook.*2 sc, 1 sc* around – 12.*2 sc, 1 sc in each of next 2* around – 16Slip stitch, finish off and weave in yarn end.
This photo shows what it looks like when the inner lid is sewn into the pumpkin.
Assembly: Sew face on pumpkin, if you haven’t already done so. Stuff pumpkin with fiberfill. Sew Inner Lid onto pumpkin so that it is hidden inside the top. Place Lid #1 on top, don’t sew it on!