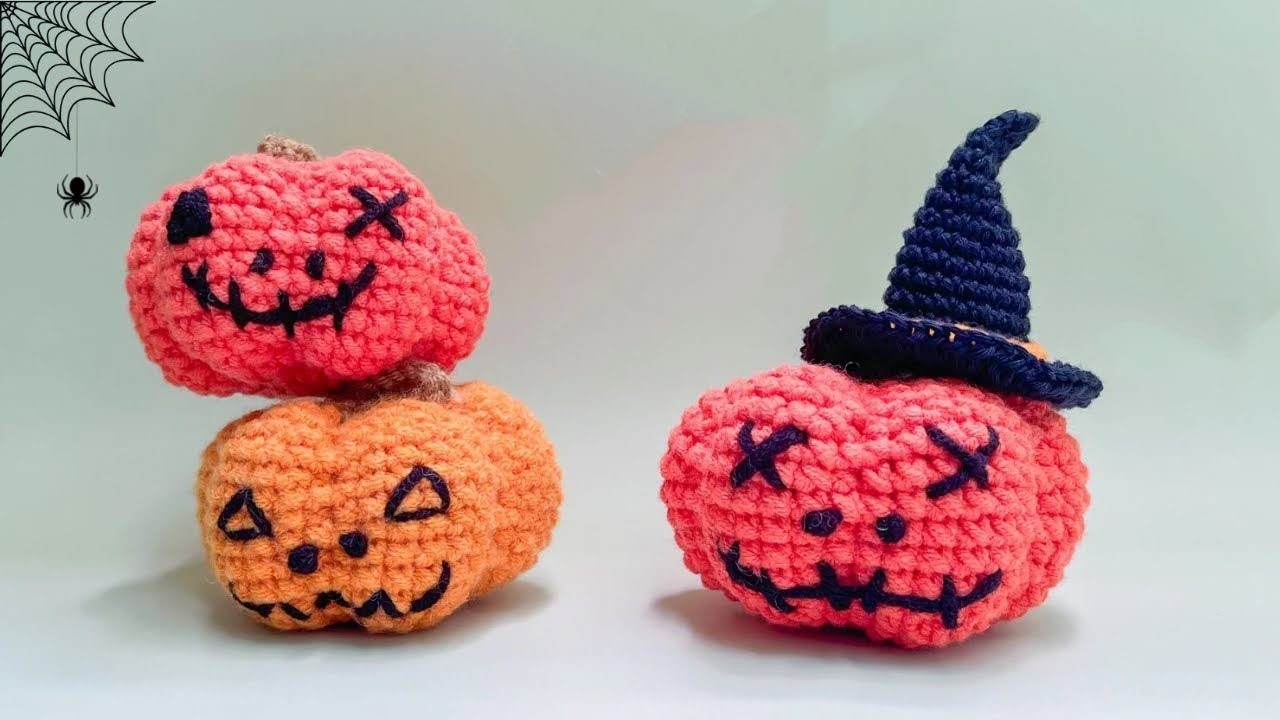
Crochet Halloween Pumpkin
Crochet Halloween pumpkins are the perfect way to add a cozy and festive touch to your home decor during the spooky season! These adorable handmade creations come in all shapes, sizes, and colors, making them a versatile addition to your Halloween setup. Whether you're an experienced crocheter or just starting out, crafting a crochet pumpkin can be a fun and rewarding project to try. From classic orange pumpkins to whimsical designs with faces and embellishments, the possibilities are endless when it comes to creating your own unique Halloween decorations. Imagine your space filled with these charming pumpkins, creating a warm and inviting atmosphere for the fall festivities. So grab your crochet hooks and yarn, and get ready to bring some handmade charm to your Halloween decor this year!

Abbreviations:
- SC — Single Crochet
- INC — Increase (make two SC in the same stitch)
- DEC — Decrease (combine two stitches into one)
Materials:
- Yarn in pumpkin color and brown for the stem
- Crochet hook suitable for your yarn
- Yarn needle
- Stuffing material
- Stitch markers and pins (optional for assembly)
Step by step Pattern
Row 1:
- Create a magic ring.
- Make 8 SC into the ring.
- Pull tightly and join with a slip stitch (SL ST) into the first SC.
Row 2:
- Chain 1 (CH 1).
- INC in all stitches around (16 stitches total).
- SL ST into the first SC to join.
Row 3:
- CH 1.
- SC in the next stitch, INC in the following stitch Repeat - around (24 stitches total).
- SL ST to join.
Row 4:
- CH 1.
- SC in the next 2 stitches, INC in the following stitch Repeat - around (32 stitches total).
- SL ST to join.
Row 5:
- CH 1.
- SC in each stitch around (32 SC).
- SL ST to join.
Row 6:
- CH 1.
- SC in the next 3 stitches, INC in the following stitch Repeat - around (40 stitches total).
- SL ST to join.
Row 7 — 14:
- CH 1.
- SC in each stitch around (40 SC each row).
- SL ST to join each row.
Row 15:
- CH 1.
- SC in the next 3 stitches, DEC Repeat - around.
- SL ST to join.
Row 16:
- CH 1.
- SC in each stitch around (32 SC).
- SL ST to join.
Row 17:
- CH 1.
- SC in the next 2 stitches, DEC Repeat - around.
- SL ST to join and fasten off the pumpkin color yarn.
Row 18 (with brown yarn for stem):
- Insert hook into a stitch at the top of the pumpkin, attach brown yarn with CH 1.
- SC in the first stitch, DEC Repeat - around.
- SL ST to join. Start stuffing the pumpkin firmly.
Row 19:
- CH 1.
- DEC in all stitches around (8 decreases total).
- SL ST to join and CH 1 to fasten off, leave a long tail for sewing.
Finishing:
- Close the top by weaving the tail through the front loops of the last row, pull tight, and secure with a knot.
- Insert the needle down the center to the bottom, wrap outside to the top, and pull to create segments. Repeat this around the pumpkin to shape into sections.
- For the stem, loop 8 chains and then SL ST back along them, fasten off and weave in ends.
Decorations:
- Use black yarn to embroider facial features or any other decorations desired.
Gauge:
- Gauge is not crucial for this project, but it affects the size and amount of yarn used. Adjust hook size or yarn weight to achieve desired size or firmness.