Crochet Jellyfish Keychain
Create your very own adorable jellyfish keychain with the art of crocheting! This fun and creative project allows you to customize your keychain with different colors and sizes to suit your personal style. Crocheting a jellyfish keychain is a great way to add a unique touch to your keys or bag, making it stand out from the rest. You can experiment with different yarn textures and embellishments to make your jellyfish keychain truly one-of-a-kind.
Materials Needed:
- Cotton medium worsted weight yarn: You can use any color you like, but light and bright colors will make your jellyfish more eye-catching.
- Size C/2.75mm crochet hook: This is the size of crochet hook that is recommended for the yarn weight you’ll be using.
- 6mm safety eyes: These will give your jellyfish a cute and whimsical look.
- Keychain: You can use any keychain you like, but a lobster claw clasp is a good option because it’s easy to attach and remove.
- Polyester fiberfill: This will be used to stuff the body of your jellyfish.
- Scissors: You’ll need these to cut your yarn
- Yarn needle: This will be used to sew the different parts of your jellyfish together.
- Paper clip (optional): You can use this to help you stuff the body of your jellyfish
With these materials, you can create a cute and cuddly little jellyfish to attach to your keys, backpack, or anywhere else you like!
Abbreviations:
- Rnd (Round): A complete circle of stitches worked continuously.
- Sc (Single Crochet): Basic stitch, inserting hook, yarn over, pulling through both loops.
- Hdc (Half Double Crochet):Taller stitch than sc, creating a looser fabric.
- Sl st (Slip Stitch): Joins two ends without adding height.
- Inc (Increase): Create an additional stitch, usually by crocheting two in one spot.
- Dec (Decrease): Reduce stitches, usually by crocheting two together.
- BLO (Back Loop Only):Crocheting only into the back loop of a stitch.
- Ch (Chain): Series of loops made with your hook, used as foundation or spacing.
Step By Step Pattern
SKIRT
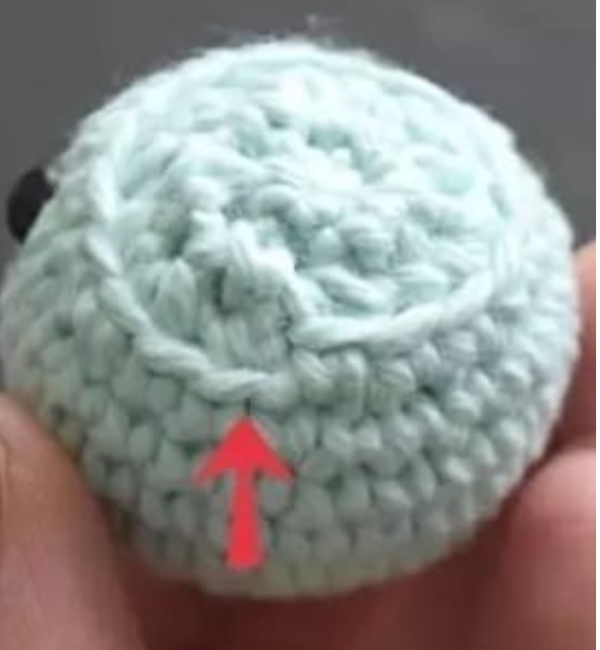
1. Insert hook under a loop
from the outside going in
2. Pull up a new loop with
the working yarn to start and ch 1
3. Make 3 hdc in the next st,
then sl st in the st after.
Repeat 9x around.
4. After the final sl st, cut a yarn
tail and weave it into the
body


SMALL TENTACLES
1. Make a slip knot and ch 11
2. Sc in 2nd ch from hook, 8
sc across, 2 sc in final st.
• Cut a tail for sewing
• Make 3 small tentacles
LARGE TENTACLES
1. Make a slip knot and ch 14
2. Sc in 2nd ch from hook, 11
sc across, 2 sc in final st.
Cut a tail for sewing
Make 2 large tentacles
SEWING TENTACLES
Front/face
Here is an underside
diagram of the jellyfish.
Red small tentacles
Green = large tentacles
The arrows show the
direction the tentacles
should face.