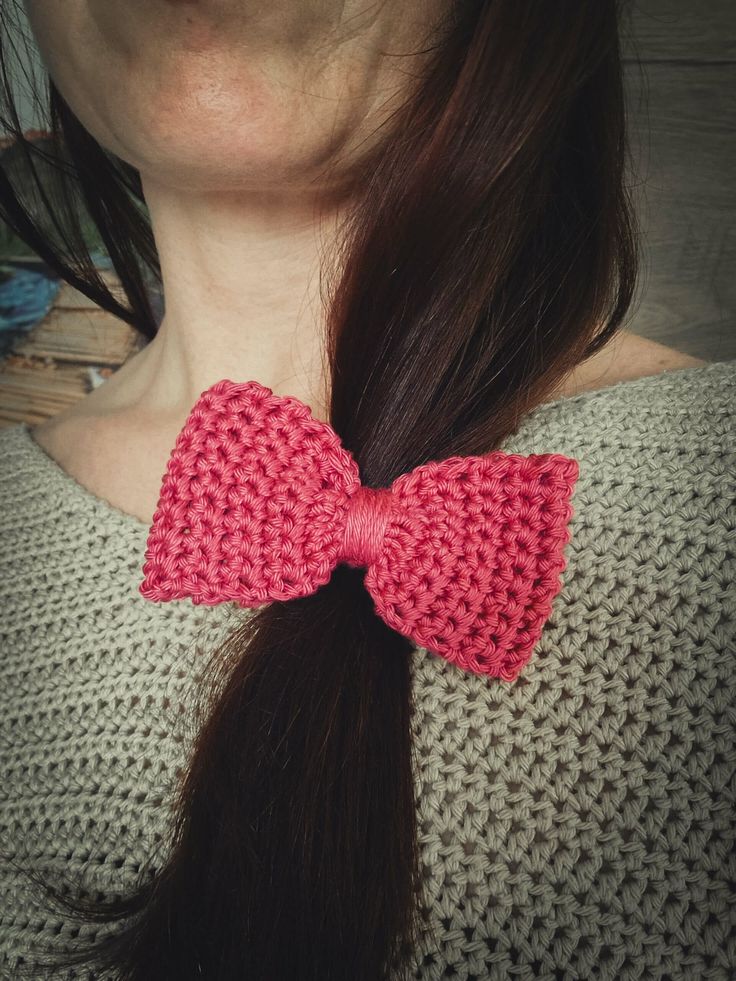
Crochet Bow Tie Hair Elastic
Add a charming touch to your hairstyle with a Crochet Bow Tie Hair Elastic! This delightful accessory combines the classic style of a bow tie with the convenience of a hair elastic, making it a fun and versatile addition to your hair accessories collection. Whether you're heading to a special event or simply want to add a cute twist to your everyday look, this crochet bow tie hair elastic is sure to make you stand out. Embrace your playful side and let your hairdo shine with this adorable accessory!

How to Make a Single Crochet
- Start with a foundation chain. Make a slipknot and chain to your desired length.
- Insert your hook. Skip the first chain from the hook, and insert your hook into the next chain.
- Yarn over. With your hook inserted in the chain, yarn over (wrap the yarn over your hook).
- Pull up a loop. Draw the yarn through the chain, so you have two loops on your hook.
- Yarn over again. Wrap the yarn over your hook once more.
- Pull through both loops. Draw the yarn through both loops on your hook. Voila! You’ve just made a single crochet.
Repeat the process across your foundation chain, and you’ll have a neat row of single crochets. As you practice, you’ll find your rhythm and see how versatile and foundational this stitch truly is.
Back to Our Bow Tie Elastic: Using the single crochet stitch, you’ll be able to craft a dense and sturdy fabric for your bow tie, ensuring it holds its shape while wrapped around your hair. The design is quick to work up, and before you know it, you’ll have a collection in various colors!
So, are you ready to dive into this project? Grab your crochet hook, some yarn, and let’s get started! Whether you’re a newbie looking to learn or a crochet aficionado searching for a quick project, this bow tie hair elastic is sure to please.
Materials
- Yarn of your choice
- Crochet hook suitable for your yarn weight
- Scissors
- Yarn needle
- Measuring tape
Instructions
Start with a Foundation Chain: Begin by making a slipknot. Chain 10 stitches. This will serve as your foundation chain.
Row 1 – Single Crochet: Starting from the second chain from the hook, work a single crochet stitch into each chain across. By the end of this row, you should have 9 single crochet stitches.
Row 2 – Single Crochet: Turn your work. Chain 1 (this acts as a turning chain and provides height for the next row). Starting from the first stitch, work a single crochet stitch into each stitch across, maintaining 9 single crochet stitches.
Continue Crocheting: Repeat Row 2 until your strip reaches approximately 17 cm in length. Make sure to measure with your measuring tape to ensure accuracy.
Finishing Off: Once you’ve reached the desired length, cut the yarn, leaving a tail long enough for sewing. Pull the yarn through the last stitch to secure.
Sewing the Ends Together: Thread your yarn needle with the yarn tail. Align the two ends of your strip, and using the yarn needle, sew the beginning and the end together with a blanket stitch. Ensure the stitches are secure and even.