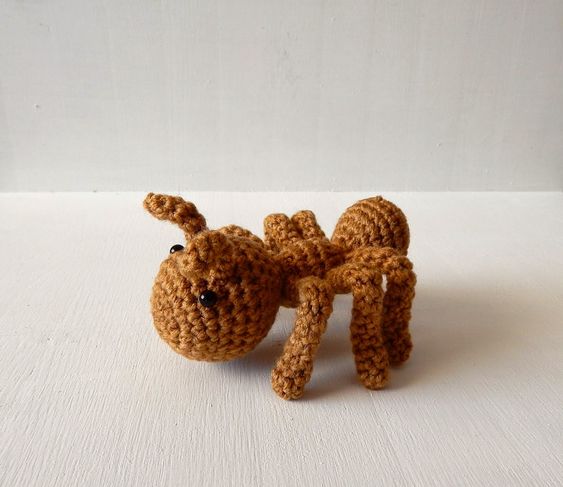
Crochet Adorable Ant
Crocheting an adorable ant can be such a fun and delightful project! With its tiny size and cute details, this amigurumi creation is sure to bring a smile to anyone's face. From carefully choosing the perfect yarn colors to crafting its tiny legs and antennas, each step of the process is filled with joy and creativity. As you work on this project, you can imagine this charming little ant happily exploring its miniature world. Whether you are an experienced crocheter or just starting out, this friendly insect is a perfect way to showcase your skills and spread a little crochet magic. So grab your crochet hook and yarn, and get ready to craft a tiny companion that will surely be loved by all who see it!
Supplies
- 2.75mm Crochet Hook
- Red Heart Super Saver Yarn in light Brown
- 7.5mm Safety Eyes
- Polyester Stuffing
- Pipecleaners
- Scissors
- Needle
Finished Size
5 inches
Head and Body
Rd1: Starting in the middle of your ants face with light brown yarn sc x 6 in an adjustable ring (6)
Rd2: Inc x 6 (12)
Rd3: Sc x 12 (12)
Rd4: Inc x 12 (24)
Rd5: Sc x 24 (24)
Rd6: You will be marking in this round where to place the eyes. Sc x 10, place a stitch marker in the last stitch you just did, sc x 6, place a stitch marker in the last stitch you just did, sc x 8 (24)
Rd7: [Sc x 7, inc] x 3(27)
Rd8: Sc x 27 (27)
Rd9: Place the safety eyes between Rd6 and Rd7 where you placed the stitch markers, sc x 27 (27)
Rd10: [Sc x 4, dec] x 4, sc x 3 (23)
Rd11-12: Sc x 23 (23)
Rd13: Dec x 11, sc (12)
Rd14: Stuff your work firmly, dec x 6 (6)
Rd15: Inc x 6 (12)
Rd16: [Sc, inc] x 6 (18)
Rd17-18: Sc x 18 (18)
Rd19: Dec x9 (9)
Rd20: Dec x 4, sc (5)
Rd21: Inc x 5 (10)
Rd22: Sc x 5, inc x 5 (15)
Rd23: Sc x 8, inc x 3, sc x 4 (18)
Rd24: [Sc x 4, inc] x 3, sc x 3 (21)
Rd25-27: Sc x 21 (21)
Rd28: Sc, dec x 10 (11)
Rd29: Dec x 4, sc x 3 (7)
Rd30: Dec x 3, sc, fo (4)
Leg (Make 6)
Assembly: