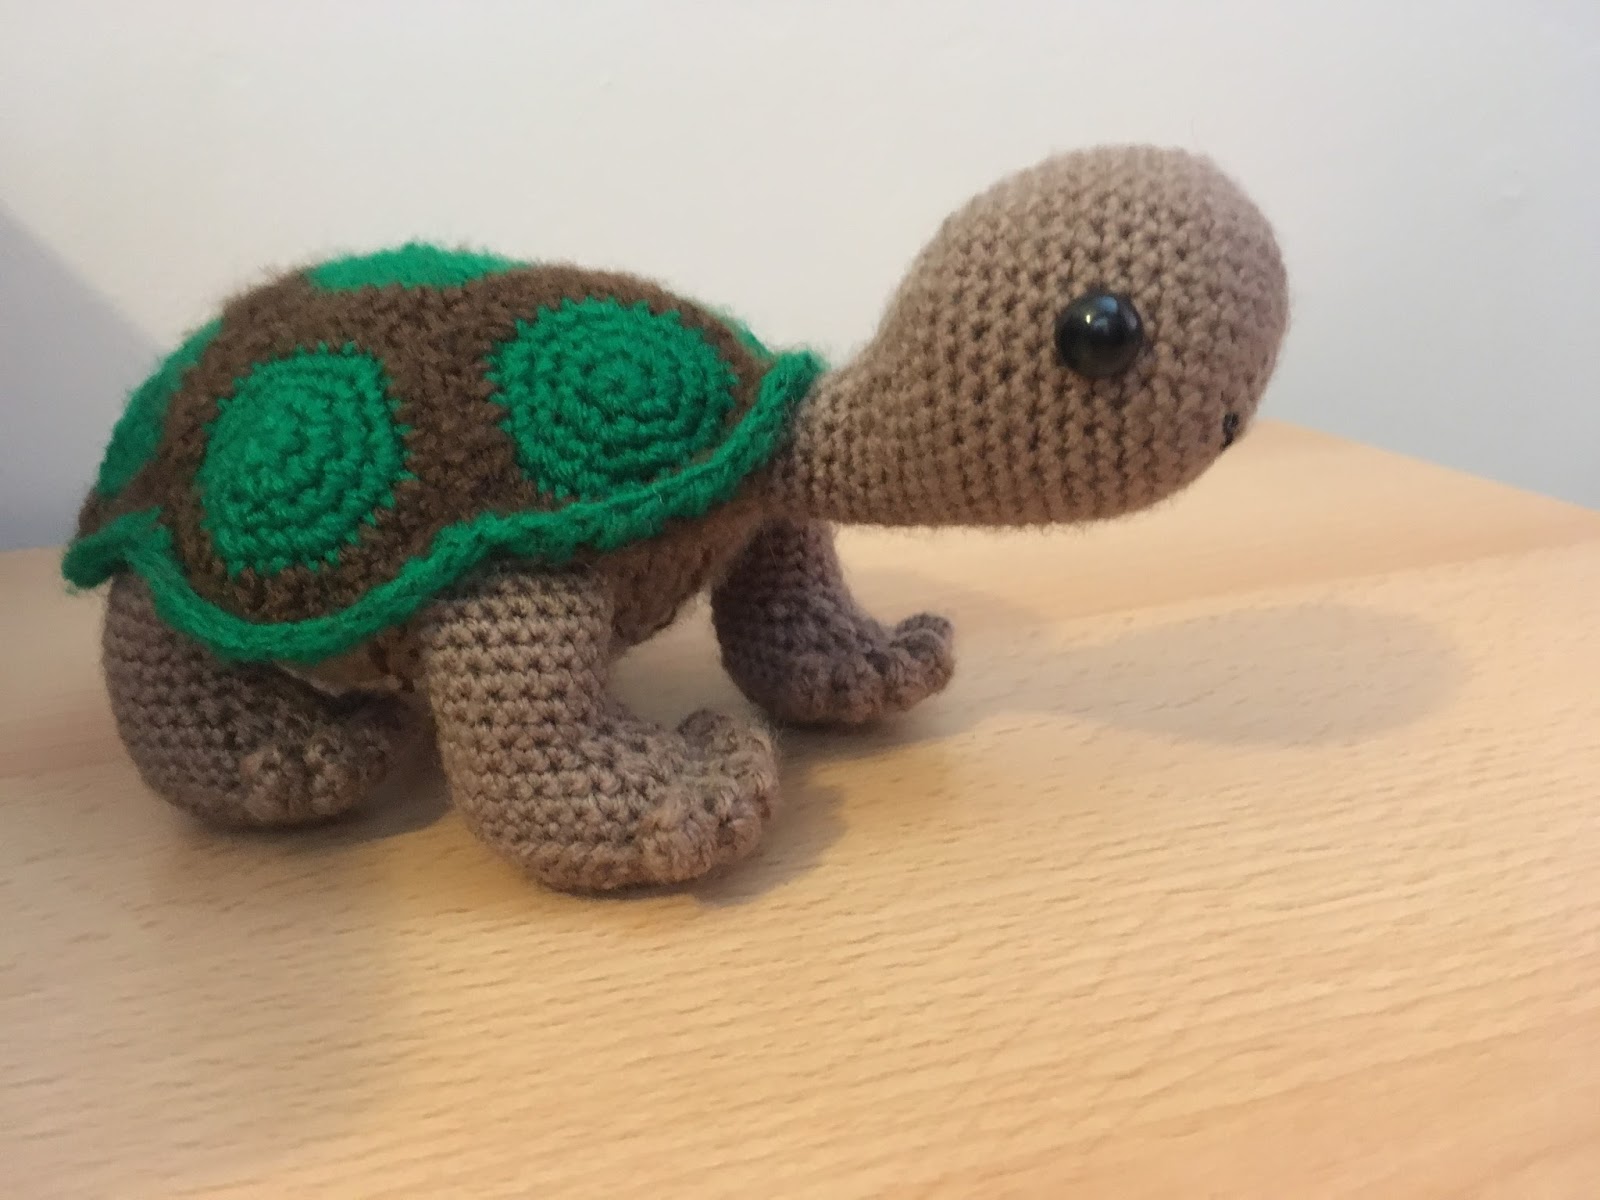
Crochet Adorable Tortoise
If you're looking for a fun and rewarding crafting project, why not give crocheting an adorable tortoise a try? This delightful project allows you to create a cute and whimsical stuffed animal that is sure to bring a smile to your face. With just a few simple stitches and some colorful yarn, you can bring this charming creature to life. Whether you're a seasoned crocheter or just starting out, this project is perfect for all skill levels. So grab your crochet hook, pick out your favorite yarn colors, and get ready to create your very own lovable tortoise friend! Happy crocheting!
You will need:
- 3mm crochet hook (Can use 4mm if preferred)
- Yarn needle
- Yarn
- Soft toy filling
Stitches and abbreviations used:
(I use US crochet terms)
- MC — Magic circle/ring (sc unless otherwise specified)
- Ch — Chain
- SC — Single crochet
- Inc — Increase stitch (2 single crochets into one stitch)
- hdc inc — 2 hdc into the same stitch)
- Dec — Decrease stitch (single crochet 2 stitches together)
- sc2tog — single crochet 2 stitches together
- sc3tog — single crochet 3 stitches together
- hdc2tog — half double crochet 3 together
- HDC — Half double crochet
- DC — Double crochet
- ST — Stitch
- FLO — Front loop only
- BLO — Back loop only
- SLST — Slip stitch
- PC — Popcorn stitch. In this pattern I used a 5dc popcorn stitch, this is for the toes but you can skip this step and just have founded feet if you prefer.
- FO — finish off
Other things to note....
- This is worked in continuous rounds. It is helpful to use a stitch marker to keep track
- The number in ( ) at the end of each round indicates the total stitch count for that round
- * * indicates repeated series of stitches
- Use invisible decreases for a neater finished product
- Stitches in [ ] are worked into one stitch
The Shell:
- Starting in green — MC (6)
- Inc (12)
- *1sc, inc* (18)
- *2sc, 3sc into the next st* (30)
- FO. You do not need to leave a long yarn tail
- Join brown to round 5, slst to hold into place, ch2 and hdc into that same st as the slst. Then *4hdc, hdc inc*. Finish round with a slst into the ch 2 at beginning of round.
- FO leaving yarn tail for sewing. Make 6 more
Sew all 7 together, using the brown yarn tails, into a form like the picture on the right. The shell may look flat at this point rather than rounded but it will take shape when the belly is attached.
- Once sewn together, attach brown to the edge and and slst into place, sc around the edge.
- Attach green — *1hdc, hdc2tog*
- FO — yarn tail does not need to be long
Belly (this is done with HDC only):
- Starting in light brown — HDC MC (6)
- *hdc inc* (12)
- *1hdc, hdc inc* (18)
- *2hdc, hdc inc* (24)
- *3hdc, hdc inc* (30)
- *4hdc, hdc inc* (36)
- *5hdc, hdc inc* (42)
- *6hdc, hdc inc* (48)
- Colour change to medium brown — *7hdc, hdc inc* (54)
- *8hdc, hdc inc* (60)
- *9hdc, hdc inc* (66)
- *10hdc, hdc inc* (72)
- FO leaving long yarn tail.
Place the wrong sides of belly and shell together and sew into place. You will have to stretch the belly to fit with the shell as it appear smaller. Use pins to hold into place and to help get it even. I sew through the strands of yarn on the shell piece that did not go through to the top, therefore making the sewing unseen on the shell.
Leave a gap unsown at the top and bottom as this is where the head a tail will be placed and also leaves a gap to add the stuffing.
Head (Medium brown):
MC (6)
*inc* (12)
*1sc, inc* (18)
*2sc, inc* (24)
*3sc, inc* (30)
*4sc, inc* (36)
36sc (36)
36sc (36)
36sc (36)
36sc (36)
36sc (36)
36sc (36)
36sc (36)
36sc (36)
36sc (36)
36sc (36)
36sc (36)
6sc, dec x6, 18sc (30)
3sc, dec x6, 15sc (24)
dec x 6, 12sc (18)
dec x 3, 12sc (15)
15sc (15)
15sc (15)
15sc (15)
15sc (15)
15sc (15)
FO leaving yarn tail for sewing. Stuff and shape.
Tail (medium brown):
MC (6)
Inc, 5sc (7)
inc, 6sc (8)
inc, 7sc (9)
inc, 8sc (10)
inc, 9sc (11)
inc, 10sc (12)
inc, 11sc (13)
inc, 12sc (14)
inc, 13sc (15)
FO and fold flat. Leaving yarn tail for sewing
Put the open end of the tail and head into the holes left from sewing the shell and body together. Sew them into place.
Legs x 4 (medium brown):
MC (6)
*inc* (12)
*1sc, inc* (18)
*2sc, inc* (24)
*5sc, inc* (28)
BLO — 9sc, pc, sc, pc, sc, pc, sc, pc, sc, pc, 10sc (28)
If you dont want to do popcorn stitches, do 28sc into the back loops only
sc all round skipping the pc stitches (23)
8sc, sc3tog, sc2tog, sc3tog, 7sc (18) — this stage can be a bit fiddly
7sc, decx3, 5sc (15)
15sc (15)
15sc (15)
15sc (15)
15sc (15)
15sc (15)
15sc (15)
15sc (15)
FO leaving yarn tail for sewing.
Fold the legs and sew flat making sure the feet are facing the desired direction. Each foot may need sewing flat from a different point to make it face the front. Sew the leg to the belly. I also tacked the leg to the belly a bit higher up to give it some stability.