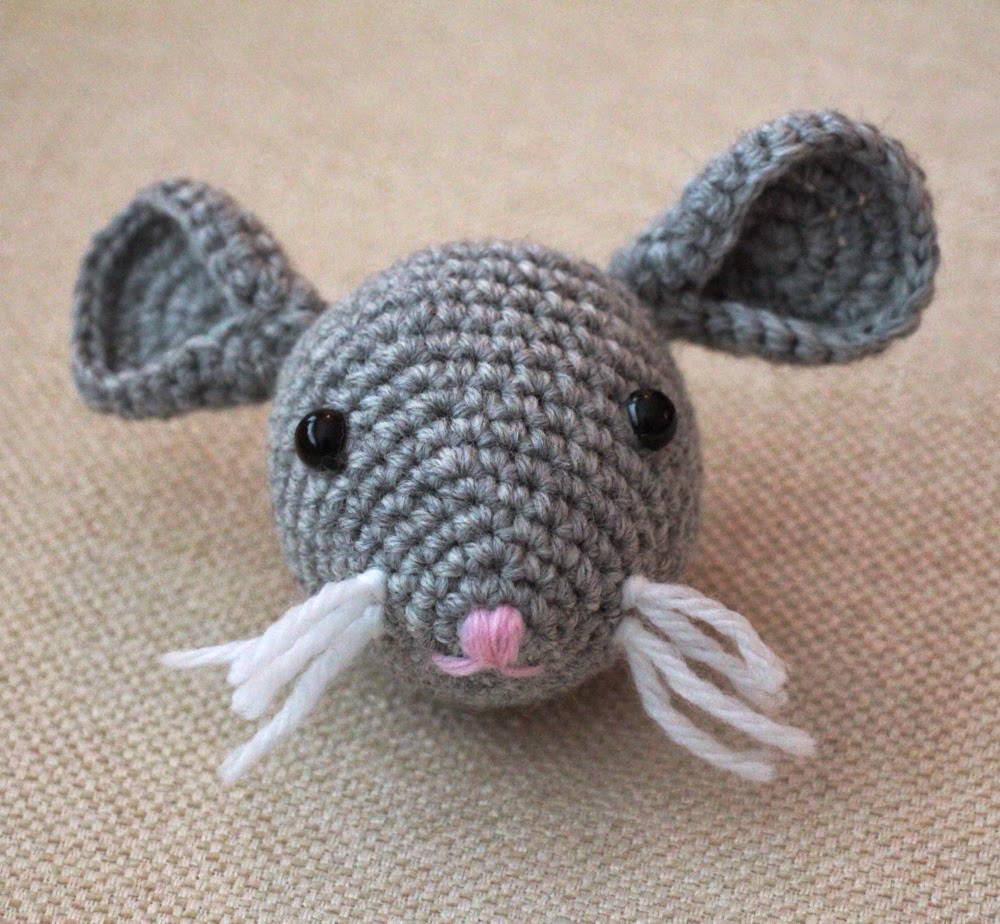
Crochet Adorable Rat
Crocheting an adorable rat can be a fun and rewarding project for those who enjoy crafting. With just a bit of yarn and a crochet hook, you can create a cute and unique addition to your collection of handmade items. Each little detail can be personalized to give your rat its own special charm. Whether you're an experienced crocheter or a beginner looking for a new challenge, making an adorable rat can be a delightful way to showcase your creativity and skills. So grab your supplies, get cozy, and let's start crafting a little rat friend together!

Key:
Ch = chain
INC = 2 sc into one stitch
#INC = do # increases in a row
DEC = invisible decrease turns the next 2 sts into one st
# or sc# = separate sc stitches (no increasing or decreasing)
Begin here:
Pointy Head (using grey):
R1 Magic circle with 6 sts in the loop (6)
R2 (sc, INC) 3 times (9)
R3 (2, INC) 3 times (12)
R4 (2, INC) 4 times (16)
R5 (3, INC ) 4 times (20)
R6 (4, INC) 4 times (24)
R7 sc around
R8 (5, INC) 4 times (28)
R9 (6, INC) 4 times (32)
R10 (7, INC) 4 times (36)
R11 (8, INC) 4 times (40)
R12 sc around
R13 sc around (Insert eyes after this round. For the example, I have placed the eyes between rounds 9 and 10, nine stitches apart. Put them in and then have a good look before you commit to those backings!!)
R14 38, DEC (39)
R15 25, DEC, 12 (38)
R16 8, DEC, 11, DEC, 10, DEC, 3 (35)
R17 6, DEC, 9, DEC, 9, DEC, 5 (32)
R18 3, DEC, 6, DEC, 6, DEC, 6, DEC, 3 (28) (YOU MAY pause here and do the ears first and/or nose and mouth or finish off the head completely. The instructions are at the end of this pattern. The choice is yours. In my pictures, I have elected to do the ears before finishing the head. Fill with stuffing leaving some room at the top.)
R19 4, DEC, 3, DEC, 4, DEC, 3, DEC, 4, DEC (23)
R20 2, DEC, 3, DEC, 2, DEC, 3, DEC, 2, DEC, 1 (18)
R21 (DEC, 1) repeat around (12)
R22 (DEC, 1) repeat around. Fasten off. Weave loose end through each stitch in the opening. Fill completely with stuffing. Pull tightly to close. Sew in your ends.
Ears (grey): make 2
R1 Magic circle with 6 sts in the loop (6)
R2 INC around (12)
R3 (1, INC) 6 times (18)
R4 (2, INC) 6 times (24)
R5 (3, INC) 6 times (30)
Fold up the bottom row:
and then fold in half and secure the bottom 3 stitches or so leaving a tail for attaching.
Attach to the head in line with the eyes. Do the same with the other ear. Go back and finish the head if you jumped ahead to do the ears.
Nose and mouth:
This may be done before the head is finished or afterwards. Using pink yarn, sew vertical lines close together at the tip of the pointy head. Then sew one strand going left and one going right. Go back into the head and tie off your yarn or stitch back and forth in the stuffing to secure yarn end.
Whiskers:
Using 4 strands of white yarn and a “latch hook” technique, attach the whiskers two to a side as in the photo.
Yay! You have finished your Rat!